Injecting language packs in a WIM file using WimWitch
This post is a follow up to my post on customizing language settings in a Microsoft Endpoint Manager task sequence using UI++ and a custom unattend.xml file. I will continue this series in a third post that discusses the native functionality in MEMCM 1910 and later.
Background
In a post a few weeks ago I discussed my process for managing languages in a Microsoft Endpoint Manager task sequence. That post went in depth on using UI++ and a custom unattend.xml file to allow a technician to select a primary language and alternate keyboard layout during OS deployment. That process requires having a Windows image that already has language packs and features on demand injected. I briefly discussed my process for creating a WIM file.
That post mentioned that I initially created a WIM file with WimWitch from Donna Ryan (@theNotoriousDRR). I would create the image, run my own script to inject the languages and features on demand, and then update the WIM using WimWitch. At that point WimWitch did not support language pack injection. Donna had mentioned that language injection support was coming – but I didn’t know when it would be available. Shortly after posting my last post she released the 1.4 beta release of WimWitch which previewed the language pack injection! WimWitch version 1.4.1 is now available. The language support is excellent!
I was originally going to write about my own script, but Donna hit this process out of the park. With each new version, WimWitch adds amazing new features that could only be designed by someone who is familiar with MEMCM, the imaging process, and has an excellent eye for detail. If you aren’t already using WimWitch, take the time to explore all of the features that are currently available – it’s a great tool and new features are being added regularly!
The Process
At a high-level language injection is a fairly simple process, but there are a few steps involved and some pitfalls to be aware of:
- Gather your baseline WIM and source content for language packs, features on demand, and local experience packs.
- Your WIM should be clean (with no updates applied). If you install alternate languages on a WIM that was already updated, you may need to re-apply those updates later.
- The language packs need to match the Windows version. If your Windows image is 1809 you will need the 1809 language pack. 1903 and 1909 both use the 1903 language pack.
-
Mount your WIM file
- Inject language packs
- After injecting my language packs, I dismount the WIM and save it as my baseline. I apply patches to this baseline WIM every month to avoid image bloat from applying updates to the same image every month.
-
After saving my baseline, I re-mount the WIM
-
Apply updates to the WIM
- Copy the WIM to my source folder and update content on my distribution point
This doesn’t appear to be that involved of a process, but if you don’t pay attention it can be difficult to manage. This is where WimWitch shines. I can create source media, inject language packs, and apply updates in a few simple steps. WimWitch also lets you save a configuration file – a simple step that makes repeating the process and applying monthly updates a breeze!
Loading WimWitch:
Obviously the most important part of this whole process is downloading WimWitch. You can find detailed instructions on downloading, installing, and operating WimWitch on SCConfigMgr.com. WimWitch is available from the PowerShell gallery. You can download it from an administrative PowerShell window using the following command:
save-script -name wimwitch -path [C:\YourDirectory\] -force
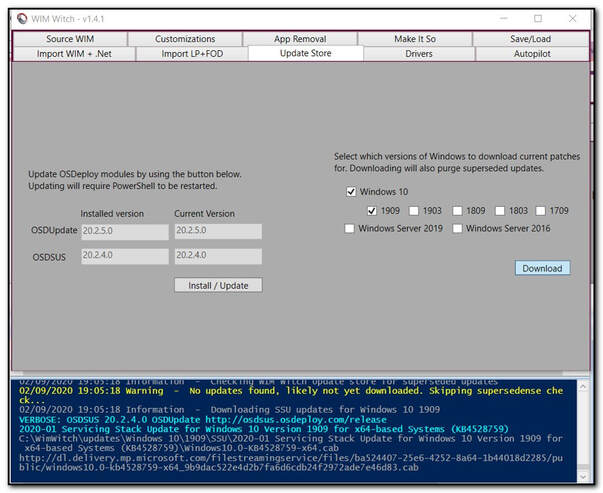
When you run WimWitch.ps1 the script will check to see if it has been installed. On subsequent uses it will do a version check and update itself if a newer version is available. If you plan on installing updates I recommend going to the “Update Store” tab and clicking Install/Update. This will check for updates to the OS Deploy module that is used for downloading updates.
The Good Stuff:
After you have downloaded and updated WimWitch, you are ready to dive into the process.
-
You will need to download the Windows 10 media, language packs, and features on demand from the Volume Licensing Service Center. As mentioned above, you need to download the correct language pack media for your Windows version (there’s one iso for both x64 and x86).
-
Mount the language pack and FOD media that you plan on using (do not mount the Windows ISO). There are two separate ISOs for the Features on Demand, but in most cases all of the FODs you will need are on the first ISO.

-
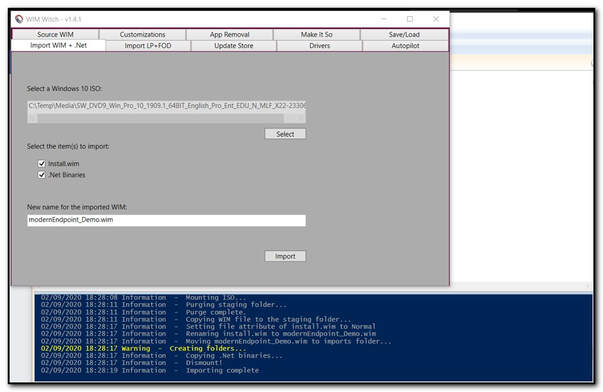
Import Wim + .Net tab – When you are creating a new WIM file the first step is to create a Wim file from source media. Click the select button and browse to your Windows 10 media. Check the box to import .Net media and your install.wim file. Enter a name and click Import. This is a good time to mention that if you keep the Powershell window visible in the background you can see a status of what WimWitch is doing. In this case we can see the steps being done when create a WIM.
-
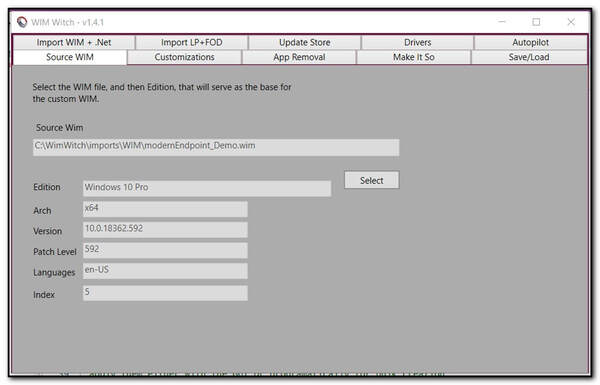
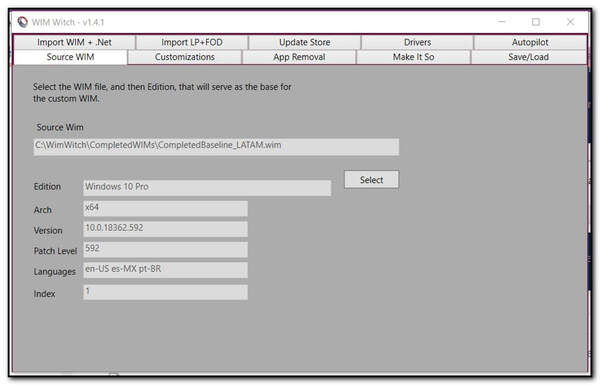
Source WIM tab – The Source WIM tab is where the magic begins. Click the select button and browse to the WIM file you created above. When you select and image a window will appear. Select the index you want available in your WIM. In this case I am using the Windows 10 Professional Index.
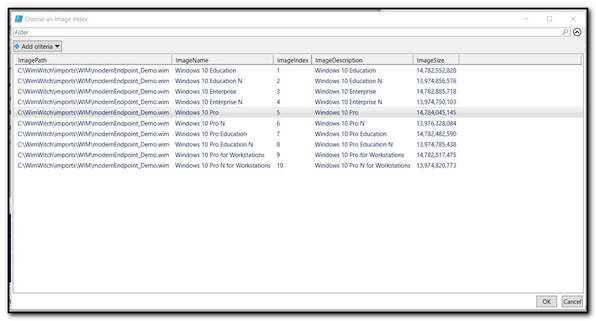
After selecting the Index, the information for the selected index will appear in the window:
-
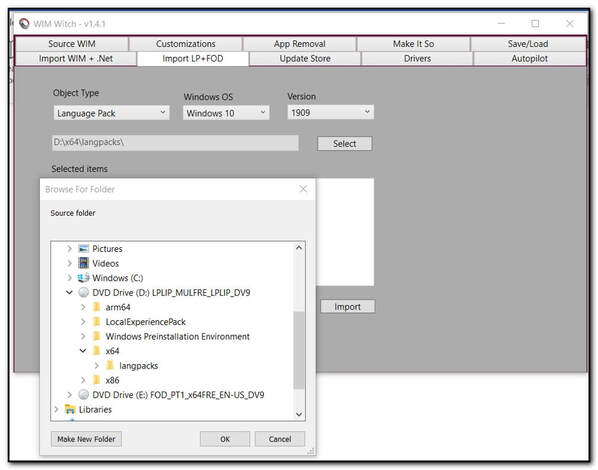
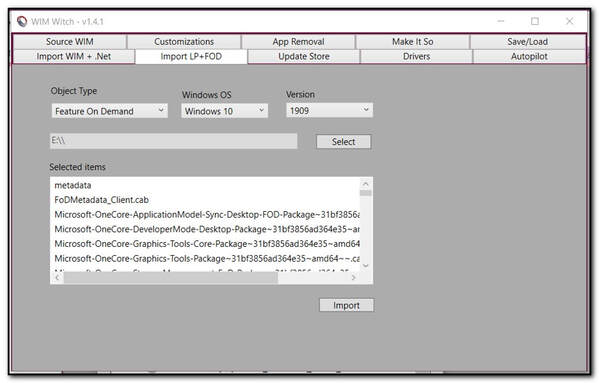
Import LP + FOD tab – This tab is where we tell WimWitch where to find our source content. Use the drop downs to select the options you want to import. In this case we want to import language packs from our Language pack ISO. The language packs are stored in [x64 or x86]\langpacks\ in the source media.
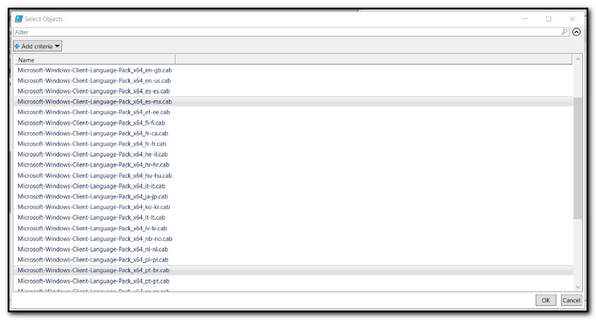
A selection box will appear. Select the languages you want to inject and click Ok.
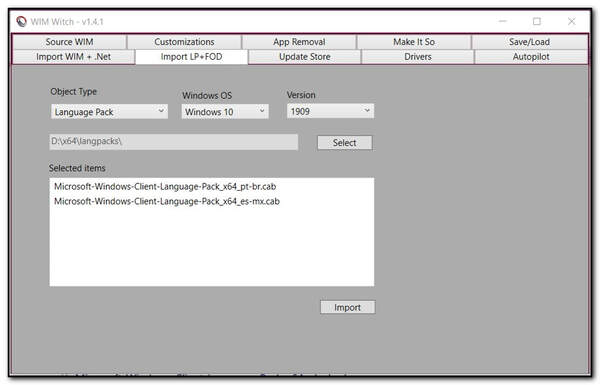
The languages you selected will appear in the list box. Click Import to Import your language packs.
-
Import Features on Demand – Features on Demand work similar to language packs, but there is one slight difference. Select the Features on Demand option and click select to browse to your source media. In this case you are selecting the root of the ISO.
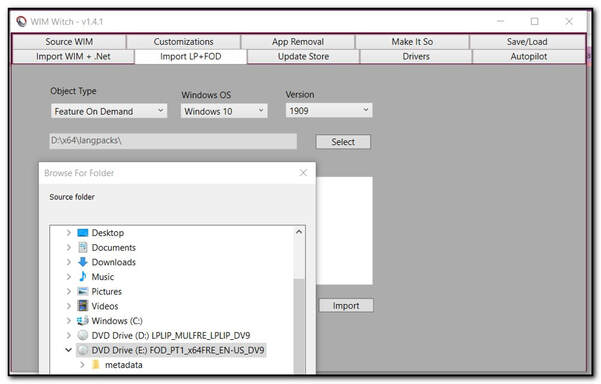
With the Language Packs you were given the option to select which languages you want to import. Because of the differences media that method isn’t as practical for Features on Demand. All the available FODs will be added to the list box. Click Import to Import the files.
-
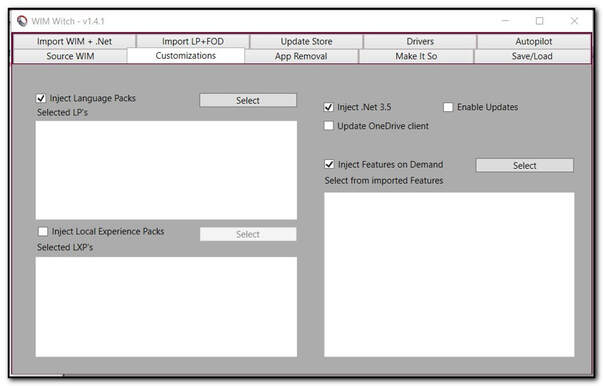
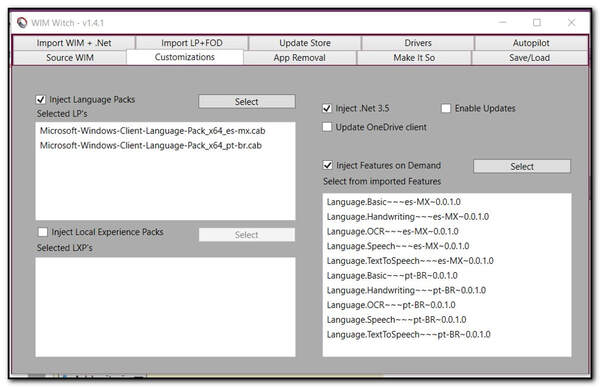
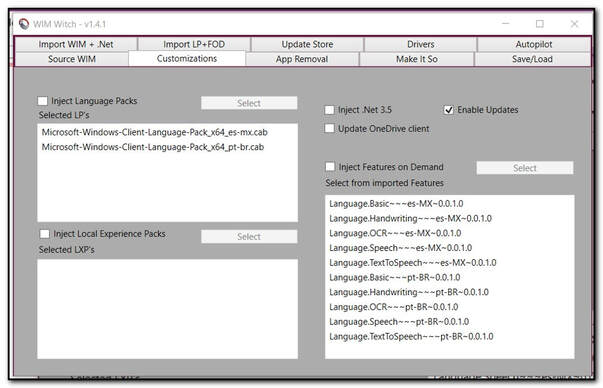
Customization tab – The customizations tab is used to tell WimWitch exactly which customizations to apply to a Wim in this step. You will see in a later step how I use this differently when creating a WIM versus when I am updating the media. Check the boxes for the customizations you want to make. In this case I want to inject .Net, Language Packs, and FODs in my baseline media.
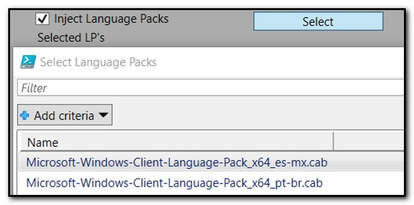
Click Select to select the language packs you want to import. You will see the language packs you previously selected available here:
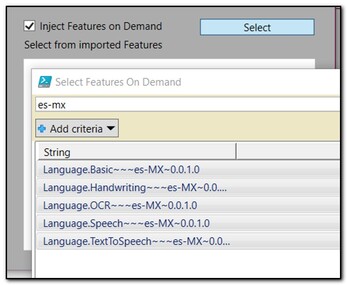
Click Select for the FODs. Here you will see all of the FODs from the media available. You can filter by using the Filter box at the top of the screen. If you have multiple languages you need to import this can be done in multiple steps. Each time you select features it adds to the list:
After setting all of your customizations, you are ready to inject them into your WIM.
-
Save/Load tab – At this point we are ready to save our baseline configuration. This tutorial focuses specifically on languages and features on demand, so I skipped over some other options like injecting drivers, removing Windows apps (seriously a great feature!) and injecting an Autopilot json file. I create a separate configuration file for each of my baseline WIMs. This allows me to create baseline media quickly in the future.
Enter a name for the configuration file and click Save. It will save the configuration in the WimWitch\Configs folder.

-
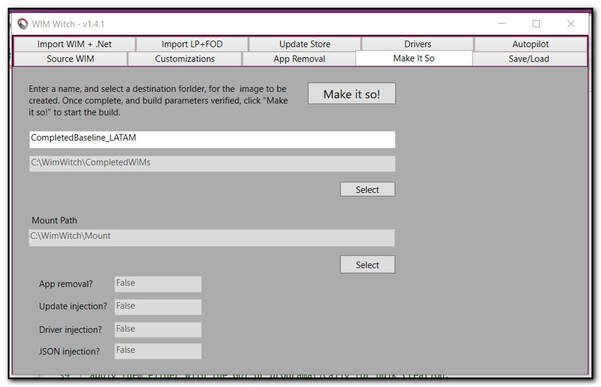
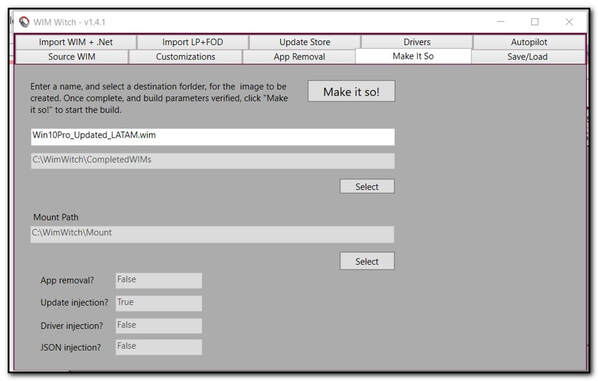
Alright Number One – Make it so – We’ve given WimWitch a bunch of stuff to do, now it’s time to let her do what she does best! Enter a file name and select a destination path for your Wim. This tab also includes several text boxes that tell us what customizations we have set. When you are ready to add the customizations to your WIM click the Make It So button.
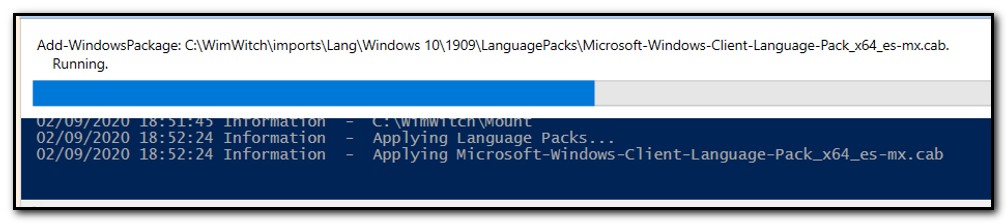
If we watch the status window we can see the progress that WimWitch is making.
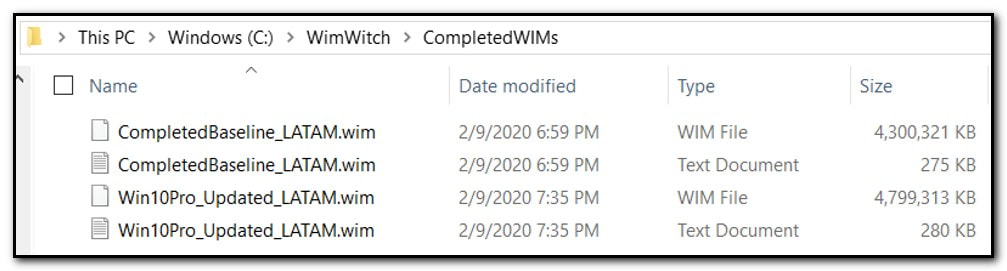
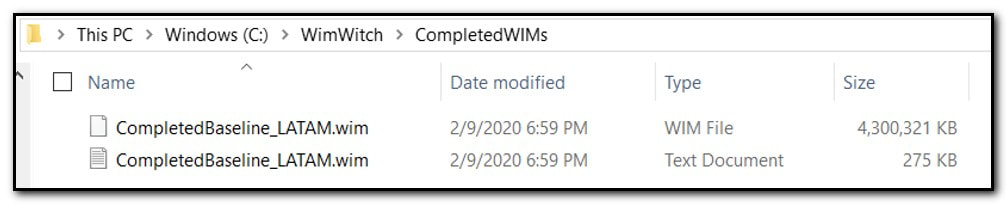
After all customizations have been made and the Wim has been dismounted, we can see the media is available in the Completed WIMs folder. There is also a verbose log file that is created in this folder.
-
Now that we have created our baseline media, we can apply updates to the image. The first step when applying updates is to make sure they have been downloaded. Go to the Update Store tab, select Windows 10 and the OS version you want to update and click Download. In the PowerShell windows we can see the status of the update process, including checking for updates from OS Deploy.
-
Source WIM – We want to make sure we update the WIM file that we just created and injected our language packs and FODs in. Go to the Source WIM tab and change the path to our new file. The Languages text box shows the languages we just injected into the WIM.
-
Customizations tab (part two!) – We have already injected our language packs, FODs, and .Net binaries in our image. Remove the checks for those items. We want to update the WIM on this pass, so we will check that box.
-
Return to the Save/Load tab and save the new customizations. We will be able to use this customization for patching all our images in the future. Provided all the baselines are configured the same you should only need to save one configuration file for updating all your WIM files.
-
After saving your configuration file, return to the Make It So tab. Confirm your customizations are correct and click Make it So to apply updates to the image.
-
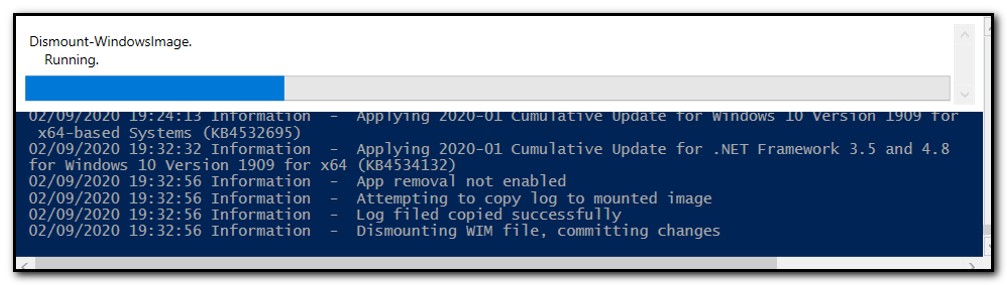
WimWitch will mount the image, apply updates, and then dismount the image. The PowerShell window lets us watch the status.
-
Once the updates have been completed, we can see both WIM files in the Completed WIMs folder. You can now use the WIM file to add an image in Microsoft Endpoint Manager. If you are updating an existing image copy the content to the source folder and update your distribution points.