
Dynamically Update Primary Users on Intune Managed Devices
Hello! It has been a while since I have had time to post a new blog entry. Today’s post is the first of two posts I have on deck with new tools I have created for community use.

Intune is great at managing devices, especially when there is a primary user assigned. In most common use cases, the primary user is automatically assigned, but what happens if the primary user changes or the device was enrolled through another method like using a bulk enrollment token?
The only native way to update the primary user on those devices is to manually update it through the console. If we know who the primary user should be we can automate that process. If you have a strong inventory system, you could use that to set the primary user – but that only works if you know who the primary user should be. What happens if you don’t have a good inventory system, or if the primary user of a device changes?
The Challenge
Configuration Manager has a concept of User Device Affinity, but that same concept doesn’t exist in Intune. On a ConfigMgr managed device, we can add a user to a device based on how frequently they log in over a specified timeframe.
I wanted to find a way to update the Intune primary user similarly to how User Device Affinity works in ConfigMgr. Devices that are enrolled with a bulk enrollment token should have a primary user automatically assigned. If one user logs into a device more frequently than the current primary user, the primary user should be dynamically re-assigned.
There are two separate pieces of information we need to know. First, we need to be able to collect a list of users that have logged into a specific machine and get a count of the number of times they have logged in. Once we have that information, we need to compare that list of users to the current primary user of the device and determine if a new user should be assigned. The challenge is that the logged in users are local to the workstation. All of the information about the Intune Primary User are stored in Microsoft Graph.
Unless you’re already collecting user login information with Log Analytics, user login history isn’t available in Azure. A device and the local user account can’t query Microsoft Graph without nesting credentials in a script. So how can we gather information from a device and leverage that information in Azure to dynamically update the Intune primary user?
The Answer
I realized that the best way to handle this task would be to gather the information from a machine and have the device send that information to a resource in Azure, and then somehow process that information. To be able to dynamically update the primary user, we need to gather historical login data. Sending the current logged in user wouldn’t be efficient – we don’t want to update the primary user every time someone logs in to a machine.
When I started looking for options to gather user logon history, I found that the best source was to collect logon events from the Security log. User log on events are stored with event ID 4624. The problem is that this will also return all logon events, including those by SYSTEM and other service principals.
Client side script
In the following block of code, I resolved that issue by gather all events with ID 4624, for the last 7 days, and then only add users with a UPN suffix that matches the value added in the variable $FilterDomain.
#Filter domain will filter all user logon events based on your domain, set the domain to find users in that domain
$FilterDomain = "[Your UPN Suffix]"
$StartTime = (Get-Date).AddDays(-7)

#Hash table to filter for logon events in security log
$FilterHash = @{
  Logname='Security'
  ID='4624'
  StartTime=$StartTime
}

#Get all logon events from last 7 days
$LogHistory = Get-WinEvent -FilterHashtable $FilterHash | Select TimeCreated,Properties

#Create empty users array
$Users =  @()

#Find user from each logon event, add any AAD users to Users array
ForEach($Event in $LogHistory){

    $User = $Event.Properties[5].Value.ToString()

    If($User -like "*$FilterDomain"){

        $Users += $User

    }

}

$UserList = $Users | Group-Object | Select Count,Name

$UserHash = @{}
$UserList | ForEach-Object { $UserHash[$_.Name] = $_.Count }
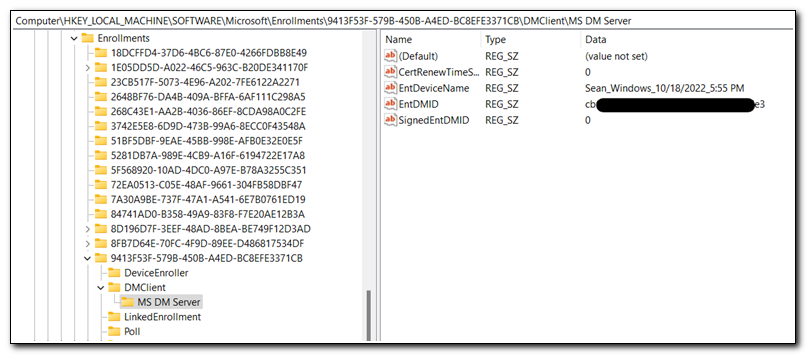
Once we have a list of users, we also need to gather the Intune managed device ID. This is stored in the registry in a key located at HKEY_LOCAL_MACHINE\SOFTWARE\Microsoft\Enrollments\. All of the keys in this locations are in different GUIDs, but the one we want will be the one that includes the key MS DM Server. The Intune managed device ID is stored in the value EntDMID.
We can return the managed device ID with the following code:
#Get Intune Device ID From registry
$Reg = Get-ChildItem HKLM:\SOFTWARE\Microsoft\Enrollments -Recurse -Include "MS DM Server"
$IntDevID = Get-ItemPropertyValue -Path Registry::$Reg -Name EntDMID
Initially, I thought I would write the login information to a table in Azure Table Storage or SharePoint. The more I explored that idea, the more I realized that it wouldn’t meet my needs. Since we are gathering the device ID and a list of users, I would need an efficient way to process the information. I elected to send the information I gathered to Azure Automation via a webhook.
The script uses Invoke-WebRequest to make a POST request to the webhook I created in Azure Automation. I will explore that later in this post. The body of the request includes the ManagedDeviceID and the hash table of users we created previously.
#Add the URI of your webhook
$UDAWebhook = "[Your Azure Automation Webhook]"

$Body = @{ "ManagedDeviceID" = "$IntDevID" }
$Body.Add("UserHash",$UserHash)
$Body = $Body | ConvertTo-Json
$URI = $UDAWebhook
$Method = "POST"

$CallAzAutomation = Invoke-RestMethod -Method $Method -Uri $URI -Body $Body -UseBasicParsing
Azure Automation Script
For the sake of brevity, I’m going to limit the explanation of the second script to the parts that are most relevant to this blog post. The script uses the Azure Automation Managed Service Identity to authenticate and make calls to Microsoft Graph. By using the managed service identity, we don’t need to nest credentials in the script or return them from Azure Key Vault. This script contains the Invoke-MsGraphCall function that I have discussed in a previous post.
The script processes the payload that is being delivered from the script running on the clients. The request body is parsed and returned to two variables - $UserHash and $ManagedDeviceID.
#Define parameter to get body from request
[cmdletBinding()]
param(
[Parameter(Mandatory=$False)]
[object]$WebHookData
)
#Parse WebHookData to get User list and Device ID
$Payload = $WebhookData.RequestBody | ConvertFrom-Json
Write-Output "Payload is of type $PType"
if ($Payload) {
$RequestObject = $Payload
$UserList = $RequestObject.UserHash
$UserHash = @{}
ForEach( $property in $UserList.psobject.properties.name )
{
$UserHash[$property] = $UserList.$property
}
$ManagedDeviceID = $RequestObject.ManagedDeviceID
Write-Output "Request object is of type $ROType"
Write-Output "UserHash is of type $UHType"
Write-Output "UserList received is $UserList"
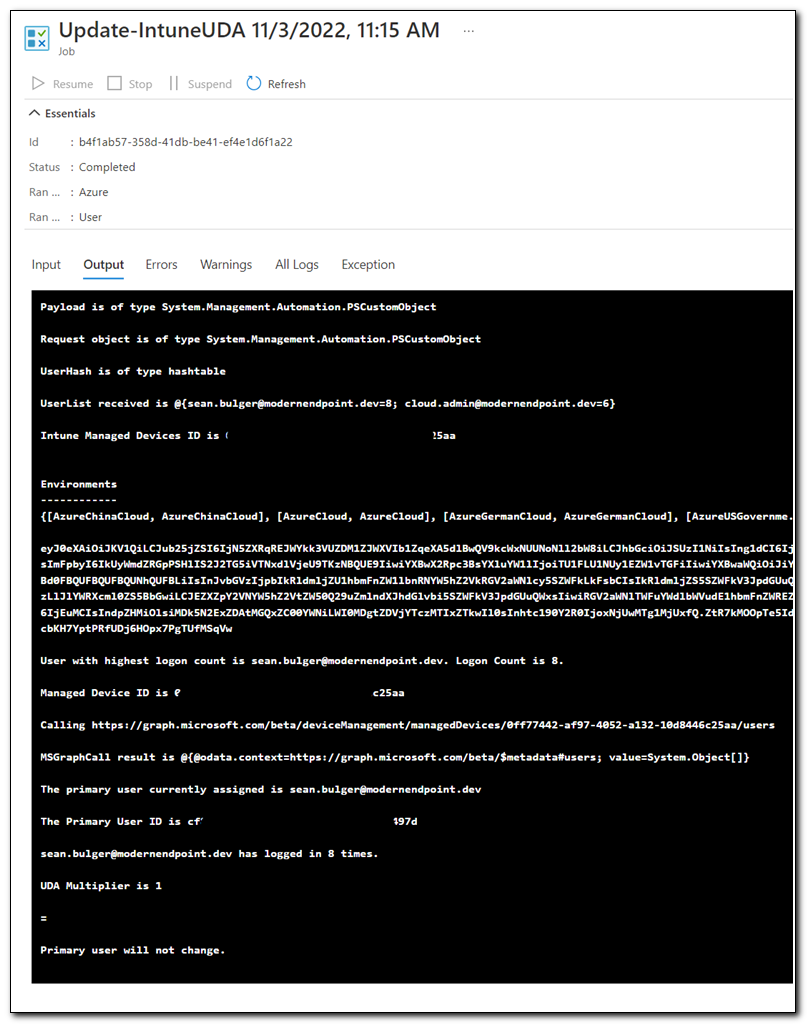
Write-Output "Intune Managed Devices ID is $ManagedDeviceID"
} Else {
Write-Output "No request body received"
}
After parsing the list of users, we find the user who has logged into the machine most frequently.
$Vals = $UserHash.Values | Measure-Object -Minimum -Maximum
$TopUser = $UserHash.GetEnumerator() | Where-Object Value -eq $Vals.Maximum
$TopName = $TopUser.Name
[int]$TopCount = $TopUser.Value
The primary is returned with a GET request to https://graph.microsoft.com/beta/deviceManagement/managedDevices/$ManagedDeviceID/users. If the device has a primary user, the script checks to see if the primary user is in the list of users that were returned. If it is, then it gets a count of how many times they have logged in. If the current primary user has logged in but does not have the highest count of logins, the highest number of logins is divided by the number of times the primary user is logged in to get a value for the $UDAMultiplier.
If there is no primary user or the $UDAMultiplier is higher than a set number (1.5 in this case), the script makes a GET request to return the user ID of the user, and then makes a POST request to update the primary user on the device.
If((!$PrimaryUser) -or ($UDAMultiplier -ge 1.5)){


    $UserPrincipalName = $TopUser.Name
    Write-Output "User with highest count to be assigned."
    Write-Output "Primary user to be assigned is $UserPrincipalName"

    #Get AAD Id of primary user to assign
    Write-Output "Getting User ID"
    $URI= "https://graph.microsoft.com/beta/users/$UserPrincipalName"
    $Method = "GET"

    $MSGraphCall = Invoke-MsGraphCall -AccessToken $Token -URI $URI -Method $Method -Body $Body
    $UserID = $MSGraphCall.id


    #Update Primary User on Managed Device
    #Create required variables
    Write-Output "Updating primary user on Intune Device ID $ManagedDeviceID. New Primary User is $UserPrincipalName, ID: $UserID"
    $Body = @{ "@odata.id" = "https://graph.microsoft.com/beta/users/$UserId" } | ConvertTo-Json
    $URI = "https://graph.microsoft.com/beta/deviceManagement/managedDevices('$ManagedDeviceID')/users/`$ref"
    $Method = "POST"

    #Call Invoke-MsGraphCall
    $MSGraphCall = Invoke-MsGraphCall -AccessToken $Token -URI $URI -Method $Method -Body $Body

}
Bringing it all together
While these two scripts can accomplish everything we set out to accomplish, we still need to deploy the solution. The solution starts running on an endpoint, but we need to deploy the service-side script first. The client-side script uses Invoke-WebRequest to call the script that ultimately updates the managed device object. Before we deploy the client script we need to generate the URL for our webhook.
The scripts that are used in this solution are available in my GitHub.
I built this solution to run on Azure Automation. It could also run in an Azure function, from a local server, or from any other automation solution that supports using a webhook as a trigger. The client-side script can be run in several ways on client machines. I prefer to use a Proactive Remediation in Intune, but you could also deploy it to run once with an Intune PowerShell script, as a Win32 app, or even run it from a scheduled task.
I discuss how to set up an Azure Automation account in this blog post. The Update-PrimaryUser script uses the system-assigned Managed Service Identity (MSI) to make calls to Microsoft Graph. To use the MSI to call Microsoft Graph, we need to assign permissions using a script.
Ben Reader has an amazing script that can be used to add permissions to the Managed Identity. I have an updated version in my GitHub that was adjusted to run in PowerShell 5.1 and includes the roles needed for Intune Administration. This tool specifically requires DeviceManagementManagedDevices.PrivilegedOperations.All to update the primary user.
Install the Az.Accounts module prior to running the script to assign permissions. Update the value of the Tenant parameter in the script, add or remove any roles that you want to assign in the $roles variable, and then run the script.
#region How to use the function
Connect-AzAccount -Tenant "modernendpoint.dev"
$token = Get-AzAccessToken -ResourceUrl "https://graph.microsoft.com"
$roles = @(
    "DeviceManagementApps.ReadWrite.All",
    "DeviceManagementRBAC.Read.All",
    "DeviceManagementServiceConfig.ReadWrite.All",
    "DeviceManagementManagedDevices.PrivilegedOperations.All"
    "DeviceManagementManagedDevices.ReadWrite.All",
    "DeviceManagementConfiguration.ReadWrite.All",
    "GroupMember.Read.All",
    "User.ReadWrite.All",
    "Directory.ReadWrite.All",
    "Device.ReadWrite.All"

)
Add-GraphApiRoleToMSI -ApplicationName "MME-MMS-DemoLab" -GraphApiRole $roles -Token $token.Token
In Azure Automation, click on “Runbooks.” Select “Import a runbook” and
upload the Update-PrimaryUserWbhook.ps1 script to the runbook. The default value for the $UDAMultiplier is 1.5. That means that if the user with the highest logon count has logged in to a machine more than 1.5 times as often as the current primary user, that user will be assigned as the primary user.
If you want to change the multiplier, edit the value in the following line:
If((!$PrimaryUser) -or ($UDAMultiplier -ge 1.5)){
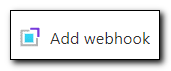
Publish the runbook, and then click “Add Webhook” to create a new Webhook.
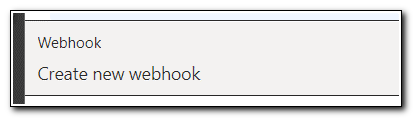
Click “Create new webhook”
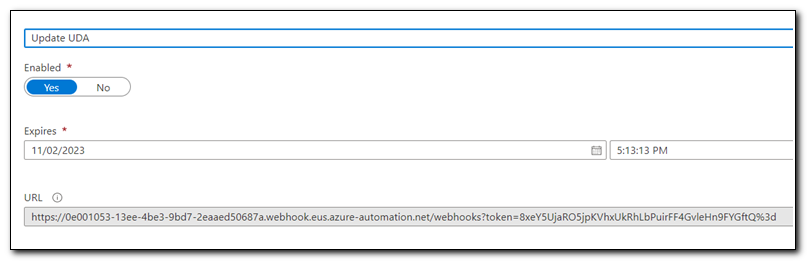
Name your Webhook, set it to enabled, and copy the URL. Click Ok. Please Note: Webhooks in Azure Automation do not have any way of authenticating the request. Treat the URL like you would treat any other secret. While this webhook has a limited scope, it’s important to minimize the opportunity for it to be exploited. The Send-UpdateUserWebhook uses a novel approach created by Damien Van Robaeys to remove the local copy of the script when it has finished running. It helps, but doesn’t guarantee the URL won’t be exposed.
Click “Configure parameters and run settings.” You don’t need to change any settings. Click OK.
Click “Create” to create the webhook.
Once Azure Automation is configured, we are ready to prepare the client-side script. We need todeliver the Send-UpdateUserWebHook.ps1 script to the machine. Update the value of $FilterDomain to match your UPN suffix and add the Webhook from the Update-PrimaryUser script to $UDAWebHook. The script returns logon events from the last 7 days. If you want to change the time frame to determine who the primary user should be, change the value of $StartTime.
#Filter domain will filter all user logon events based on your domain, set the domain to find users in that domain
$FilterDomain = "[Your UPN Suffix]"
$UDAWebhook = "[Your Azure Automation Webhook]"
$StartTime = (Get-Date).AddDays(-7)
You can test the script by running it on a client machine in an administrative PowerShell session. In Azure Automation you should see the job appear and run. Once it has completed, the job’s Output tab should show a log of all information that was written to the script’s output stream.
I prefer to deploy this script with a proactive remediation. That will allow it to run at a set interval to allow your devices to update the primary user periodically. Since the solution uses Azure Automation, it’s important to remember that you will be billed based on consumption. This script is quick and lightweight, but you may want to consider the impact of running it across many devices. If, for example, you have 100 devices and the script runs hourly, it will run 2400 times in a single day. If you scale it back to daily, it will run around 3,000 times in a month. Azure Automation includes 500 free minutes per month, and then bills at $.002 per minute, so any billing is likely to be minimal, but if you are concerned about costs, you will want to monitor this in your environment.
To create a new Proactive Remediation in Intune, click on “Reports”. Go to “Endpoint Analytics” and select “Proactive Remediations.” Click on “+Create Script Package” to add a new script package. Assign a name to your remediation and click next.
Next to the “detection script file” click on the folder icon to browse for a script. Upload the Send-UpdateUserWebhook.ps1 script. Set the script to run in 64-bit PowerShell and click Next.
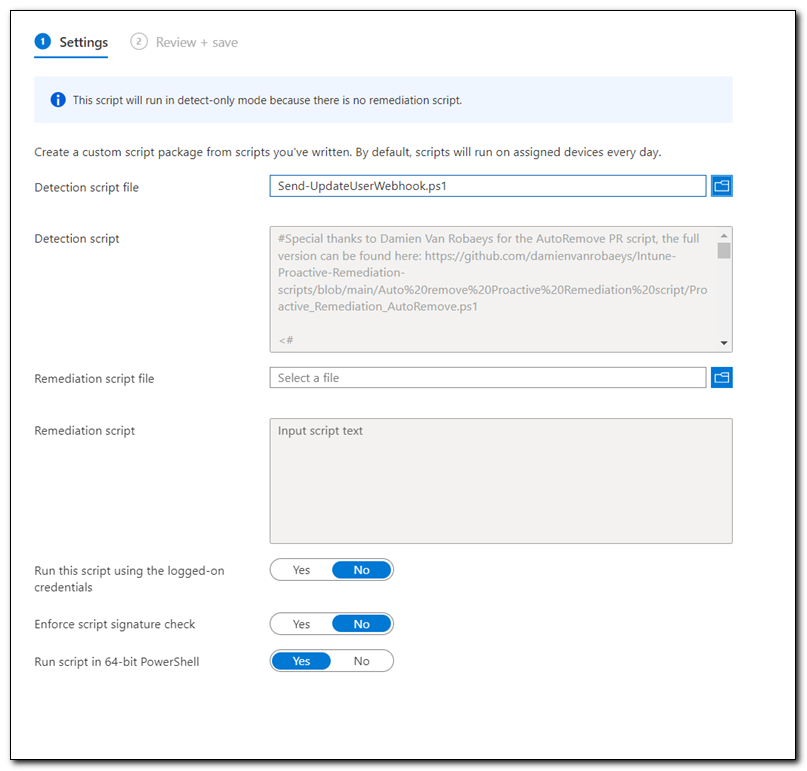
On the Assignment tab, assign the script to a group and create a schedule for it to run. Click Next, and then click “Create” to create the proactive remediation.
After the Proactive Remediation has been deployed, you can monitor it’s status by clicking on “Device Status” in the proactive remediation. Because of the way this script was designed, we expect that devices will show up with a detection status of “Without issues,” and a remediation status of, “not run.”

This tool accomplishes everything we needed to assign a primary user to a device that was enrolled with a bulk enrollment token and to keep the primary user up to date over time. Please feel free to edit it to meet the needs of your environment and to experiment with deployment options.
Keep watching for more great blog content!