
Creating an Azure Automation Account
This is the latest installment in my series on endpoint automation with Microsoft Graph and the AdminService. I have been providing the building blocks to automate endpoint management tasks in your environment. You can find the rest of the series here.
Welcome back! This is the latest post in my series on Endpoint Automation with Microsoft Graph and the Admin Service! To this point in the series, we have talked about the basics of Rest APIs and Microsoft Graph. In my last post I covered Azure Key Vault and began laying the foundation for automating tasks in Microsoft Azure. This post continues that theme. There are a lot of different tools that can be used to automate tasks in Azure, but perhaps the most flexible is an Azure Automation account.
Azure Automation is a service that allows for automation and orchestration of your environment from the Azure cloud. Tasks can be automated across your Azure services and on-premise. By leveraging a Hybrid Runbook Worker, we can run scripts against our on-premise Active Directory and on-premise servers. This provides a seamless way to leverage your existing scripts to automate tasks across your entire infrastructure. We can trigger tasks directly from our Automation Account, but we can also integrate with other tools. Connectors in Power Automate and Logic Apps connect to Azure Automation and provide a low-code solution to quickly deploy automation workloads.
In this post, we are going to create an Automation Account. Once we have created the Automation Account, we will set up a managed identity, and then create an access policy in Azure Key Vault to allow the managed identity to retrieve stored keys and secrets. This post assumes that you have already created an Azure Key Vault and stored a secret as I described in my last post.
Setting up an Automation Account using the Azure Portal
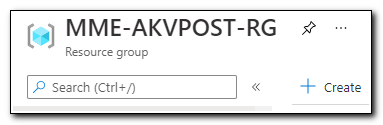
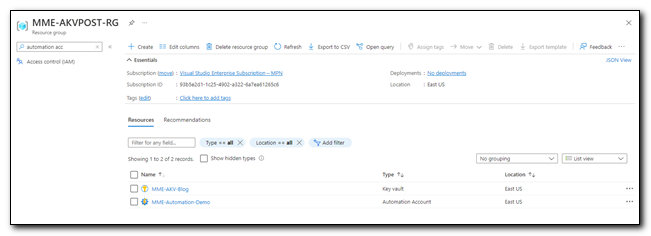
Sign into the Azure Portal. Click on Resource Groups and click on the name of your resource group to open it. Click “+ Create” to create a new resource.
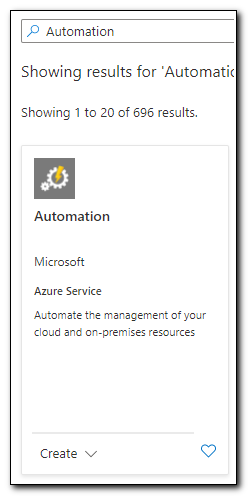
In the search box type “Automation” and press enter. Click on “Create” and select “Automation” to create a new Automation account.
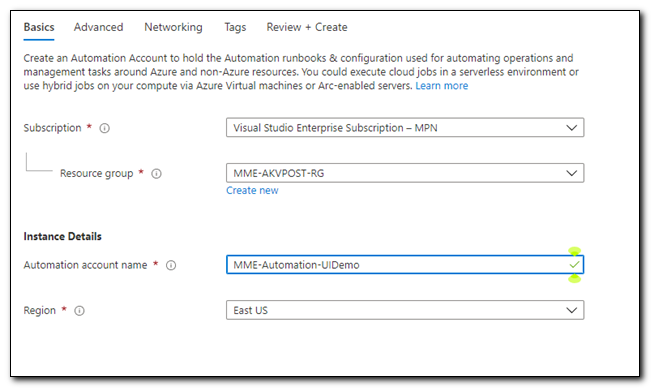
Name your Automation account and select a region, then click “Review + Create.”
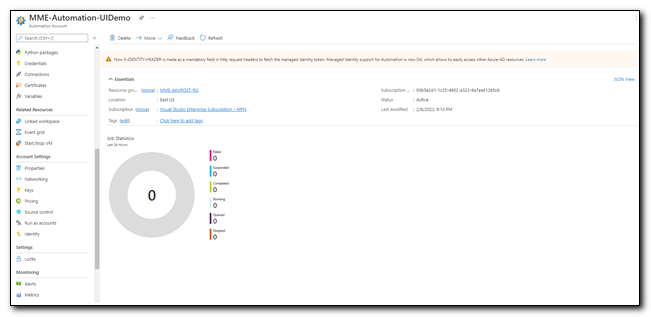
On the confirmation page, click “Create” to create the automation account. Once the account has been created, click “Go to resource” to open your Automation Account.
The first thing we need to do with our Automation Account is to set up a Managed Identity. A Managed Identity is an Azure managed service principal that doesn’t require you to provision or manage any secrets. It can be used across various Azure Resources, but we will primarily use it to access secrets stored in Azure Key Vault. In the past, Azure Automation used a RunAs account to access shared resources, but those accounts required an administrator to manage secrets. While they are still available, managed identities are now the preferred option for automation workloads.
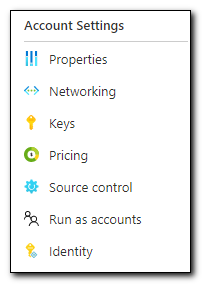
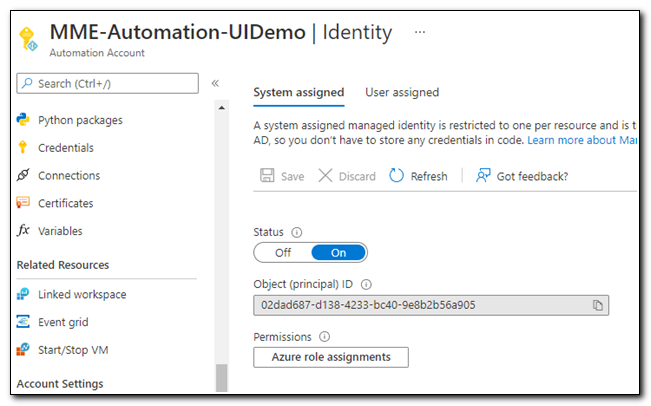
To create a managed Identity, click “Identity” under Account Settings.
Move the slider to “On” to turn on the system-assigned managed identity. A system-assigned managed identity is tied to a specific resource and is available for the life of that resource. Only the resource that created an identity can use it. A user-assigned managed identity is created as a standalone resource that can be assigned to other resources. For the purposes of this blog post, a system-assigned managed identity is preferred.
After we enable the managed identity, we need to assign a role to it. Click “Azure Role Assignments.”
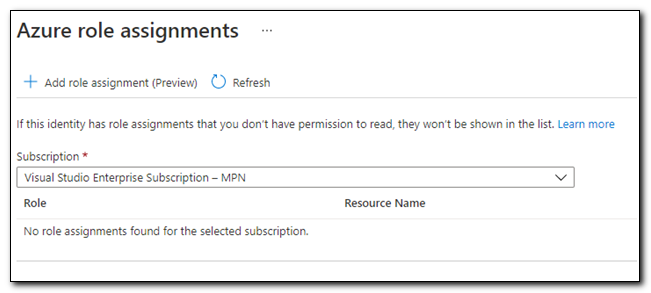
Select the correct subscription then click “Add Role Assignment.”
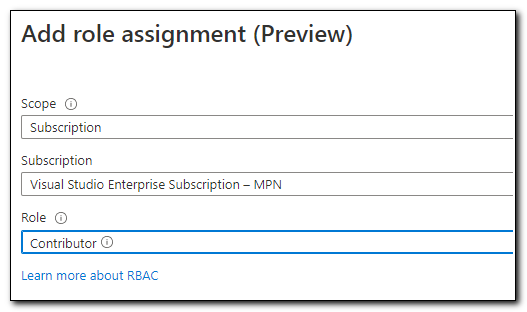
Set the scope to “Subscription” and the role to “Contributor.” This will allow the managed identity to act as a contributor with broad access, but limited control over resources in the subscription.
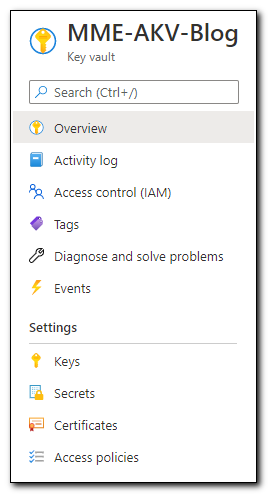
The managed identity needs to have access to return keys from our Key Vault. Copy the Object Id from the managed Identity page. Open your Azure Key Vault from the Resource Group. Inside of the Key Vault, click on “Access Policies” under Settings.
Click ”+ Add Access Policy” to create a new Access policy. On the Add Access Policy page, set the Key Permissions and Secret Permissions to “Get,” click “none selected” next to Select principal. Search for the Object Id of your managed Identity, click the account, and then click “Select.” Click “Add” to save the Access Policy.

Under Application Access Policies, we can see that the access policy was created. Click “Save” on the ribbon to save changes.

Later in the post we will create a simple runbook that will test our managed identity and its ability to return a secret from Azure Key Vault, but first I will demonstrate how to create our Automation Account through PowerShell.
I got a fever, and the only cure is more PowerShell!
We can also create an Automation Account through PowerShell. I have added a new script to my GitHub that fully automates the process. This is built using the same basic format that I used in my Create-NewKeyVault script. (Expect to see this functionality incorporated in a new module or community tool at some point in the future!) For the sake of brevity, I am only going to cover the steps that are required to create the automation account in this post. If you want to find more information on how to create a key vault, please reference my previous blog post. This script requires the Az PowerShell module. If you are running the complete script from my GitHub you will need to enter a name for your Azure Automation Account. Other parameters are optional, but the script will also prompt you for any additional values that it needs.
These examples can be run independently of the provided script, but please note you will need to provide your own values for the variables.
First, create the new Automation Account. We will use the New-AzAutomationAccount cmdlet to complete this task.
#Declare variables required to run outside of main script
$AzAutomationAcctName = "MME-Automation-Demo"
$Region = "eastus"
$ResourceGroupName = "MME-AKVPOST-RG"
#Create new Automation Account
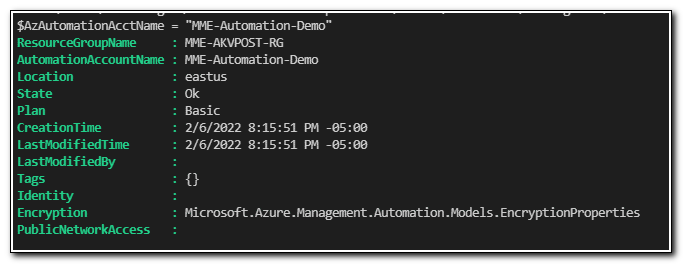
$NewAutoAccount = New-AzAutomationAccount -Name $AzAutomationAcctName -Location $Region -ResourceGroupName $ResourceGroupName
$NewAutoAccount
We can see that the Automation Account was created:
Next, we need to enable the managed identity. We do this using the Set-AzAutomationAccount cmdlet with the -AssignSystemIdentity parameter
#Enable system Identity
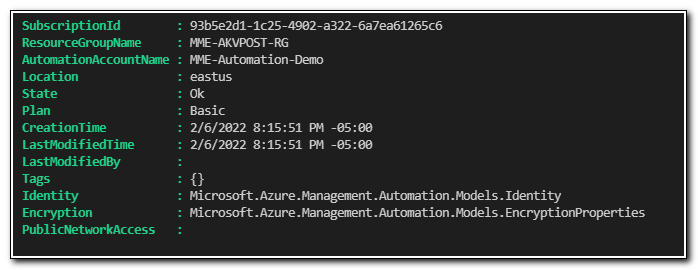
$AssignId = Set-AzAutomationAccount -ResourceGroupName $resourceGroupName -Name $AzAutomationAcctName -AssignSystemIdentity
$AssignId
Set-AzAutomationAccount returns the updated object. We can see that the Identity property has been populated with a new object of type ` Microsoft.Azure.Management.Automation.Models.Identity. If we return the Identity property of the resource, we can see that the object ID for the managed identity is stored as $AssignId.identity.PrincipalId`.
Next, we create our role assignment. We need to pass in the PrincipalId of the Managed Identity for the ObjectId parameter and the subscription ID for our subscription as part of the Scope parameter.
$AutIdentityId = $AssignId.identity.PrincipalId
$SubId = "93b5e2d1-1c25-4902-a322-6a7ea61265c6"
#Assign Role assignment and grant GET permissions to get keys from Azure Key Vault
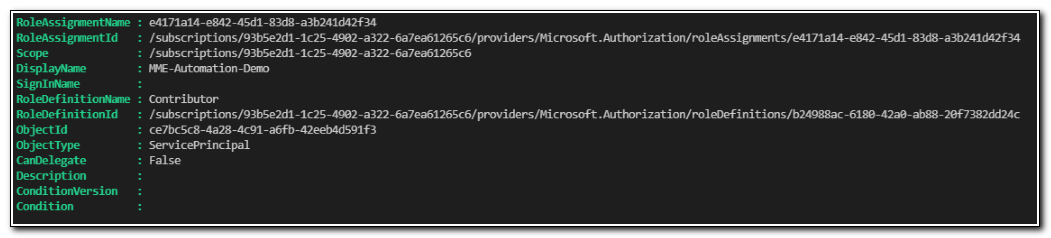
New-AzRoleAssignment -ObjectId $AutIdentityId -Scope "/subscriptions/$subId" -RoleDefinitionName "Contributor"
The resulting output of the New-AzRoleAssignment cmdlet shows that the role was assigned contributor access to the subscription.
Finally, we need to assign an access policy to be able to retrieve keys from Azure Key Vault. Because we will primarily use our managed identity for automation workloads, it only needs to be able to return keys and secrets. We will assign GET permissions for both secrets and keys.
Set-AzKeyVaultAccessPolicy -VaultName $AzKeyVaultName -ObjectId $AutIdentityId -PermissionsToKeys GET -PermissionsToSecrets GET
But will it work?
We are ready to test out Automation Account by running a simple runbook. I will cover runbooks more in depth in a later post, but we do want to make sure that we can use our managed identity to return a key from Azure Key Vault. Access your Automation Account by opening your resource group and clicking on the Automation Account in the list of resources.
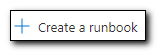
Click on “Runbooks” under Process Automation.

Click “+ Create a Runbook” to create a new runbook.
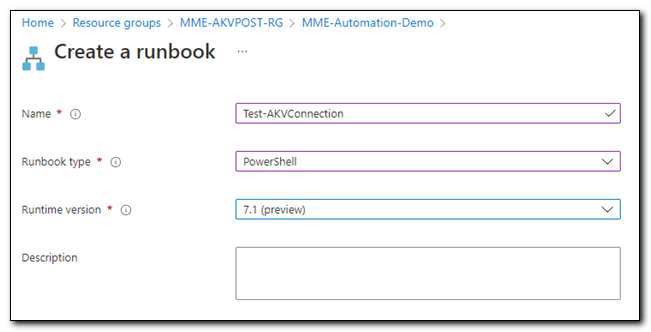
We are going to create PowerShell runbook. Name your runbook, select a version, and then click “Create.”
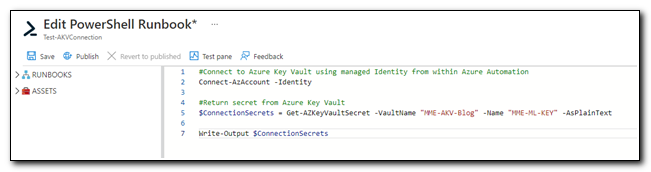
When you first create a runbook, you will be taken directly to a script editor. Copy the following PowerShell code into the editor and click “Save”
#Connect to Azure Key Vault using managed Identity from within Azure Automation
Connect-AzAccount -Identity

#Return secret from Azure Key Vault
$ConnectionSecrets = Get-AZKeyVaultSecret -VaultName "MME-AKV-Blog" -Name "MME-ML-KEY" -AsPlainText

Write-Output $ConnectionSecrets
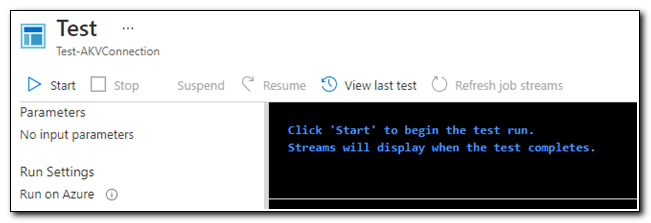
We can test the script by clicking on the “Test Pane” icon on the page ribbon.
On the test pane, click Start.
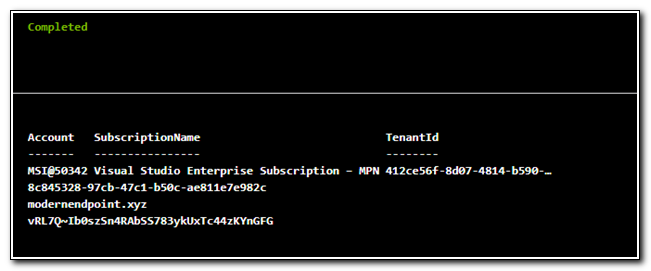
Once the script run completes, we can see that the multiline secret we had previously stored in Azure Key Vault is available to us.
Our Automation Account was successfully configured. We have validated that the managed identity is available and able to access keys stored in the key vault. While there are ways to automate tasks without the Automation Account, it will open a lot of options to us. In future blog posts we will talk about how to use our Automation Account with tools like log analytics, a hybrid runbook worker, and logic apps to automate management tasks across our entire endpoint management landscape.
Follow the full series below:
- Everything I wanted to know about APIs but was afraid to ask
- Connecting to Microsoft Graph with PowerShell
- Troubleshooting Microsoft Graph App Registration Errors
- Defining a script and finding the Microsoft Graph Calls
- Splatting with Invoke-RestMethod in PowerShell
- Updating Device Management name in PowerShell with Microsoft Graph
- Surprise Post:Adding Filters to application assignments with PowerShell and Microsoft Graph
- Working with Azure Key Vault in PowerShell
- Creating an Azure Automation Account
- Setting up a Hybrid Worker on an Azure Arc Enabled Server
- Connecting an Azure Automation Account to the Configuration Manager AdminService
- Running an Azure Automation runbook to update MEMCM Primary User
- Using Power Automate to update MEMCM Device based on Intune User