
Using Power Automate to update MEMCM Device based on Intune User
Welcome back! This is the second post this week, and a follow up - today I will use the runbook created in my last post as part of a workflow in power Automate. This is the latest post in my series on automating endpoint management tasks with Microsoft Graph and the MEMCM AdminService. You can find the rest of the series here.
Hello and welcome back! This is the latest blog post on my series on automating endpoint management tasks with Microsoft Graph and the Microsoft Endpoint Manager AdminService. If you read my last post, you know that this is my second post this week. Originally these two posts were going to be combined in a single post. As I began writing the post and documenting all the steps involved, I realized that a single post wasn’t enough to cover everything I wanted to cover. With that being said, if you want to learn more about the PowerShell runbook that I’m calling from Power Automate, you can read more about it and the last post.
This post is going to focus on creating a workflow with Power Automate. Power Automate is a low-code workflow tool that allows users and administrators to automate tasks across their cloud services. Power Automate is one several services available in Office 365 and Azure that can be used to automate various tasks. While there are tools like Logic Apps that are targeted primarily at systems administrators, Power Automate is a good starting point. I will explore the differences between those services in the future, but in today’s post I am going to limit the scope to just Power Automate. Power Automate is part of the Power Platform, which also includes Power Apps, Power Bi, and Power Virtual Agents. As I continue to explore automation workloads, expect to see more information about the Power Platform suite, especially Power Apps.
In today’s post, we are going to create a Power Automate workflow that will update the Primary User in Microsoft Endpoint Configuration Manager on a co-managed device. The workflow will be manually triggered and require the user to enter a device name. Any automation task requires some form of trigger – either manual or automatic. To keep things simple, we will use a manual trigger today, but I hope to explore automatic triggers as this series continues to grow.
Defining our Flow
Early on in this series, I talked about the importance of defining the bounds of a script. The same applies to low-code tools like Power Automate. We need to be able to clearly define each step in the process. This workflow will require the following steps:
- Manually trigger the workflow and input the device name
- Connect to Azure Key Vault to return a Client ID and Client Secret
GETthe Intune managed device object from Microsoft Graph- Parse the returned device object to find the primary user
- Launch an Azure Automation runbook that
- Finds the device’s Resource ID in Configuration manager
- Find’s the user’s Unique User Name in CM
- Sets the device’s Primary User
Welcome to Power Automate
Power Automate can connect to several different services across our Azure tenants. It uses connectors to create connections back to those services. Power Automate uses both standard and premium connectors. Standard connectors are connectors that access data within the context of an application, while premium connectors are connectors that connect to services outside of the Power Platform. Users are entitled to use Power Automate as part of their Microsoft 365 licensing, but those user licenses are limited to the use of standard connectors. If your workflows use premium connectors, users will need to have a standalone license. The connectors used in this demonstration are premium connectors.
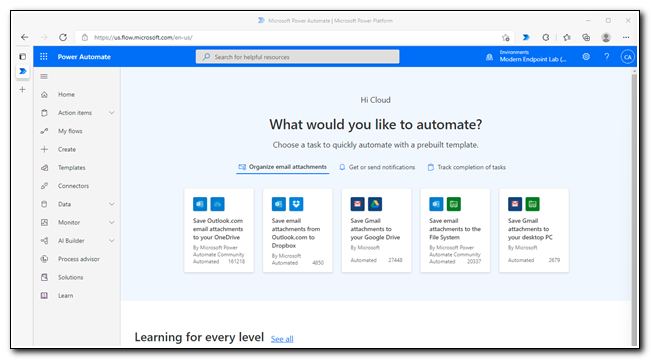
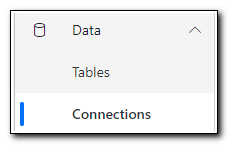
Connectors can be added while creating a workflow, but in some cases, they need additional information before they will run. For this workflow we will need to set up two connections – Azure Key Vault and Azure Automation. Both will run in our Admin User’s context. Click on “Data” and select “Connections” from the menu. For this example, we will manually create the connections before setting up our workflow. Browse to https://flow.microsoft.com/.
Click on Data and select Connections from the menu.
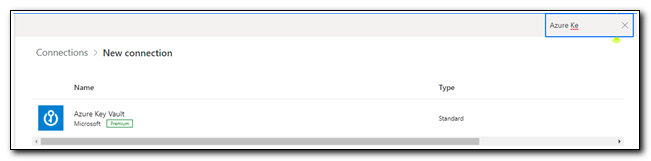
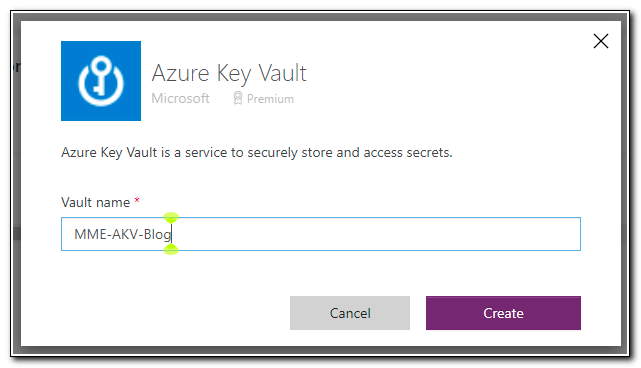
Click “+ New Connection” on the ribbon. In the search bar in the upper left corner, type “Azure Key Vault.” Click on the link to create the connection. (Pro-tip: don’t use the search bar on the page header, it won’t work. I learned that the hard way – several times!)
Type the name of your key vault and then click create. When prompted, sign in with an account that has permissions to return secrets from your key vault.
After creating the connection, search for Azure Automation.
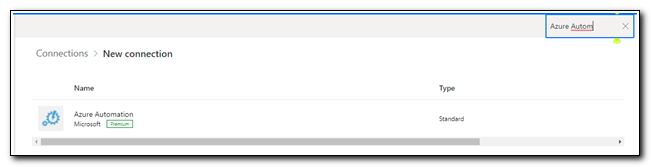
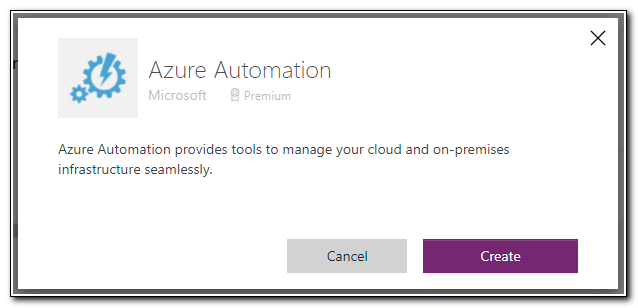
Click on the Azure Automation connector, and then click create to set up the connection. Sign in with an account that has permission to Azure Automation to complete the connection.
Now that we have set up the connectors, we should be able to use them in our workflows without any additional information. Click on “My flows” to access the flows screen.

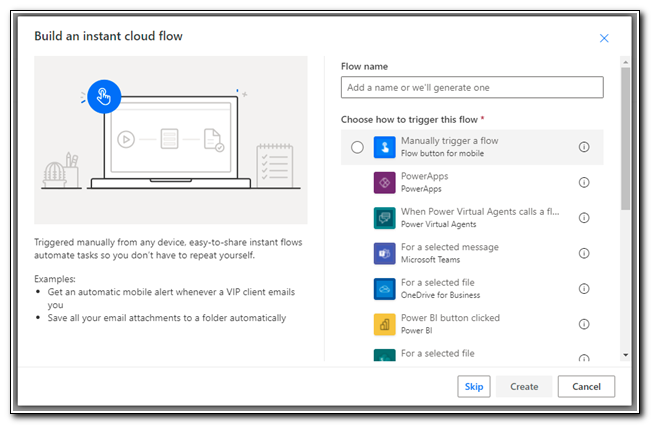
Click on New flow and select “Instant cloud flow.” This will create a workflow that is triggered manually. Instant cloud flows can also require input, which will allow us to specify a device.
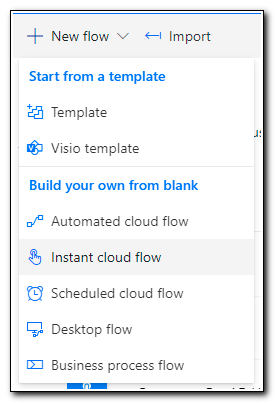
Select “Manually trigger a flow” and then click create.
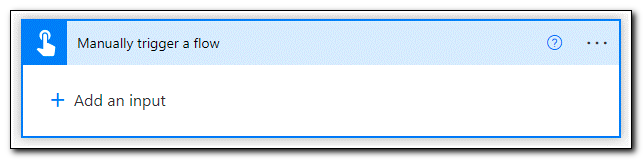
When the new flow is created, we see a step to Manually trigger a flow. The flow name is listed in the upper left corner. At this point, it is untitled. Click on the name and enter a descriptive name for your flow

Click on the “Manually trigger a flow” step to set up the trigger and add inputs to the workflow.
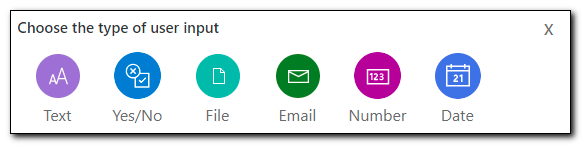
Click on + Add an input. When prompted, select “Text” as the type of user input.
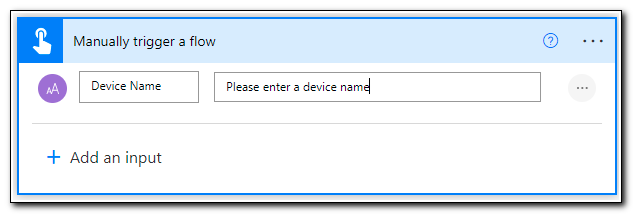
Enter the name of the text input field. This will be used throughout the workflow to access the value as dynamic content. You can also provide help text by updating the value in the second box.
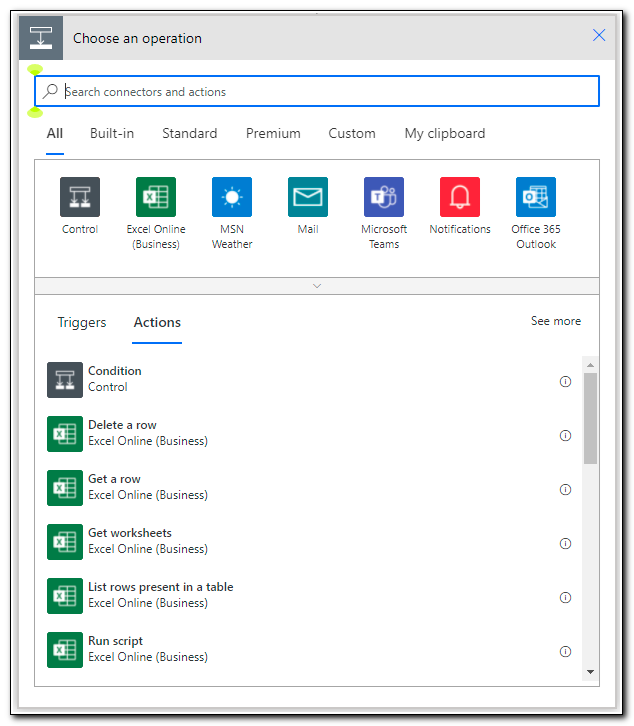
Click + New Step to add a new step. After clicking the new step button, you will be asked to select an operation.
We already know that we will need to make a GET request to Microsoft Graph to return the device object. We could make this request with a user account that has appropriate administrative rights to access user and device objects, however, it is best to use a service principal with appropriate rights following the principle of least privilege.
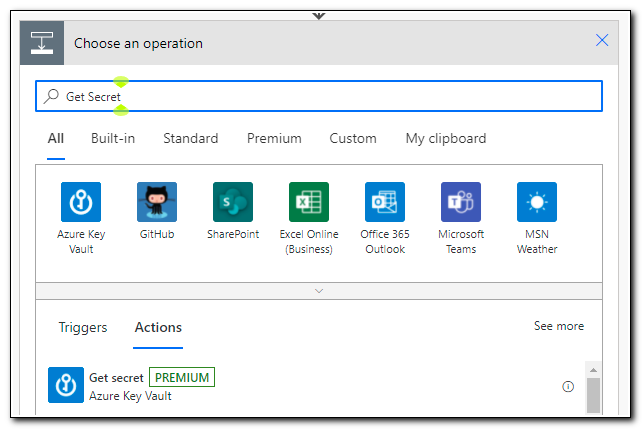
Rather than hard coding in the Application ID and Client Secret, we can store them in Azure Key Vault. This will allow us to get a stored secret and pass them securely back to our workflow. In this case, I have already stored my Application ID and Client Secret in Azure Key Vault. To return a secret from AKV search for “Get Secret.”
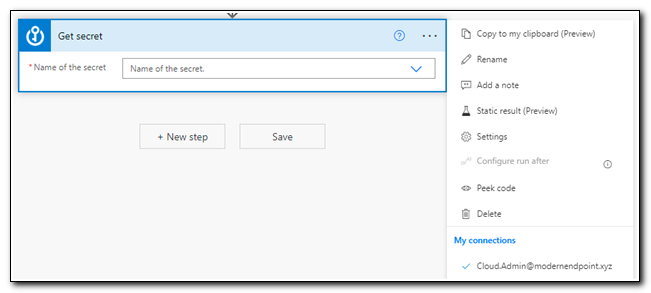
After you add the Get Secret step, click on the ellipses in the upper right corner. The first thing you will notice is that our connection is already selected. We have different options available in this menu. We can rename steps to make them clearer, view the settings for the step, and even delete steps we no longer need.
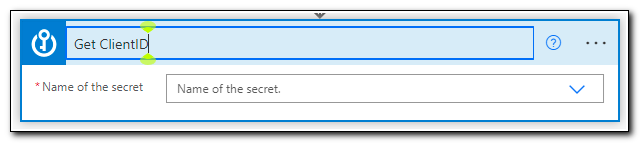
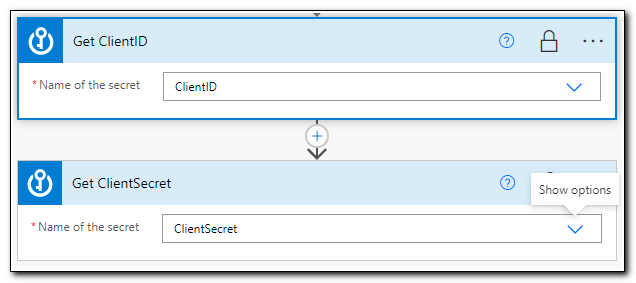
We will have to return two separate secrets, so let’s rename this step for clarity. Click on “Rename,” and rename the step to “Get ClientID.”
Next, we want to make sure that we secure our secrets throughout the workflow. One of the unique settings available for Azure Key Vault is the option to secure inputs and outputs. Open the menu and select Settings. Turn both “Secure Inputs” and “Secure Outputs” on. When you enable secure outputs, all references to the secret will be kept hidden through the rest of the workflow. Click Done.

Next, click the dropdown to select the secret to return. Select your Client ID, and then click “+ New Step.”
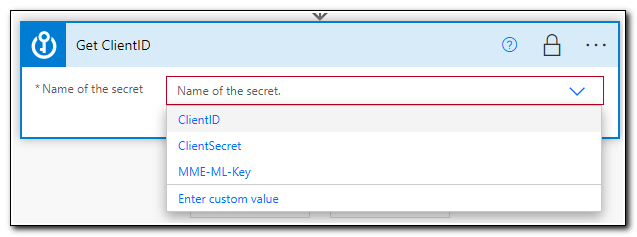
Repeat the steps to add an additional Get Secret step. This time, return your ClientSecret. Click “+ New Step” to add the next step.
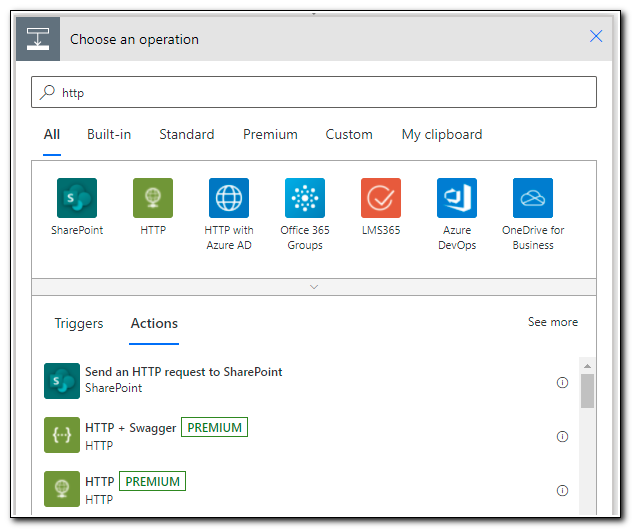
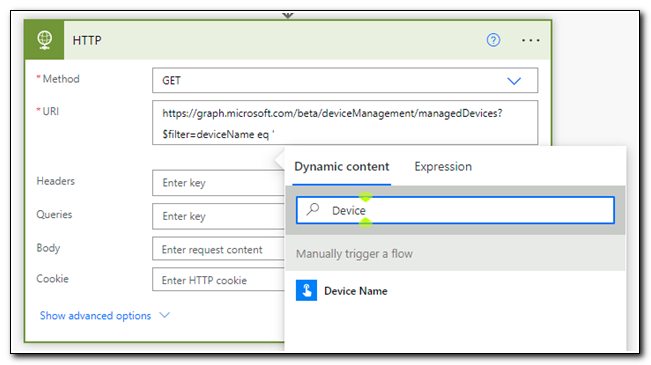
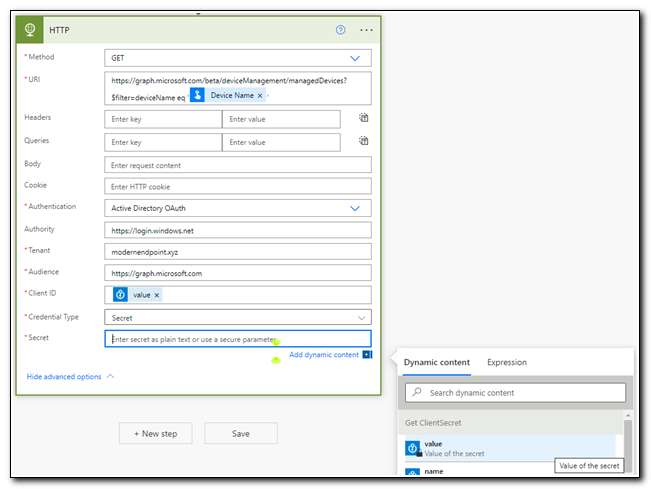
Now, we are ready to make our GET request to https://graph.microsoft.com/beta/deviceManagement/managedDevices?$filter=deviceName eq '[Device Name]'. Search for “http” and select the HTTP operation.
With Power Automate, we can use the output of a previous step as part of the parameters for another step. In this case, we need to use the Device Name we entered at the start of the workflow as part of the URI for our Microsoft Graph call. Paste in https://graph.microsoft.com/beta/deviceManagement/managedDevices?$filter=deviceName eq ', but don’t enter a second single quote yet.
In the Dynamic content box, search for “Device Name.” In the search results, we will see the name of any steps that have an output that matches our search string and we can select the name of the object we would like to use. In this case, we can see “Device Name” is one of the outputs from the “Manually trigger a flow” step.
Select Device Name and type in a second single quote to complete the request URI.
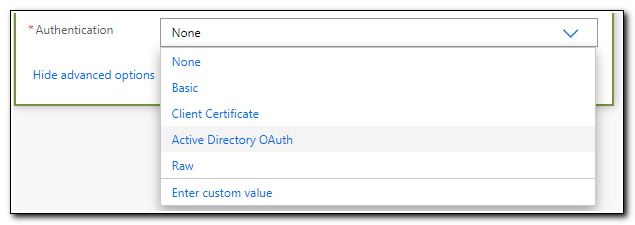
Next, click on “Show Advanced Options,” at the bottom of the box. Set the authentication value to “Active Directory OAuth.”
Enter the following parameters for OAuth authentication:
Authority: `https://login.windows.net`
Tenant: Your tenant ID
Audience: https://graph.microsoft.com
Client ID: Select `value` under the **Get ClientID** step in the dynamic content search box
Secret: Select `value` under the **Get ClientSecret** step in the dynamic content search box
The REST API call we made in the step above will return our device’s managed device object from Microsoft Graph in JSON format. Power Automate can automatically parse a JSON body and return the values from the payload as values we can use in our workflow. The easiest way to do this is with a Parse JSON step. First, we need to generate an example JSON file to use in the parse step. We can do this by testing our workflow and copying the output of our HTTP request from the last step.
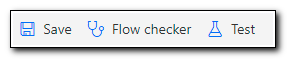
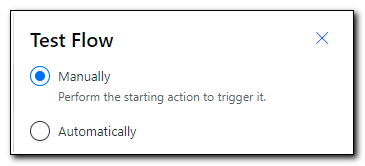
Click “Save” in the upper right corner, and then click on “Test.”
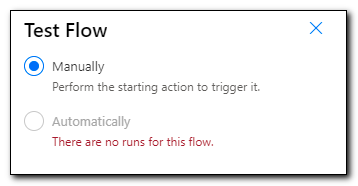
Select the radio button to run the flow manually, and then click on “Test.”
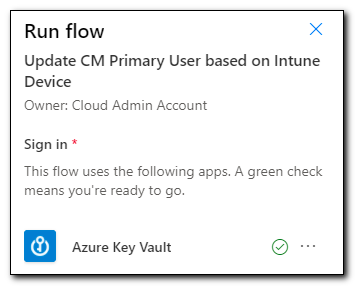
You may be prompted to fix issues with any connectors. If your Azure Key Vault connection shows any errors, correct them. Click Continue to run the test.
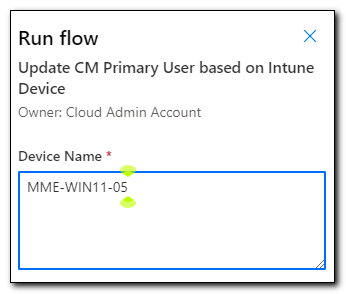
Enter your device name, and then click “Run Flow.” Click “Done,” you will automatically be redirected to the test pane.
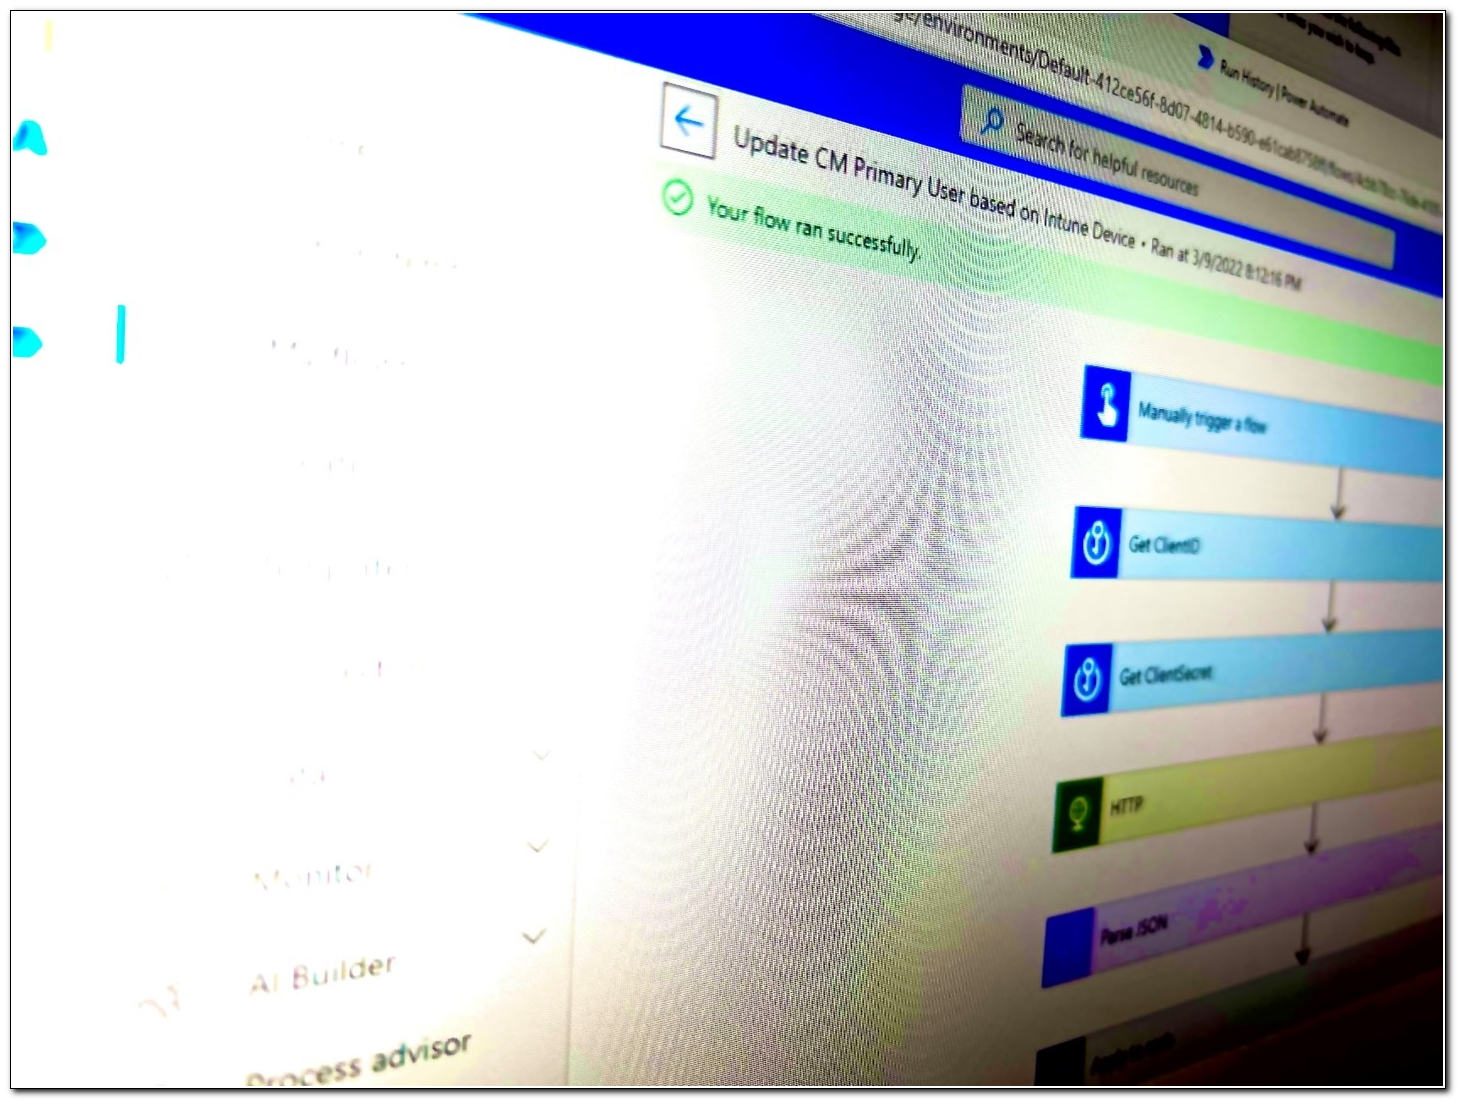
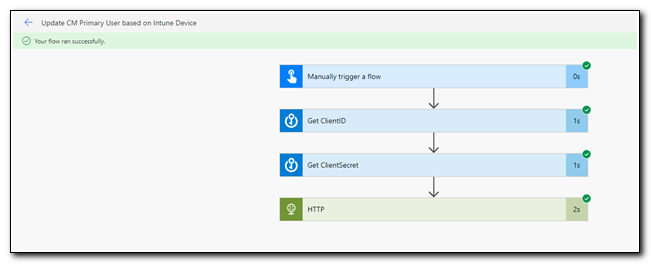
As the flow runs, the page will update to reflect which step is currently running. If there are any errors, you will see a red X on the step that failed. If it ran successfully, all steps should show a green check.
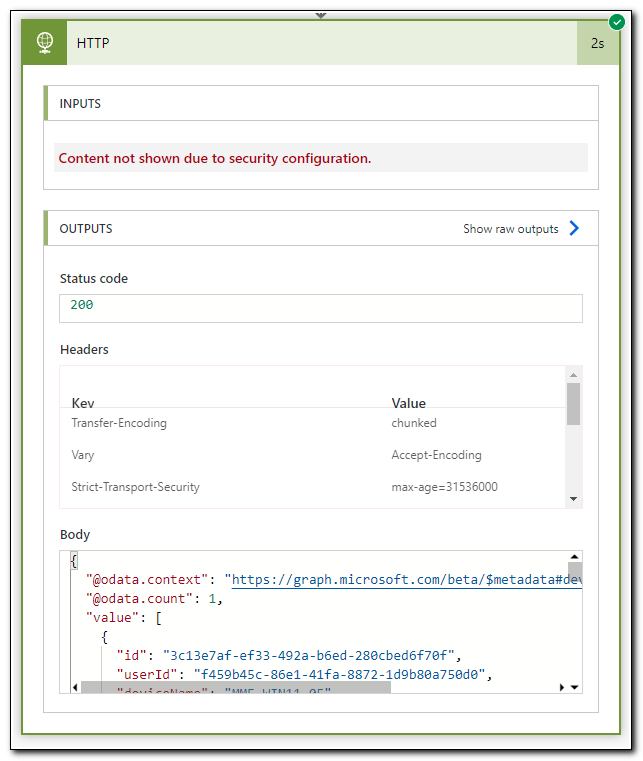
Click on the HTTP step to view more details. This page shows information about the request itself, and the response is shown under Outputs. We can see that this request returned a status code of 200 and the body is the JSON output we received from Microsoft Graph. Copy the entire contents of the body to the clipboard. Click “Edit” in the upper right corner to be returned to the editing canvas.
Note that in the screenshot below, we see a message that inputs are not being shown due to a security configuration. This is due to the settings we made to secure the outputs of our Azure Key Vault – Get Secret steps.
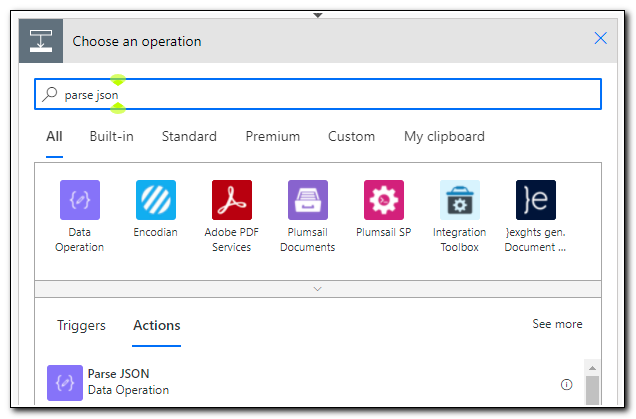
Add a new step and search for “parse json.” Click on the Parse JSON data operation.
Click on the content field and select the “Body” value from the dynamic content box. Click on the “Generate from sample” button to input the JSON sample we generated in our test.
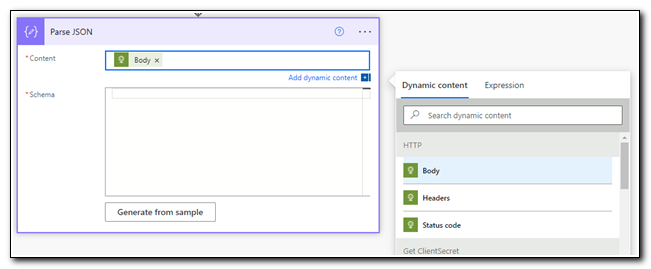
Paste in the entire contents of the body output from our test above, and then click Done.

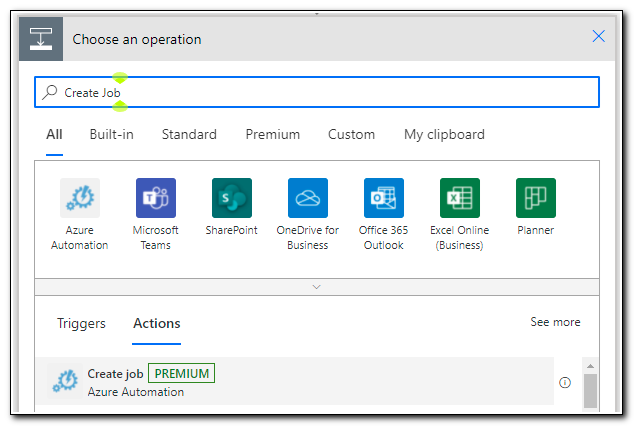
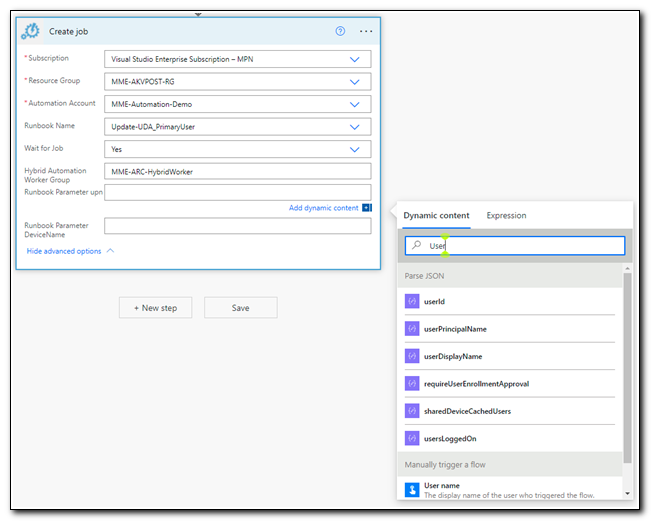
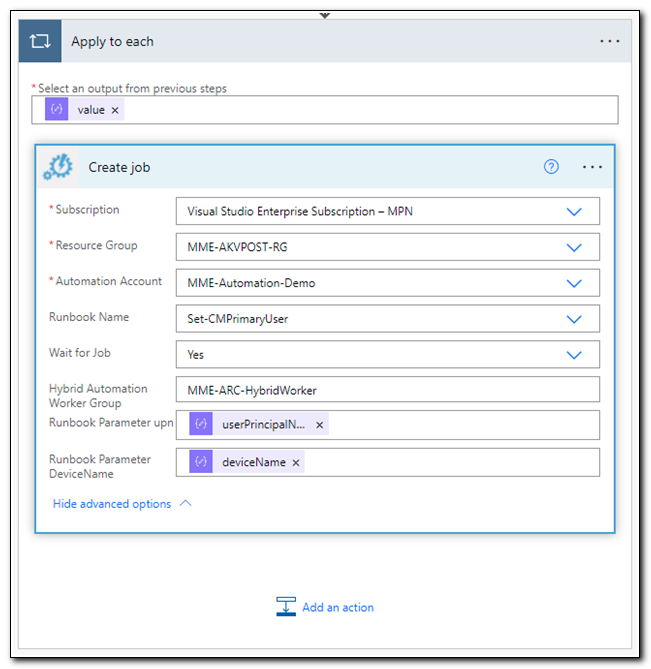
Add a new step and search for “Create Job.” Select the Create job operation for Azure Automation.
Select your subscription, resource group, automation account, and runbook name. Set “Wait for job” to yes. Click “Show advanced options,” and enter the name of your hybrid worker group.
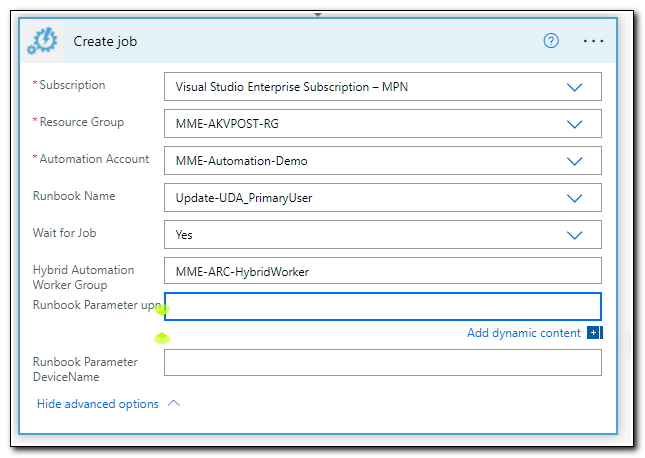
Next, click on the “runbook parameter UPN” text box, and search for UserPrincipalName in the dynamic content box.
At this point, you may notice that your “create job” step gets nested inside of an “Apply to each” step. This is completely normal. If the JSON object returned from our HTTP request had multiple objects, the apply to each step would run for each item returned.
Click Save. Our workflow is now complete, and we are ready to test it.
In Configuration Manager I have a co-managed, hybrid-joined device that was just onboarded with Autopilot. The device doesn’t have a primary user assigned.

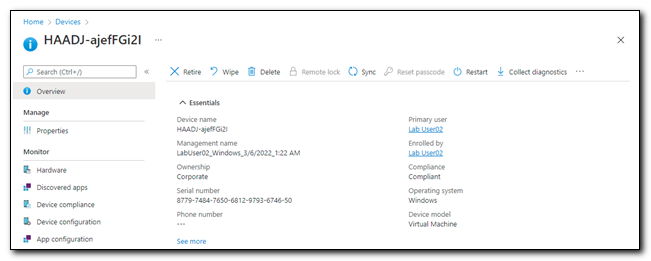
The device object in Microsoft Endpoint Manager has a primary user, LabUser02.
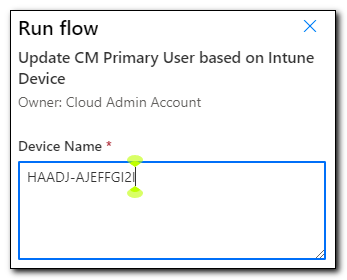
In Power Automate, click “Test” on the ribbon. Select the manual option and click Test to trigger the flow.
Enter the name of your test device and click Run Flow. You may be prompted to confirm any new connectors that were added since your last test. If prompted, fix any issues and continue to run the flow.
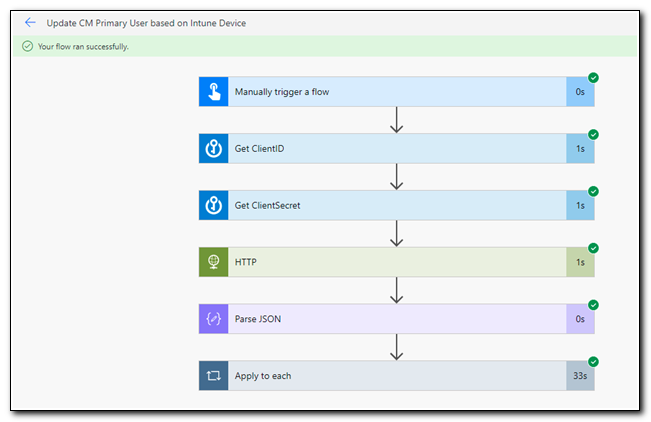
The flow runs page shows the status of our workflow. The flow ran successfully.
If we look at the device in Configuration Manager, we can see that the primary user has now been assigned.

Once we have created a workflow, we can adjust how and when to run it by changing the trigger. Power Automate has a range of connectors that we could use to launch the flow. In future posts, I will begin to explore other triggers, Power Apps, and other automation tools that are available in Azure.
Now that we have established the basic tools needed for endpoint management automation, I will continue to explore other avenues, including creating task-specific automation workloads that you can use as a basis for tools in your environment.
Once again, I hope this post and the series have been helpful. Thank you for visiting. Keep following for more great content!
Follow the full series below:
- Everything I wanted to know about APIs but was afraid to ask
- Connecting to Microsoft Graph with PowerShell
- Troubleshooting Microsoft Graph App Registration Errors
- Defining a script and finding the Microsoft Graph Calls
- Splatting with Invoke-RestMethod in PowerShell
- Updating Device Management name in PowerShell with Microsoft Graph
- Surprise Post:Adding Filters to application assignments with PowerShell and Microsoft Graph
- Working with Azure Key Vault in PowerShell
- Creating an Azure Automation Account
- Setting up a Hybrid Worker on an Azure Arc Enabled Server
- Connecting an Azure Automation Account to the Configuration Manager AdminService
- Running an Azure Automation runbook to update MEMCM Primary User
- Using Power Automate to update MEMCM Device based on Intune User
- Comparing Invoke RestMethod to the PowerShell SDK
- MMS Intune Management PowerApp Demo Part 1 Creating the PowerAutomate flows