
Working with Azure Key Vault in PowerShell
This is the latest installment in my series on endpoint automation with Microsoft Graph and the AdminService. I have been laying the foundation and providing the building blocks to help you automate tasks in your environment. You can find the rest of the series here.
Hello and welcome back! This post is the most recent installment in my series on automating endpoint management tasks with Microsoft Graph and the AdminService! If you’ve been following along, you know that I have been providing the building blocks needed to work with REST APIs in PowerShell. Previous posts have covered topics like API basics, authenticating to Microsoft Graph with PowerShell, finding the resources needed, and finally building a script to automate device management tasks.
This post will begin the transition to building automation tasks with various cloud tools. Over the next several posts, I will explore low-code tools like PowerAutomate and Logic Apps, automation tools like Azure Automation, and various associated tools that we can use to build robust automation workflows in the cloud. Before we dive into those tools, we will need to lay the groundwork to use those tools in Azure. Today’s post will walk you through creating an Azure Key Vault. While a key vault isn’t required for using tools like Azure Automation, it will allow us to store our secrets and access them without needing to store them in plain text or hard code them into our scripts. I will also talk about how I store and access secrets in multiline secrets, which comes in handy when using Azure Automation.
Setting up a Key Vault using the UI
There are different ways to create and store secrets in an Azure Key Vault. This post assumes that you have already created an App Registration in Azure Active Directory and generated a client secret. It also assumes that you have access to an Azure subscription and can create or access a resource group to store the key vault. I will demonstrate creating a key vault using the UI and through a PowerShell script. We will access the keys using PowerShell, and finally, I will demonstrate the use of multiline secrets, which currently needs be done through PowerShell.
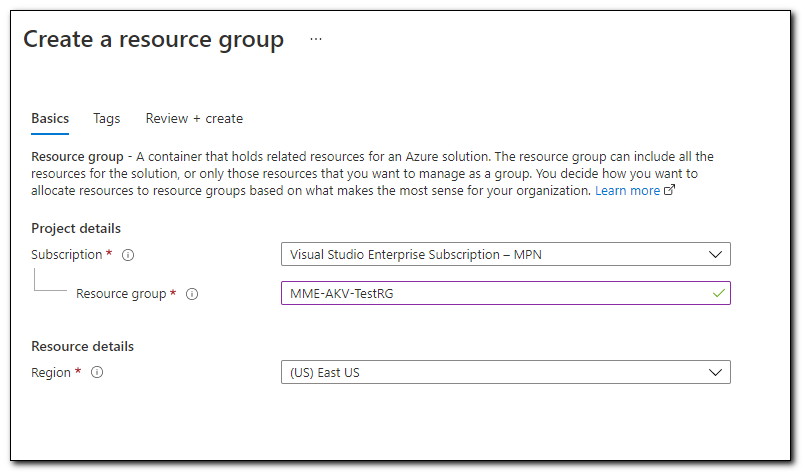
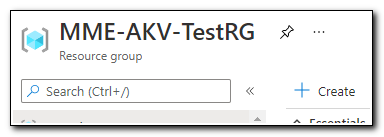
Before creating a Key Vault, we need to have a resource group to store the key. If you don’t have an existing resource group, sign in to Azure portal. Click the “Resource Groups” icon to access the resource groups blade (or click here).
Click “+ Create” to create a new resource group. Select a subscription and region. Add a name for your resource group and then click “Review + create.”
Click “+ Create” to add a new resource.
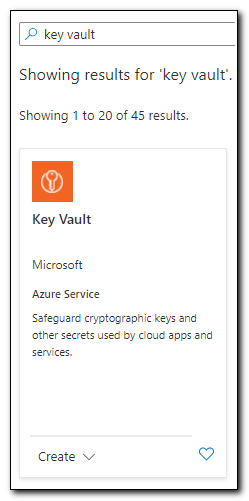
Search for “key vault” in the search box and then click on “Create” on the Key Vault card.
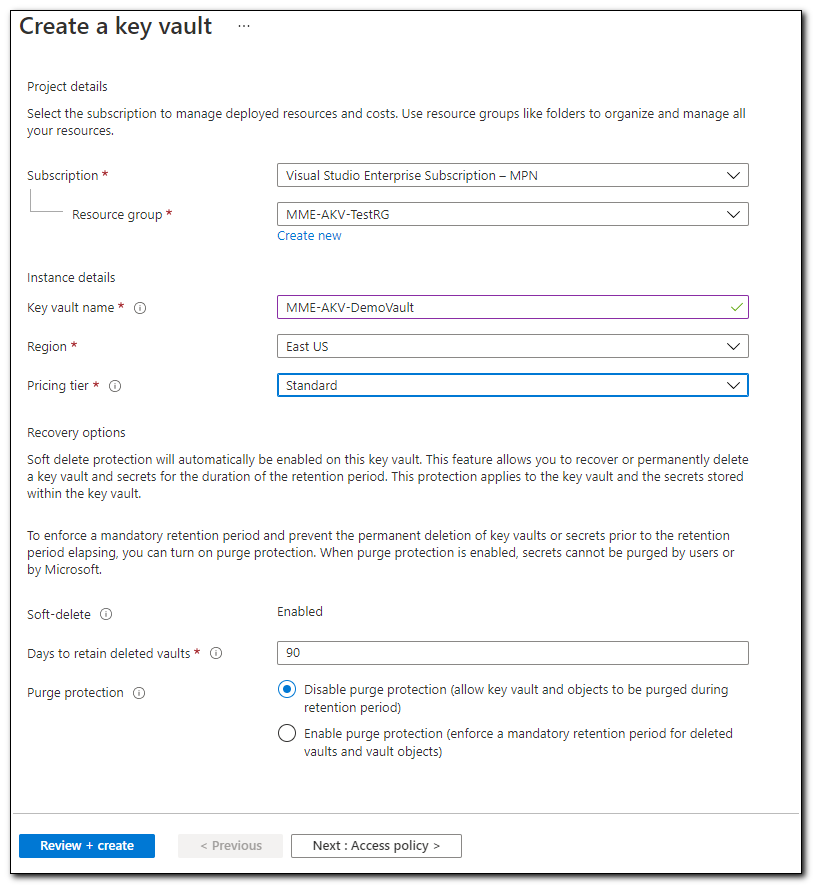
On the Create a Key Vault page your subscription and resource group should already be selected. Enter a name, region, and set the pricing tier to Standard. Click “Review + create” to create the vault. On the confirmation screen, confirm your settings and then click the “Create” button.
Azure Key Vault has a lot of different features. I am not going to speak to them in depth as part of this post. To be able to read from the Key Vault, you may need to create an access policy to access the keys stored in the Key Vault. You can add a vault access policy by clicking on “Access Policies” on the navigation menu. You can read more about configuring an access policy here.
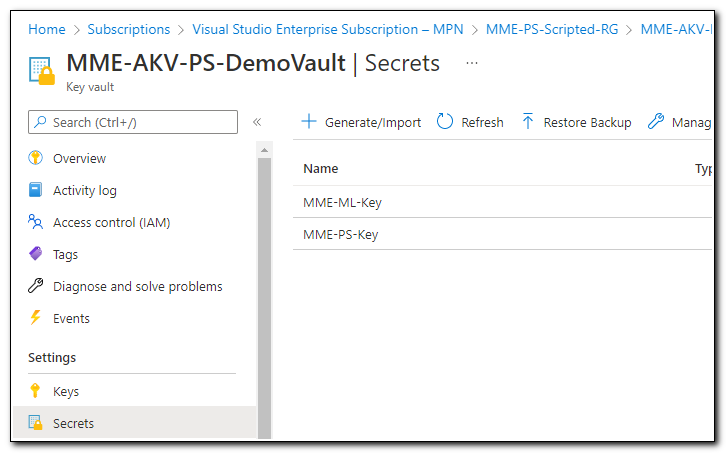
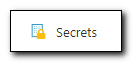
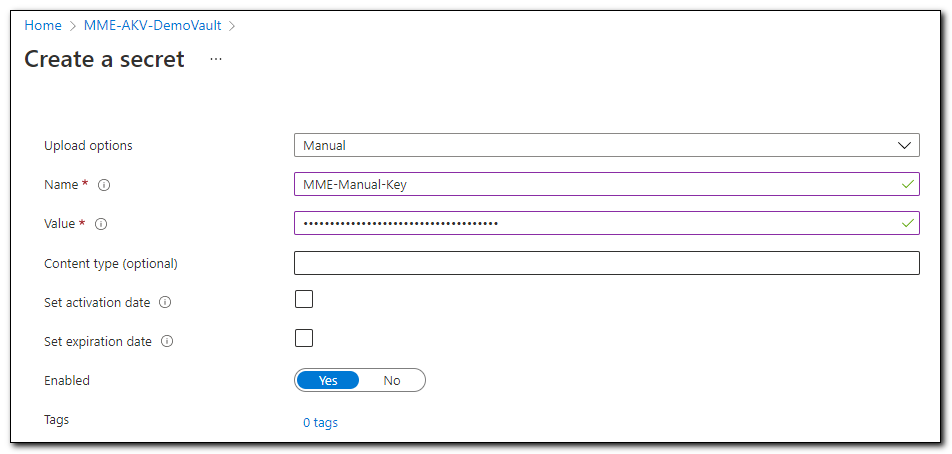
We are going to create a secret. Click on “Secrets” from the navigation menu.
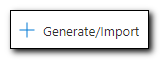
Click “+ Generate/Import” to create a new secret.
In this instance I am using a secret that was created on an existing App Registration in my tenant. You can read more about creating an app registration and generating a secret in my recent post, Connecting to Microsoft Graph with PowerShell. Add a name for the secret and enter the client secret from the App Registration in the value field. Click “Create” to create the secret. Secrets are accessed in the same way regardless of how they are created.
Secrets are accessed in the same way regardless of how they are created. I will cover access the secrets in PowerShell later in this post.
Creating a Key Vault using PowerShell
Alternatively, we can create a resource group, key vault, and secrets with PowerShell. Creating a key vault with PowerShell has the same advantages of scripting any task – it allows for automation, repeatability, and, depending on your needs, can be much quicker than using the GUI. In this section, I will break down the steps to create the Key Vault and add the secret using PowerShell. I have also created a script to create a new key vault and uploaded it to my GitHub repo. The variables used in script blocks throughout this section will be consistent and cumulative. If you do not see a variable declared in a specific script block, please look at the previous script blocks if you need to reference it.
The steps in this blog post require the AZ PowerShell module. If you don’t have the module installed, you can install the module by typing Install-module Az in an administrative PowerShell console. Once the module is installed, we need to authenticate to Azure PowerShell.
$Credential = Get-Credential
Connect-AzAccount -Credential $Credential
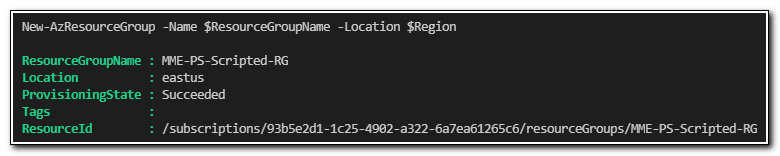
After connecting to Azure powerShell, we can create a new resource group using the New-AzResourceGroup cmdlet.
$ResourceGroupName = "MME-PS-Scripted-RG"
$Region = "EastUS"

New-AzResourceGroup -Name $ResourceGroupName -Location $Region
If this is successful, you should see output similar to the following:
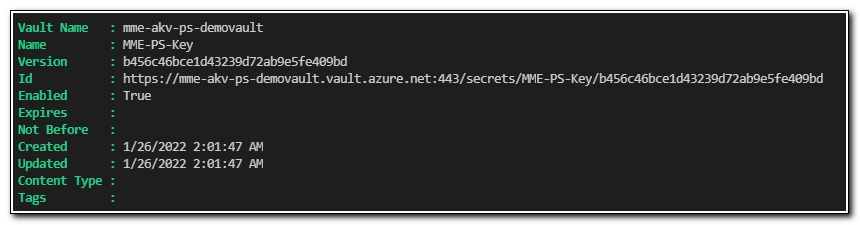
After creating the resource group, we can create a new key vault using the New-AzKeyVault cmdlet.
$VaultName = "MME-AKV-PS-DemoVault"

New-AzKeyVault -Name $VaultName -ResourceGroupName $ResourceGroupName -Location $Region
This should return the new vault object:

Next, we can add a secret to the vault using the Set-AzKeyVaultSecret cmdlet. Note: I know my secrets are visible here. I am including them for clarity, and they, along with the key vaults, will be deleted. Never share your secrets with anyone, certainly not in a blog post!
$SecretName = "MME-PS-Key"
$SecretValue = "zPI7Q~ajN4xshSJfD_r.UdA1kf4ohEG8zGYgS"

#Add Secret to key vault
$Secretvalue = ConvertTo-SecureString $SecretValue -AsPlainText -Force
$SetSecret = Set-AzKeyVaultSecret -VaultName $VaultName -Name $SecretName -SecretValue $secretvalue
In this case, we returned the response from our cmdlet to the variable `$SetSecret. By viewing the variable, we can see the result, which confirms our secret was created.
Now, we should be able to access the key that we have stored in our key vault and use it to authenticate to Microsoft Graph. We can access the key using the Get-AzKeyVaultSecret cmdlet. We will pass in the key vault name for the vault we created above.
#Return connection secret to ConnectionSecrets variable
$ConnectionSecrets = Get-AzKeyVaultSecret -VaultName $VaultName -Name $SecretName –AsPlainText
If we view the value of the $ConnectionSecrets variable, we can see that it returned the secret we stored in our previous step.

We can now pass this secret with the Microsoft Authentication Library PowerShell module to authenticate to Microsoft Graph. You can find out more about how to use this module here.
#Authenticate to Azure with app registration and return authorization token.
$authparams = @{

    ClientId    = '8c845328-97cb-47c1-b50c-ae811e7e982c'
    TenantId    = 'modernendpoint.xyz'
    ClientSecret = ( $ConnectionSecrets | ConvertTo-SecureString -AsPlainText -Force )

}

$auth = Get-MsalToken @authParams
$auth
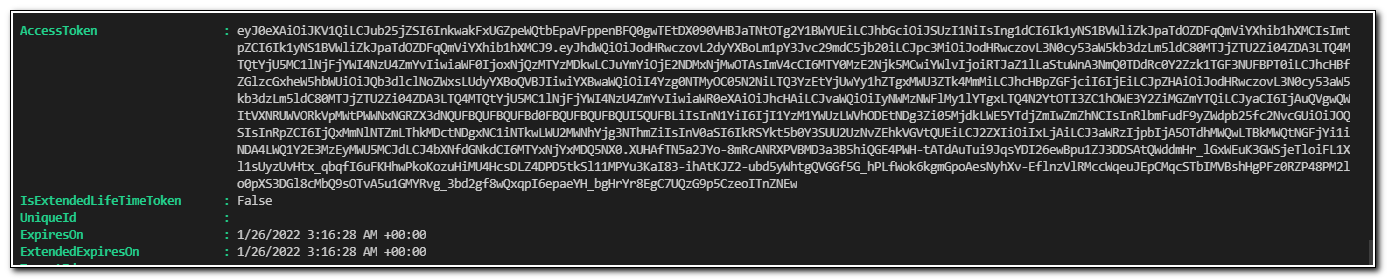
This will return our access token.

Working with Multiline Secrets
Now that we have explored the various ways to create a key vault, store a secret, and access a client secret, I want to discuss one more thing. When we access use the Microsoft Authentication Library PowerShell module to get an authorization token, we need to pass in three different values. Those values are the Client ID of our app registration, our Tenant ID, and finally the client secret. If you are following the Principle of Least Privilege, you should have different app registrations for different tasks based on their required permissions.
To make my code more portable, I try to parameterize each one of these values. When we use tools like Azure Automation, we will need to specify the values for each variable each time we need to access a different app registration. To make this easier, I like to store all the information in a single client secret. We can do this using a multiline secrete in Azure Key Vault. Multiline secrets can’t be created using the GUI, so I wanted to demonstrate how to create a secret with PowerShell. While this isn’t strictly necessary, it’s something I frequently do. This is an important building block that I use in my scripts, so I am including it here for your reference.
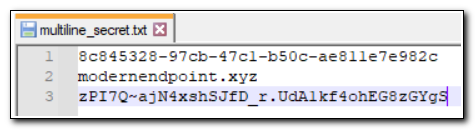
To create a multiline secret, we need to store the secret in a text file. In this instance, I have created a text file, multiline_secret.txt and stored it in c:\temp\. Each line of the text file is a different value in my multiline secret.
We can use Set-AzKeyVaultSecret to set multiline keys. From a cmdlet perspective, there is no difference when the key is created. We just need to import the content of the above file to a secure string and use the same cmdlet and parameters we used before.
#Retrieve contents of text file, convert to secure-string
$File = "C:\temp\multiline_secret.txt"
$MLSecretName = "MME-ML-Key"
$SecretImport =  Get-Content $File -Raw
$MLSecretValue = ConvertTo-SecureString -String $SecretImport -AsPlainText -Force

#Set multiline secret
$SetSecret = Set-AzKeyVaultSecret -VaultName $VaultName -Name $MLSecretName -SecretValue $MLSecretValue
If we use Get-AzKeyVaultSecret to return this value, we can see the entire secret was stored and is returned.
$ReturnedMLSecret = Get-AzKeyVaultSecret -VaultName $VaultName -Name $MLSecretName -AsPlainText

The returned value has the type System.String. We will need to split the string to access the values. We can split the string using $ReturnedMLSecret.split().

The line breaks create additional items in the object once it has been split, so to return the values we want, we will need to take the objects in even numbered positions in the array (0,2, and 4). We can see this by writing the values of the objects to variables and returning those values to our console.
$ReturnedMLSecret = Get-AzKeyVaultSecret -VaultName $VaultName -Name $MLSecretName -AsPlainText
$ClientSecret = $ReturnedMLSecret.Split()[0]
$TenantID  = $ReturnedMLSecret.Split()[2]
$ApplicationClientID = $ReturnedMLSecret.Split()[4]

Write-Output "Application Client ID is $ApplicationClientID"
Write-Output "Tenant ID is $TenantID"
Write-Output "Client Secret is $ClientSecret"
We can see each value was written as expected:

We can use these values to use the MSAL.ps module to get an authorization token. In this example, the ClientID, TenantID, and ClientSecret have each been parameterized. This will allow us to create a function that can be reused in a script to access different secrets or added to a module.
$authparams = @{

    ClientId    = $ApplicationClientID
    TenantId    = $tenantID
    ClientSecret = ( $ClientSecret | ConvertTo-SecureString -AsPlainText -Force )

}

$auth = Get-MsalToken @authParams
$auth
This method also returned an access token that we can use to make REST calls to Microsoft Graph.
This post was intended to provide an additional building block that we will use on our journey to automate endpoint management tasks in Microsoft Graph and the AdminService. While it didn’t include a lot of Graph specific content, understanding how to use Azure Key Vault is essential to securely automating tasks across Azure. Join me in future posts, as I continue to explore how we can leverage the power of Microsoft Azure to automate Microsoft Endpoint Manager workloads.
Follow the full series below:
- Everything I wanted to know about APIs but was afraid to ask
- Connecting to Microsoft Graph with PowerShell
- Troubleshooting Microsoft Graph App Registration Errors
- Defining a script and finding the Microsoft Graph Calls
- Splatting with Invoke-RestMethod in PowerShell
- Updating Device Management name in PowerShell with Microsoft Graph
- Surprise Post:Adding Filters to application assignments with PowerShell and Microsoft Graph
- Working with Azure Key Vault in PowerShell
- Creating an Azure Automation Account
- Setting up a Hybrid Worker on an Azure Arc Enabled Server
- Connecting an Azure Automation Account to the Configuration Manager AdminService
- Running an Azure Automation runbook to update MEMCM Primary User
- Using Power Automate to update MEMCM Device based on Intune User