
Running an Azure Automation runbook to update MEMCM Primary User
This is the first of two posts I have for you this week! In today’s post I am building a runbook to update the MEMCM Primary user based on the primary user in Intune. In my next post, I will show you how to use this runbook in a Power Automate workflow! You can find the rest of the series here.
Hello, and welcome! This week, I planned on posting a single blog post. Things don’t always go according to plan – and this week’s blog posts are evidence of that! While I could cover everything I wanted to in a single post, I quickly discovered that if I wanted to do this week’s topic justice, I really needed to split it into two posts. This week, I will be making two posts! In this blog post, I will explain why the demonstration in my last post wasn’t practical for automation and provide a PowerShell runbook that solves those problems. Then, in my next post, I will create a flow with Power Automate that uses our new runbook in a practical automation workflow.
In my last post, we explored how to connect to the Microsoft Endpoint Configuration Manager AdminService through an Azure Arc enabled server. This method provides a secure path to access on-premise resources with a relatively low barrier to entry. By using an Azure Automation runbook, we can run scripts on-premise and return results back to the cloud for use in automation workflows.
The problem with the last post
In that post, I shared a script that would allow an administrator to make a single REST API call to the AdminService using an Azure Automation runbook. There are a lot of possible uses for this script, but it’s not going to be the best option in every situation. I demonstrated how to set the primary user for a device in Configuration Manager via the AdminService. While it was effective and was a great demonstration on how to make a POST request, I had to pass in values that are only available in Configuration Manager.
If you’ve spent any time automating workloads, you know that for an automation task to be effective it should require minimal input. Gathering the input shouldn’t be more work than performing the task manually. The REST API call I demonstrated in that post required a JSON body that included two values – the unique username of the user and the CM resource ID of the device.
There are a few different ways I could have found or built the username, but all of them would have required performing additional tasks. For example, I could have dynamically built it based off the on-premise domain name and SamAccountName. Another option would have been to run another script that would pull it from the on-premise AD user object, or, I could have searched for the user object based on a Configuration Manager attribute that I could also get from Azure Active Directory.
Even if I did find a way to gather the unique username, I would still be left needing to find the device’s resource ID in Configuration Manager. There’s only one place to find that, and it’s in Configuration Manager.
So, how do we fix it?
While my last post met the goal of being able to make a REST API call to the AdminService from Azure Active Directory, it required inputs that we could only find by looking in Configuration Manager. If we have to find the resource ID in MEMCM, we may as well manually update the Primary User while we are at it. To solve this issue, we need to create a script that will query the AdminService based on information we already know or that a workflow can find automatically.
Earlier in this series, I talked about the steps needed to write a script. One of the first steps is to define what we want the script to do and create an outline of the steps we need to take. In this case, I want to assign a primary user in Configuration Manager for a co-managed device. If you’ve brought an Autopilot device into co-management, you know that the primary user isn’t immediately assigned when the client is installed. You could let the primary user be assigned through user device affinity, but that could take time. Depending on your environment, you may need the primary user to be assigned sooner.
We already know that we need the device’s resource ID and the user’s unique username. Neither of those are stored in Azure, so our script will need to take known information and find both of those values. We already know the device name and the primary user, so we can use that information to find the values we need from CM.
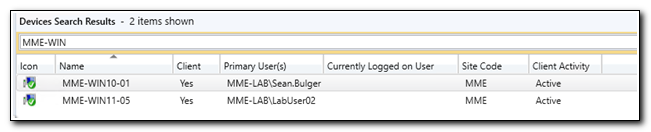
To see what we can query, let’s take a look at the device object in MEMCM. If we look at the properties, we see the Name property matches the name of the device in Microsoft Endpoint Manager.
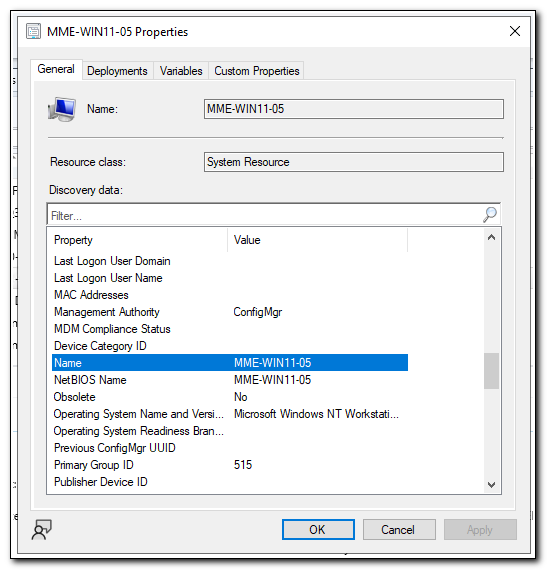
We can use the AdminService to find a device by name. The REST API call that we need to make to find a device by name is GET https://Your-CM-Server.FQDN.com/AdminService/wmi/SMS_R_System?$filter=Name eq ‘[NAME]'. If we pass in the device name as a parameter, we can get the resource ID based on the results of this GET request.
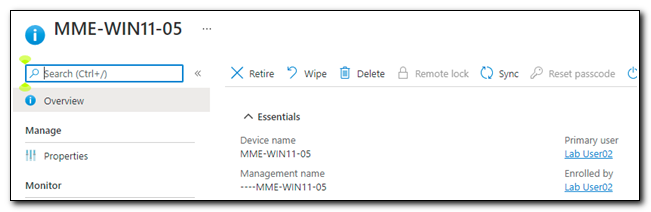
Next, we need to find a way to get the user’s unique user name from Configuration Manager. We can’t query based on a value we don’t know, but since we do know the primary user in Intune, we can search for this user based on their User Principal Name, which is also stored in the Configuration Manager user object.
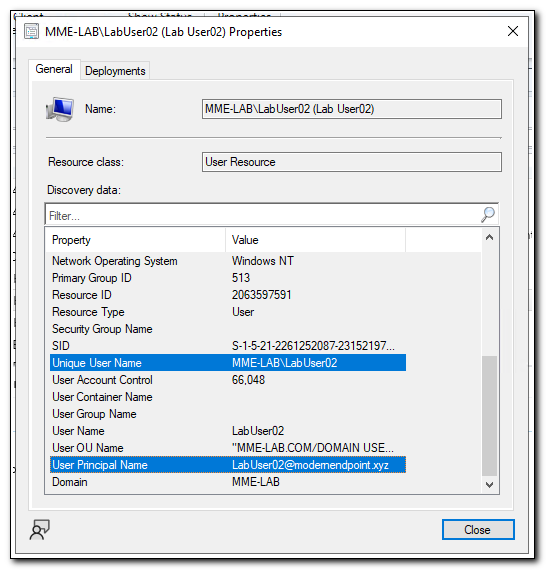
We can query the AdminService to find this user by making a GET request to https://Your-CM-Server.FQDN.com/AdminService/wmi/ SMS_R_User?$filter=UserPrincipalName eq '$($UPN)'.
Once we return both objects, we can use the returned values to build the JSON body we need to pass into the request to set the primary user.
The script
PowerShell runbooks in Azure Automation are just like any other PowerShell script. In this example, we will start the script by defining parameters, declaring variables that will be used throughout the script, and defining functions. We will pass in two parameters – the UPN and the DeviceName. We will set the value of BaseURI to match the base URL of the AdminService, and copy in the function Invoke-AdminServiceCall that I created in my last post.
#Get input parameters and set the base URI to query the Admin Service
[cmdletBinding()]
param(
    [Parameter(Mandatory=$True)]
    [string]$UPN,
    [Parameter(Mandatory=$True)]
    [string]$DeviceName
)

$BaseURI = "https://mme-memcm01.mme-lab.com/AdminService"

#Create function to call the Admin Service
Function Invoke-AdminServiceCall {

    [cmdletBinding()]
    param(
        [Parameter(Mandatory=$True)]
        [string]$URI,
        [Parameter(Mandatory=$True)]
        [string]$Method,
        [Parameter(Mandatory=$False)]
        [string]$Body
    )

    #Create Splat hashtable
    $SplatParams = @{
        Headers     = @{
            "Content-Type"  = "application/json"
                    }
        Method = $Method
        URI = $URI
        UseDefaultCredentials = $True

    }

    #If method requires body, add body to splat
    If($Method -in ('PUT','PATCH','POST')){

        $SplatParams["Body"] = $Body

    }

    Write-Output $SplatParams

    #Return API call result to script
    $AsInvokeResult = Invoke-RestMethod @SplatParams #-UseDefaultCredentials

    #Return status code variable to script
    Return $AsInvokeResult

}
Next, we need to return the device Resource ID. We will build the URI for the GET request based on the BaseURI defined earlier in our script and append the DeviceExtension variable. Once we have defined the required values for the API call, we will call the Invoke-AdminServiceCall function and parse the results to get our Resource ID.
You may notice that in this script there are additional backticks before certain characters in variables. The backtick ` is an escape character in PowerShell. By adding a backtick before the $ and single quotes in the string, it will process those characters as part of the string instead of trying to interpret them as part of the script.
#Set values to return device
$DeviceExtension = "wmi/SMS_R_System?`$filter=Name eq `'$DeviceName`'"
$URI = "$BaseURI/$DeviceExtension"
$Method = "GET"

#Get device from AdminService, set ResourceID from results
$AdminServiceCall =  Invoke-AdminServiceCall -URI $URI -Method $Method -Body $BodyJson
$DeviceResult  = $AdminServiceCall.value
$ResourceID = $DeviceResult.ResourceId
Write-Output $ResourceID
Once we have found the Resource ID, we need to find the unique user name. This looks very similar. Again, we will build the URI from the BaseURI and append the UserExtension, which includes the UPN to filter the results and return the correct user. After calling Invoke-AdminServiceCall, we will parse the results to return the $UniqueUserName.
#Get Specific User
$UserExtension = "wmi/SMS_R_User?`$filter=UserPrincipalName eq `'$($UPN)`'"
$URI = "$BaseURI/$UserExtension"
$Method = "GET"

$AdminServiceCall = Invoke-AdminServiceCall -URI $URI -Method $Method -Body $BodyJson
$UserResult = $AdminServiceCall.value
$UniqueUserName = $UserResult.UniqueUserName
Write-Output $UniqueUserName
Finally, we can make the API call to the AdminService to assign the primary user. The URI will again be built dynamically, but this time we will make a POST request. We will create a hash table with our parameters, including the ResourceID and $UniqueUserName . The $Params hashtable is then converted to JSON and passed in to Invoke-AdminServiceCall as the -Body parameter.
If we want to be able to access the results of a runbook for other tasks, we have to return it to the output stream of the script using the write-output cmdlet. (I know I mentioned that in my last post, but personal experience has taught me that you can’t be reminded of that enough!)
#Assign primary user
$UDARequestExtension = "wmi/SMS_UserMachineRelationship.CreateRelationship"
$URI=  "$BaseURI/$UDARequestExtension"
$Method = "POST"

$Params = @{
    MachineResourceId = $ResourceId
    SourceId = 6
    TypeId = 1
    UserAccountName = "$($UniqueUserName)"
}

$BodyJson = $Params | ConvertTo-Json
Write-Output $BodyJson

$AdminServiceCall = Invoke-AdminServiceCall -URI $URI -Method $Method -Body $BodyJson

Write-Output $AdminServiceCall
Creating the runbook
My last post talked about creating and testing a runbook. That means that this next part may be somewhat redundant, but I wanted to take the time to make sure I covered it accurately.
Open you Azure Automation Account and click on Runbooks. On the Runbooks blade, click “+ Create a runbook.” Assign a name to your runbook, set the runbook type to PowerShell, and set the Runtime version to 5.1. Click Create.

Paste in the entire contents of the script (the full version is available in my GitHub repo). Click save and then click publish. (Ordinarily I would test the script using the test pane, but for the purposes of this post I want to show you how to trigger the script as a job)

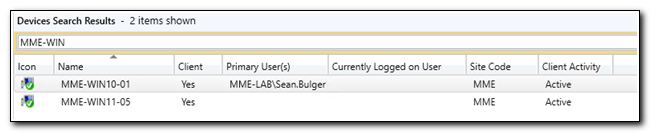
If we look at our test device in Configuration Manager, we can see that there is no primary user currently assigned.
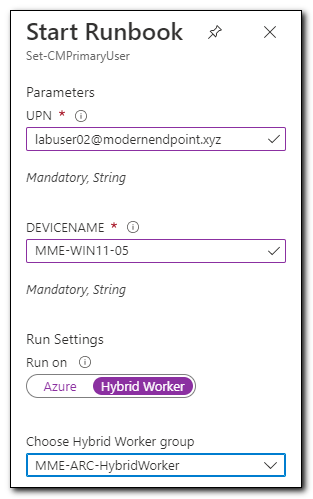
Click “Start” on the ribbon in Azure Automation to run the job. In the Start Runbook pane enter the primary user’s UPN, the Device name, and set Run on to Hybrid Worker. Select your hybrid worker and click Ok.
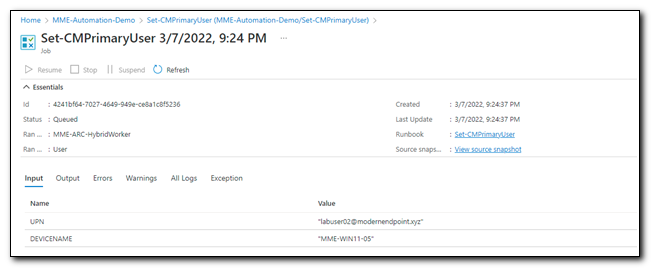
You will be taken to the job page, which shows the name of the Runbook and time and date that it was launched. The status will initially show as queued and based on the current status of a job it will update throughout the process. The Input tab shows any inputs that were made to run the script.
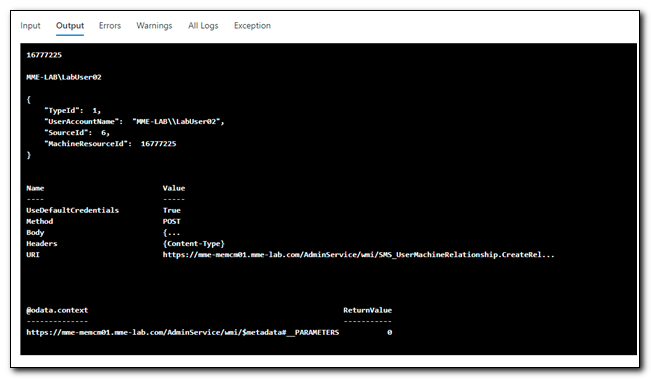
Once the job has completed, the Output tab will show the output of our script. In the script I created above, I wrote the device’s resource ID and unique user name to the output stream. I also included some other information to troubleshooting, and we can see the final output returned by the AdminService.
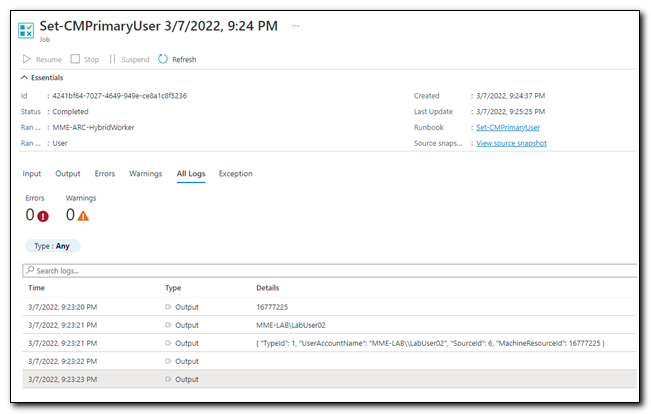
If there had been any errors or warnings while the job was running, we would have seen that information in the Errors and Warnings tabs. The All logs tab shows all of the items that were written to the output by the script in table format. This demonstrates how write-output is used for logging in an Azure Automation runbook.
Finally, if we look in Configuration Manager, we can see that the device’s primary user was successfully updated.
And on to the next!
My original plan for this week was to write a post that covered this script, along with demonstrating how to create a workflow with Power Automate. As I worked on the original post, I quickly realized that by doing that, I would be doing a disservice to how to create a runbook in Azure Automation and the reasons behind creating this script.
There is a lot more content that could be covered with Azure Automation. I am sure I will get to it in future posts, but the last post didn’t spend enough time on how to create and run a runbook. Now my next post can focus entirely on Power Automate. I hope that by taking this approach I can provide enough detail to demonstrate the value in both services.
Thank you for reading, and I hope you will keep following for more great content, including my next post that will explore how to user Power Automate!
Follow the full series below:
- Everything I wanted to know about APIs but was afraid to ask
- Connecting to Microsoft Graph with PowerShell
- Troubleshooting Microsoft Graph App Registration Errors
- Defining a script and finding the Microsoft Graph Calls
- Splatting with Invoke-RestMethod in PowerShell
- Updating Device Management name in PowerShell with Microsoft Graph
- Surprise Post:Adding Filters to application assignments with PowerShell and Microsoft Graph
- Working with Azure Key Vault in PowerShell
- Creating an Azure Automation Account
- Setting up a Hybrid Worker on an Azure Arc Enabled Server
- Connecting an Azure Automation Account to the Configuration Manager AdminService
- Running an Azure Automation runbook to update MEMCM Primary User
- Using Power Automate to update MEMCM Device based on Intune User