
MMS Intune Management PowerApp Demo Part 1: Creating the PowerAutomate flows
Hello and welcome back! Now that MMS is over, I feel like I can finally focus on writing blog posts again! This post is the latest installment in my series on automating endpoint management tasks with Microsoft Graph and the Configuration Manager AdminService. If you attended MMS, you may have joined some of the sessions that covered PowerApps, Microsoft Graph, or the AdminService. If you did, the next few posts make look (and sound) familiar.
Last week, I shared a post that included instructions on how to import a Power App that I used in one of my demos. That app provides a basic GUI interface for an administrator to find a user’s devices, select one, and retire it from Endpoint Manager. It demonstrates the art of the possible for administrators that are interested in exploring PowerApps.
Over the course of the next few posts, I will walk you through how that app was created, including the controls that were added to the Power App and the underlying Power Automate flows. The goal of these posts is to share a basic how-to for creating your own apps built on the Power Platform. It will also lay the groundwork for future posts in this series.
I’ve got the power!
If you aren’t familiar with the Power Platform, it consists of four services that work together to combine multiple technologies into a single platform to help streamline modernization tasks:
- Power BI is used to help visualize business intelligence data for building reports and dashboards.
- Power Automate is a low-code tool that lets users from across your organization create automation workflows that can connect various systems in your environment.
- Power Apps can be used to create custom applications to streamline business processes. It’s low-code format allows less technical users to create tools that are custom-built for your environment.
- Power Virtual Agents can be used to create intelligent chatbots that are built on your business processes.
All these tools are powerful (as their names suggest), and each of them have their place in process automation. With that being said, I have no plans to cover Power BI in the future, and while I hope to eventually cover Power Virtual Agents, that won’t likely happen as part of this series.
However, that leaves both Power Apps and Power Automate. Both tools will be covered in depth over the next few blog posts. I have covered Power Automate in a previous post, and will continue to cover it throughout this series. I have several posts focused on Power Apps planned, and those posts will be accompanied by tools that will be shared with the community. Whenever I build a tool to share, I will also include blog posts that explore the tool in detail so that you can see how it was built and customize it for your environment.
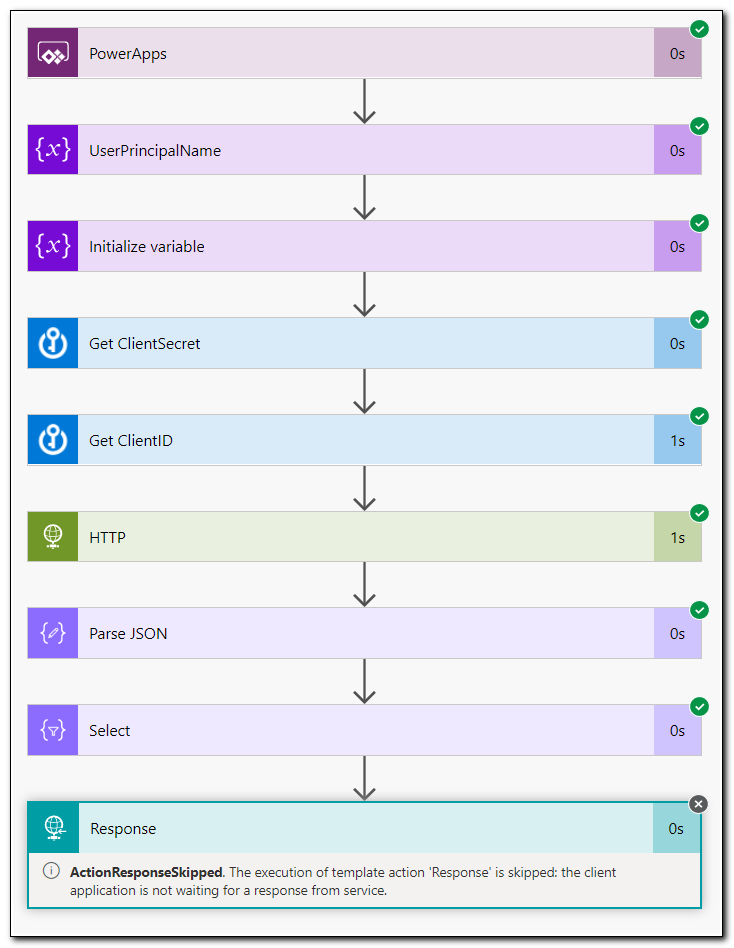
Perhaps the greatest value in Power Platform is the ability to use connectors to connect to outside services. This will allow us to expand our low codes tools to other services in Azure, other cloud services, and even to on-premise resources. I will do my best to cover as many different tools as practical, but the possibilities are endless. Today we are going to explore the underlying Power Automate workflows that are being used in the demo Power App. This app is relatively simple. It uses two connectors (O365 Users and Azure Key Vault) and two Power Automate workflows. The app searches for a user from Office 365, returns their devices, and then lets an administrator select one from a gallery object and retire it from Intune.
Cool, so what do we do next?
There’s a chicken-or-egg question when building Power Apps based on Power Automate workflows. Should I create the workflow first or the app first? I have done both. Typically, I prefer to create the base flow, and then update it based on what I learn from building the app. You will likely have to make some changes to the flow, but the Power App is more dependent on settings in the flow than the flow is dependent on the App. For the sake of this example, we are going to start by creating our Power Automate flows first.
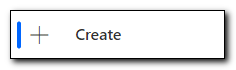
Sign in to Power Automate and click + Create.
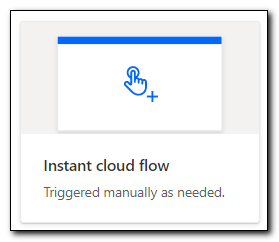
Select Instant Cloud Flow from the “Start from blank” section of the page.
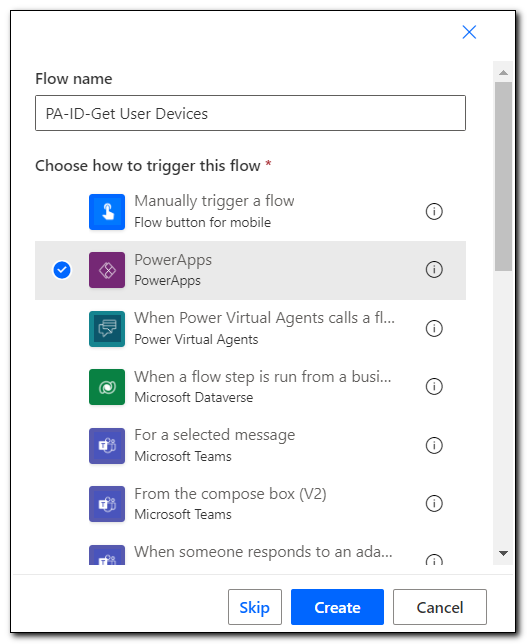
Name your flow, select PowerApps, and click create. This will create a new flow with a Power App trigger.
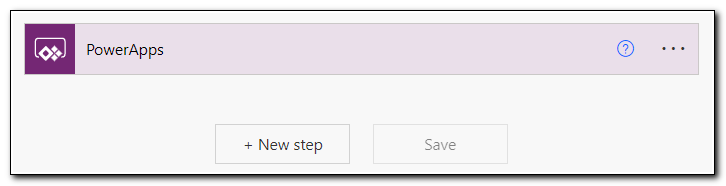
The app will initially be created with a single step, a PowerApps trigger. This trigger tells the app that it will be launched by an app created in Power Apps. Click New Step to create a new step.
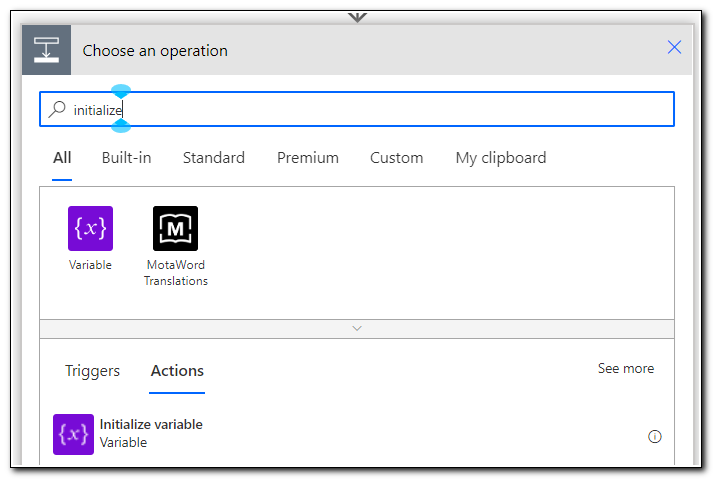
The “Choose an operation” dialogue will open. In this flow, we are going to start our flow by initializing two variables – UserPrincipalName and HTTPFilter. Our demo flow will specifically target non-Windows devices. We will use a filter to accomplish that.
Search for “initialize” in the operation search box. Click on “initialize variable.”
An initialize variable step will be added to the flow. Click on the ellipses … in the upper right corner and select rename. I renamed my step to “Init UserPrincipalName.” This will make it easier to find later. Set the name value to UserPrincipalName. The type should be set to String. Click on the value field and select “Ask in PowerApps” from the dynamic content list.
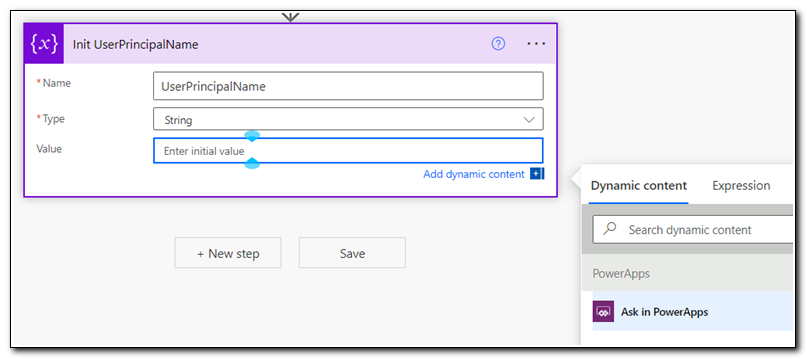
This will set the value field to reflect InitUserPrincipalName_Value from the PowerApps step.

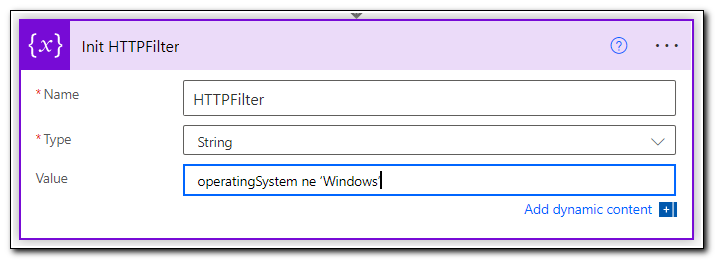
Click New Step and add another initialize variable step. Rename the step “Init HTTPFilter.” Set the name value to HTTPFilter, the type to String, and the value to operatingSystem ne ‘Windows’. This step will limit the search results to Android and iOS devices. This isn’t a hard requirement but will help to limit the scope of the demo application.
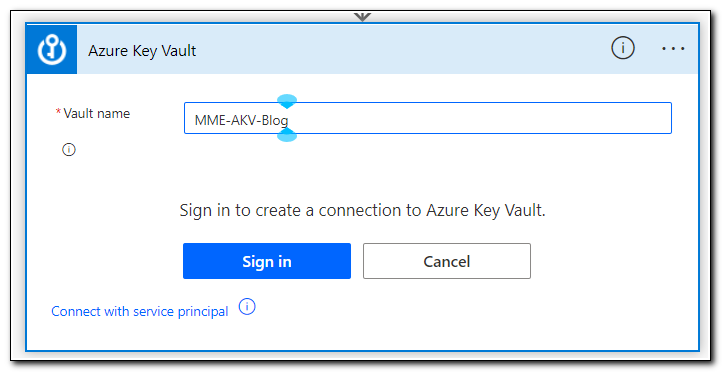
This app relies on secrets being stored in Azure Key Vault. We will use an Azure Key Vault connector to get the ClientID of an Azure application registration and an associated ClientSecret. I covered the specific secrets required in my last blog post. Once you have created a Key Vault and added the required secrets, click new step to add a new step. Search for Azure Key Vault and select “Get secret.”

Enter your vault name and click “Sign in.” When prompted, sign in to create the connector.
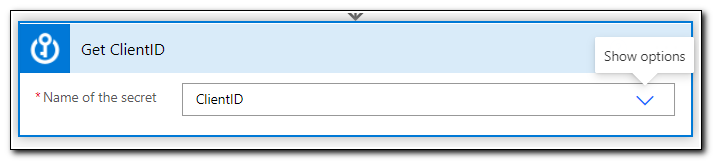
Rename the step to “Get ClientID” and select your Client ID secret from the list of secrets that are available.
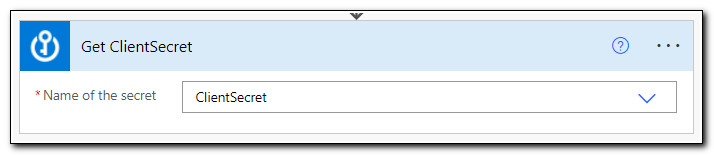
Add a second get secret step, rename it to “Get ClientSecret.” Select your client secret from the list of available secrets.
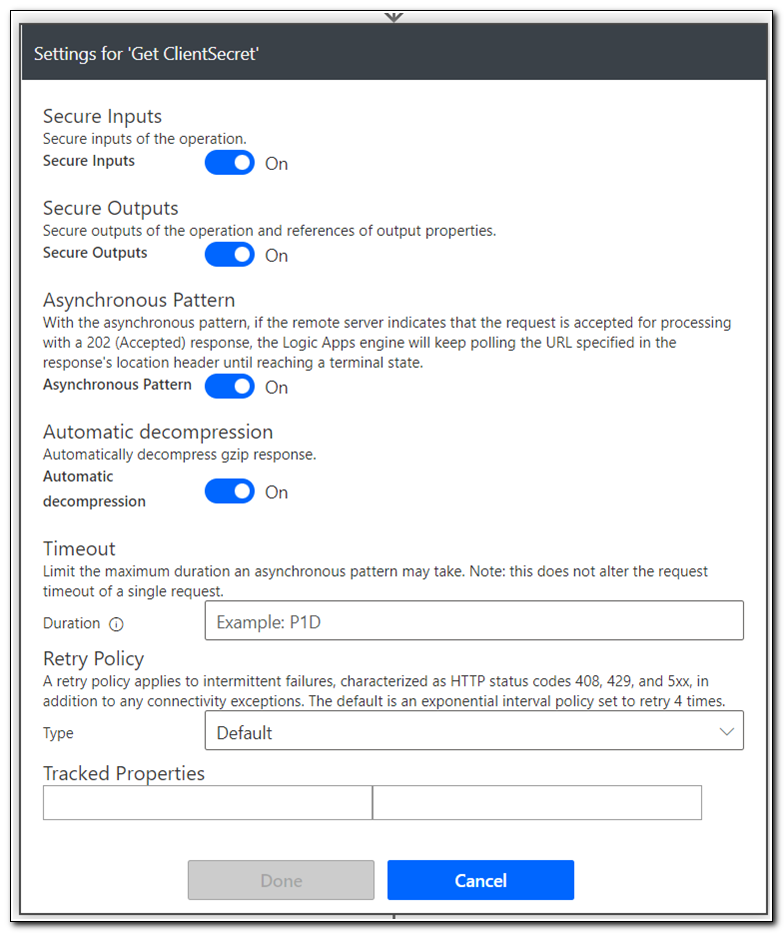
When we are working with secrets in Power Automate, we want to make sure that they are protected. We can limit the visibility of the secrets in the flow output by clicking on the ellipses and selecting “Settings.” On the settings screen, set “Secure Inputs” and “Secure Outputs” to on.
Next, we will add an HTTP step. Add a new step and select, “HTTP”.

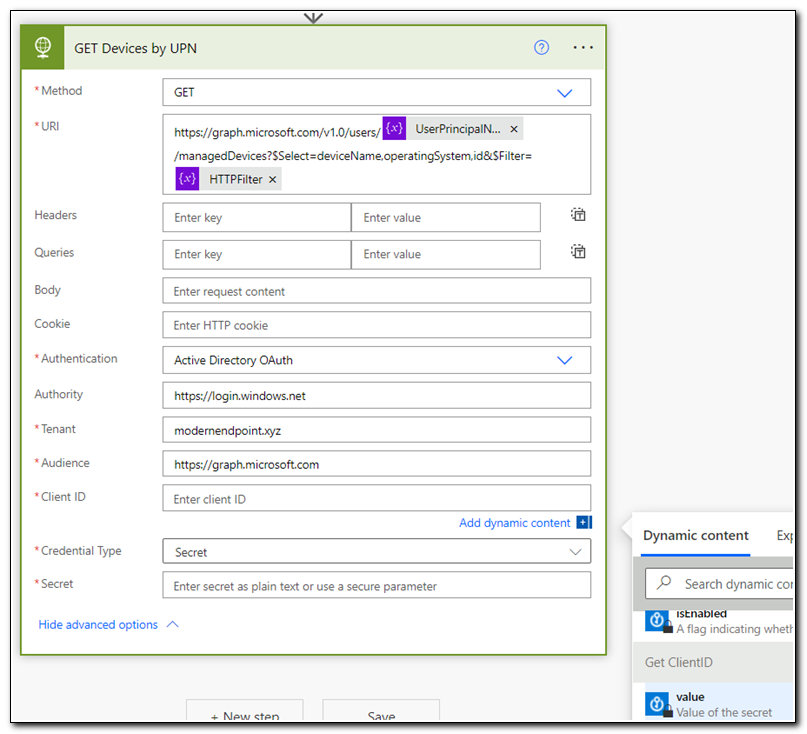
Rename the step to “GET Devices by UPN.” Set the Method to GET, and the URI to https://graph.microsoft.com/v1.0/users/[USERPRINCIPALNAME]/managedDevices?$Select=deviceName,operatingSystem,id&$Filter=[HTTPFilter]. Replace [UserPrincipalName] and [HTTPFilter] with the variables we set by selecting them from the Dynamic Content selection box.
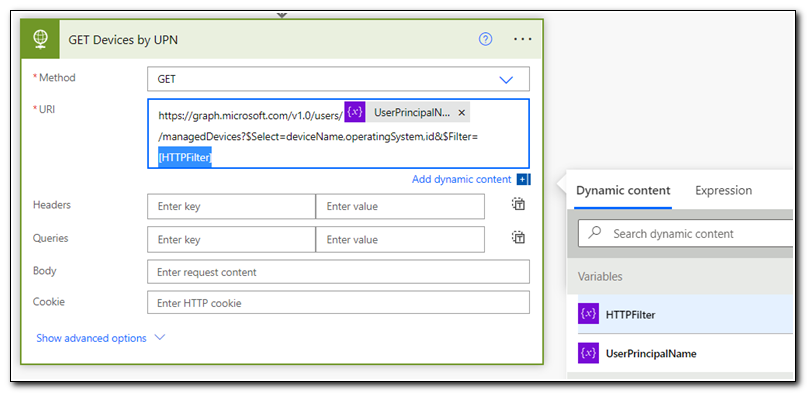
Click on “Show Advanced Options.” Set Authentication to Active Directory OAuth. Set the authority to https://login.windows.net, the tenant to your tenant ID or primary domain, and the audience to https://graph.microsoft.com. For the Client ID select the value from Get ClientID under dynamic content. Repeat this for the client secret value.
The HTTP step is the heart of this flow. We are making an HTTP request to Microsoft Graph to return a user’s managed devices. Once we make the request, we need to process the results and return the results to our flow. The next step will be to parse the JSON object that was returned. To do that, we need a sample of the JSON response from the HTTP request. To get that sample we will test our workflow.
Click “Test” on the ribbon.
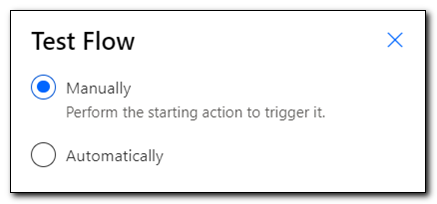
When prompted, select “manually” to test the flow manually and click the test button at the bottom of the screen.
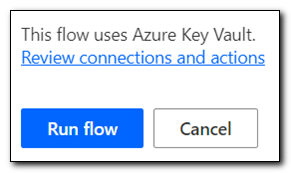
If prompted, confirm the Azure Key Vault connection is working and then click continue.
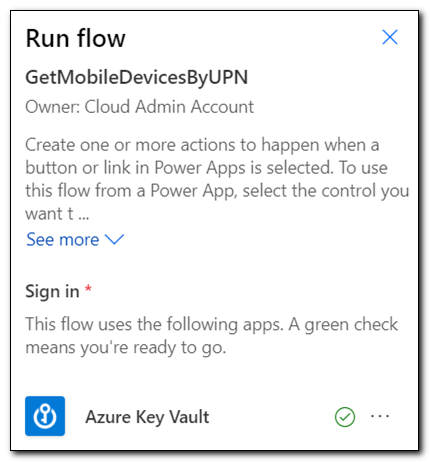
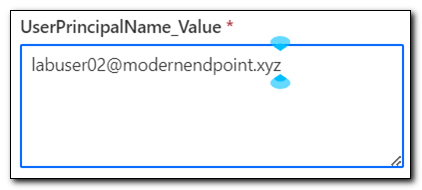
Enter the User Principal Name of a user whose devices you want to return and then click Run flow at the bottom of the screen.
Once the flow run has been completed, we can open the HTTP step. We should see a status code of 200, which tells us the request was successful and content was returned.

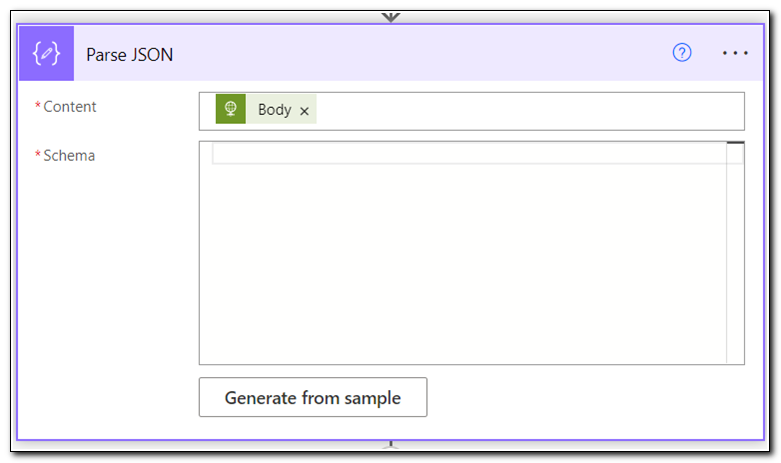
Copy the entire contents of the output body and click “Edit” to edit the flow. Add a new Parse JSON step. Set the content field to use the Body of the HTTP request, and then click “Generate from Sample.”
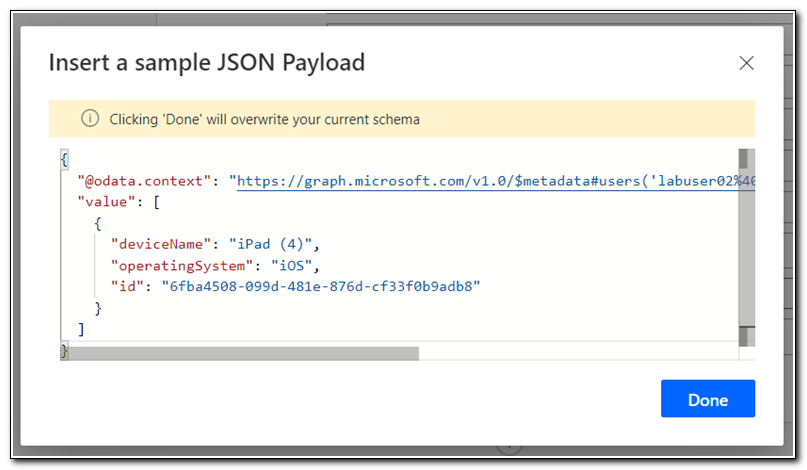
Paste the output body from the HTTP request in the sample JSON dialogue and click done. (Note: In this instance, we can select a single object from the value in the JSON payload to use later in our flow. Copy the value, including the square brackets, to use later.)
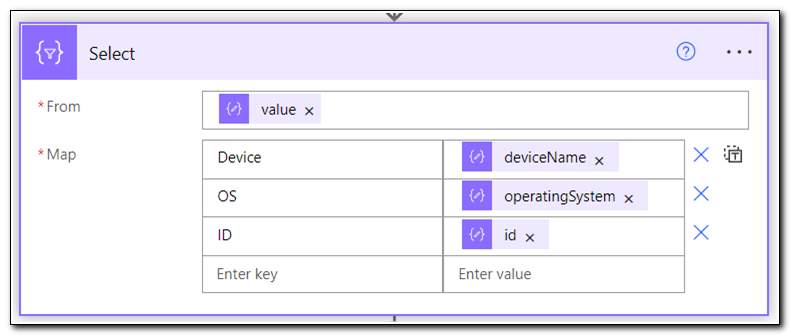
Add a new step, search for select, and select the Data Operation select step.

The select step will create a new JSON object based on the output from the Parse JSON step. Set “From” to use the resulting value from the Parse JSON step. Add three fields under “Map”. Each value will be based on the corresponding result from the Parse JSON step. Set Device to deviceName, OS to operatingSystem, and ID to id.
We are using the Select operation because it will handle a JSON array. By using the value field from the Parse JSON step, we are telling it to parse each individual value in the array returned from the JSON output.
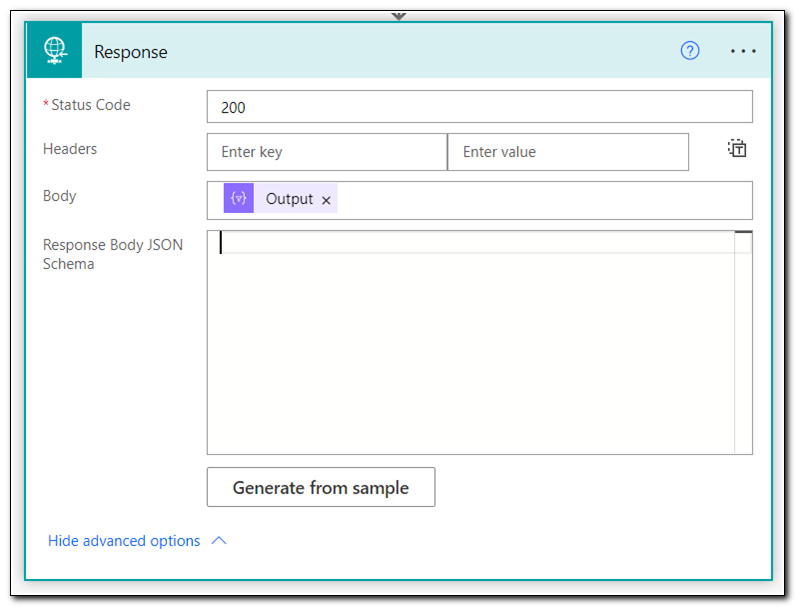
Add a new step, search for response, and select the Request Response step.

If we were returning a single object to our PowerApp we could use the “Respond to PowerApps” step, unfortunately that option doesn’t support arrays. If we need to return multiple objects, we can do that with the Response step. The select step we used above will create a JSON array that we can pass into our response. If the flow ran successfully and it contains a response, we will want to send a status code of 200, which tells the app that the response was successful and contains content.
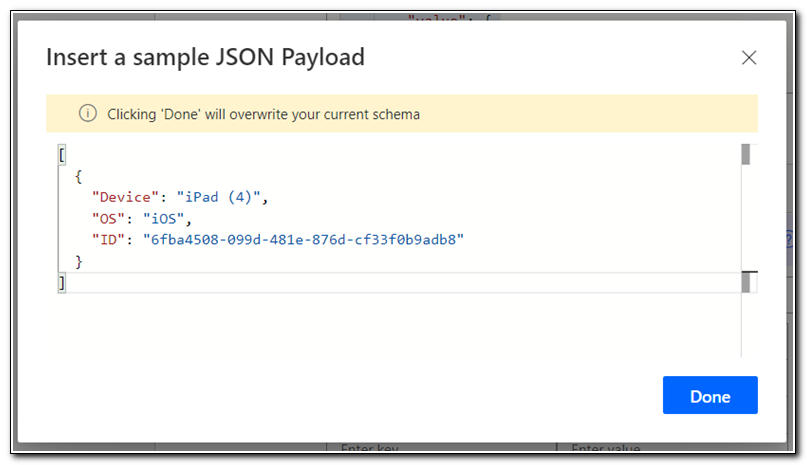
Set the Body to the Output of the select step above. We need to include a JSON schema in the response step. In this case, the schema matches the value from the Parse JSON step above. If you copied that value you can use it again here, otherwise test your flow and copy the output value from our select step above. Click Generate from Sample when you are ready.
Paste the sample JSON payload into the editor and click done.
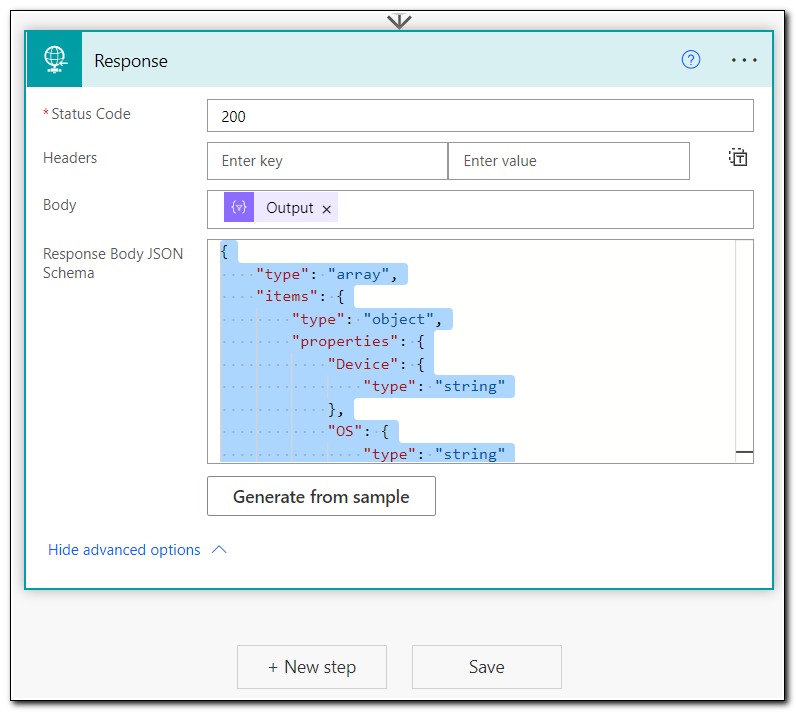
After saving the sample payload the flow is complete. Click Save to save the flow.
You can also test the complete flow at this point. If you test a workflow that ends with any sort of “response” step the final step will be skipped. Since the flow is being run manually, there is not place to send the response.
But wait, there’s more!
Our Power App has three key steps – user lookup, device lookup, and performing the retire action. User lookup will be handled with a connector in the PowerApp. The flow we just built handles device lookup, but we still need to handle the retire action. We will trigger the action using a second Power Automate flow.
Triggering a device action may seem like a more complex task, but it only requires a single Microsoft Graph POST request. A successful POST request to perform a device action returns a status code of 204, which means no content is returned. Since no content is returned, we don’t need to parse the response and the only response we need to return to the app is the status code.
This leaves us with a much shorter flow.

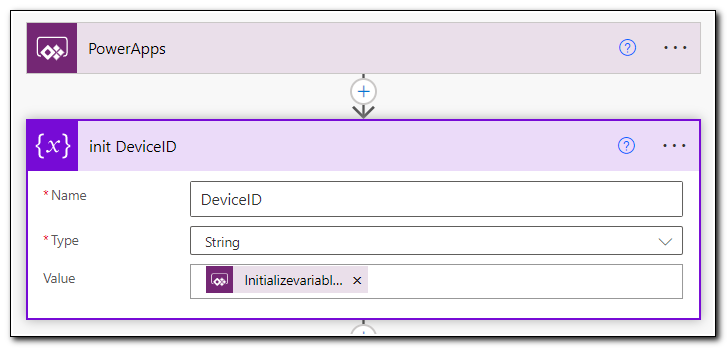
Create a new flow with a PowerApps trigger. Add an initialize variable step. Rename the step. Set the name to DeviceID, type to String, and set the value to “Ask in PowerApps.”
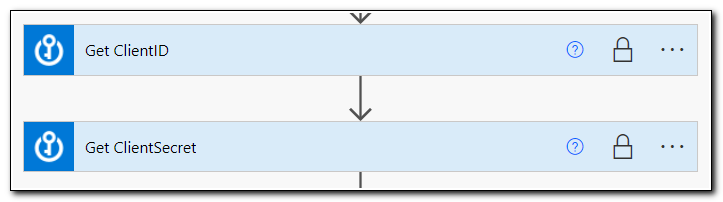
Next, add in steps to get your ClientID and ClientSecret from Azure Key Vault. These will be identical to the steps used in the flow above. (Note: In a production environment, we could optimize this so we don’t have to keep making calls to Azure Key Vault – but in the interest of keeping the demo environment simple, we aren’t doing that here.)
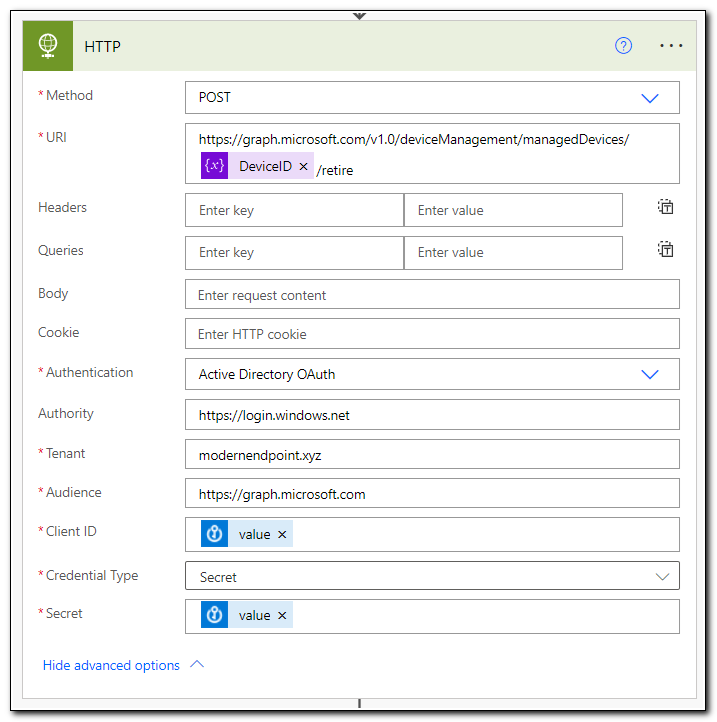
We now have all of the information we need to make our POST request to Microsoft Graph. Create a new HTTP request. Set the method to POST and the URI to https://graph.microsoft.com/v1.0/deviceManagement/managedDevices/[DeviceID]/retire. (Make sure to replace [DeviceID] with the DeviceID variable we created above. Click show advanced options and configure the authentication settings to match our previous flow.
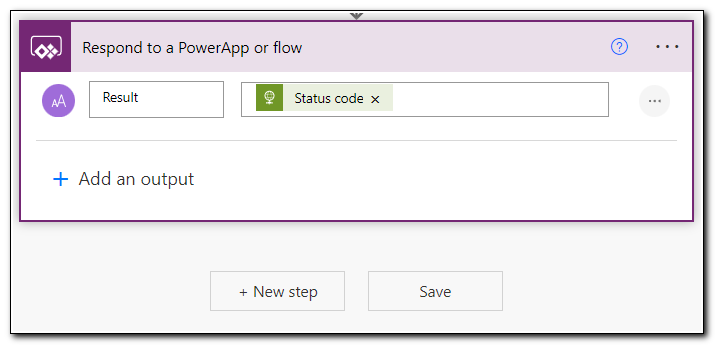
Finally, in our app we want to give the user a notification that lets them know if the flow ran successfully or not. Since we are only returning a single object (the status code) we can use the built in PowerApp response. Create a new step and search for “Respond,” select “Respond to a PowerApp or flow.”
Set the name of the value to “Result,” and set the value to the Status code returned from the HTTP step. Save your flow.
That’s all for now!
In today’s post we created the Power Automate workflows that are used in the demo app that we created at MMS. Next, I will explore the Power App itself. There are a lot of different elements that go into building the app, and I want to take the time to explain them in detail. The demo app is relatively simple, but there are a lot of lessons that can be learned from it.
We will explore how the demo app was built over the next two posts. Keep watching for those posts soon!
Thank you for reading! I have a lot of fresh content to post soon from MMS. Keep following for more great posts on automating workloads, including some fun PowerApps that I shared with the community!
Follow the full series below:
- Everything I wanted to know about APIs but was afraid to ask
- Connecting to Microsoft Graph with PowerShell
- Troubleshooting Microsoft Graph App Registration Errors
- Defining a script and finding the Microsoft Graph Calls
- Splatting with Invoke-RestMethod in PowerShell
- Updating Device Management name in PowerShell with Microsoft Graph
- Surprise Post:Adding Filters to application assignments with PowerShell and Microsoft Graph
- Working with Azure Key Vault in PowerShell
- Creating an Azure Automation Account
- Setting up a Hybrid Worker on an Azure Arc Enabled Server
- Connecting an Azure Automation Account to the Configuration Manager AdminService
- Running an Azure Automation runbook to update MEMCM Primary User
- Using Power Automate to update MEMCM Device based on Intune User
- Comparing Invoke RestMethod to the PowerShell SDK
- MMS Intune Management PowerApp Demo Part 1: Creating the PowerAutomate flows
- MMS Intune Management PowerApp Demo Part 2: Creating the PowerApp user lookup controls