
Connecting to Microsoft Graph with PowerShell
Greetings and welcome back! This post is the second post in my series on Automating Endpoint Manager tasks using Graph API and the AdminService. My goal with this series is to provide a roadmap for Endpoint Management professionals to begin working with APIs, especially in script building and toolmaking. Most of the resources around the various APIs are focused on developers. I want to provide a resource that works for endpoint managers. In my first post, I covered the basics – understanding API basics and how to form a simple API call. In this post I am going to build on that knowledge by showing you how to connect to Graph API using PowerShell. In future posts I will continue to build on these concepts to provide a guide on building tools that leverage these APIs.
 |
Connecting to Microsoft Graph with PowerShell
In my last post, I explored the basics of working with REST APIs. It was the start of a series on how we, as endpoint managers, can use Microsoft Graph and the AdminService. This post will provide another building block on how we can utilize these tools in our environments. We use a lot of different tools to automate tasks, but perhaps the most important tool for many of us is PowerShell. PowerShell is incredibly powerful, and we can leverage it to connect to the APIs. In this post, I will discuss how to connect to Microsoft Graph using PowerShell.
Connecting to Graph requires two parts – authentication and authorization. Authentication is proving you are who you say you are, while authorization is granting permissions to do something. When you authenticate to Microsoft Graph the service returns an authorization token. When you make calls to Microsoft Graph you provide the authorization token in the form of a bearer token in the Authorization header.
When we connect to Graph through PowerShell, we are actually connecting to an application we have registered in Azure Active Directory. To do this, we need to create an App Registration. An App Registration is essentially the underlying definition of an application. It includes the application information including API permissions, secrets, and redirect URIs that the application is built on. The application become a service principal that we connect to. We connect with the information stored in the App Registration.
In many cases you can connect to an existing well-known application. I prefer to create an application that I control. This allows me to customize the permissions on a per-app basis. A common mistake many people make when working with App Registrations is to over-provision their permissions. By creating app registrations that only have the permissions needed to perform a specific task, we limit the risk of over-provisioning and can practice the principle of least privilege.
Creating the App Registration
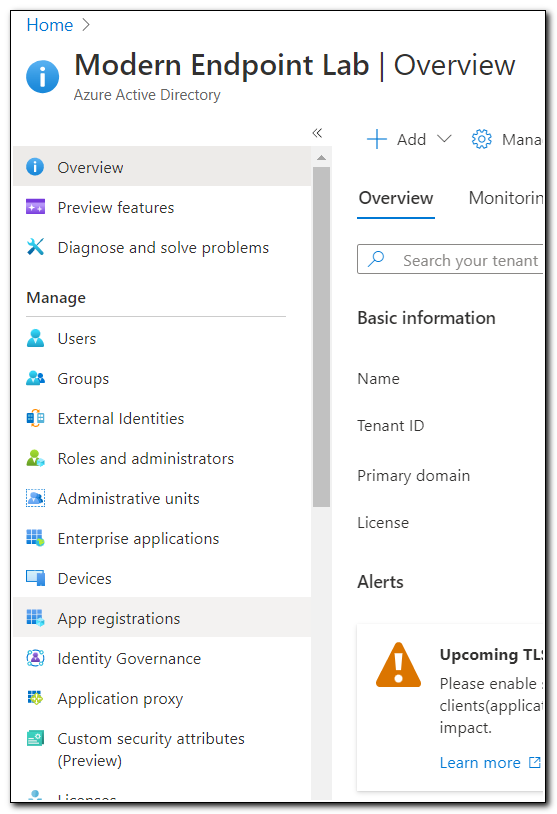
Open Azure Active Directory. Click on “App Registrations” in the menu.
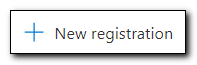
To create a new app registration, click on + New registration.
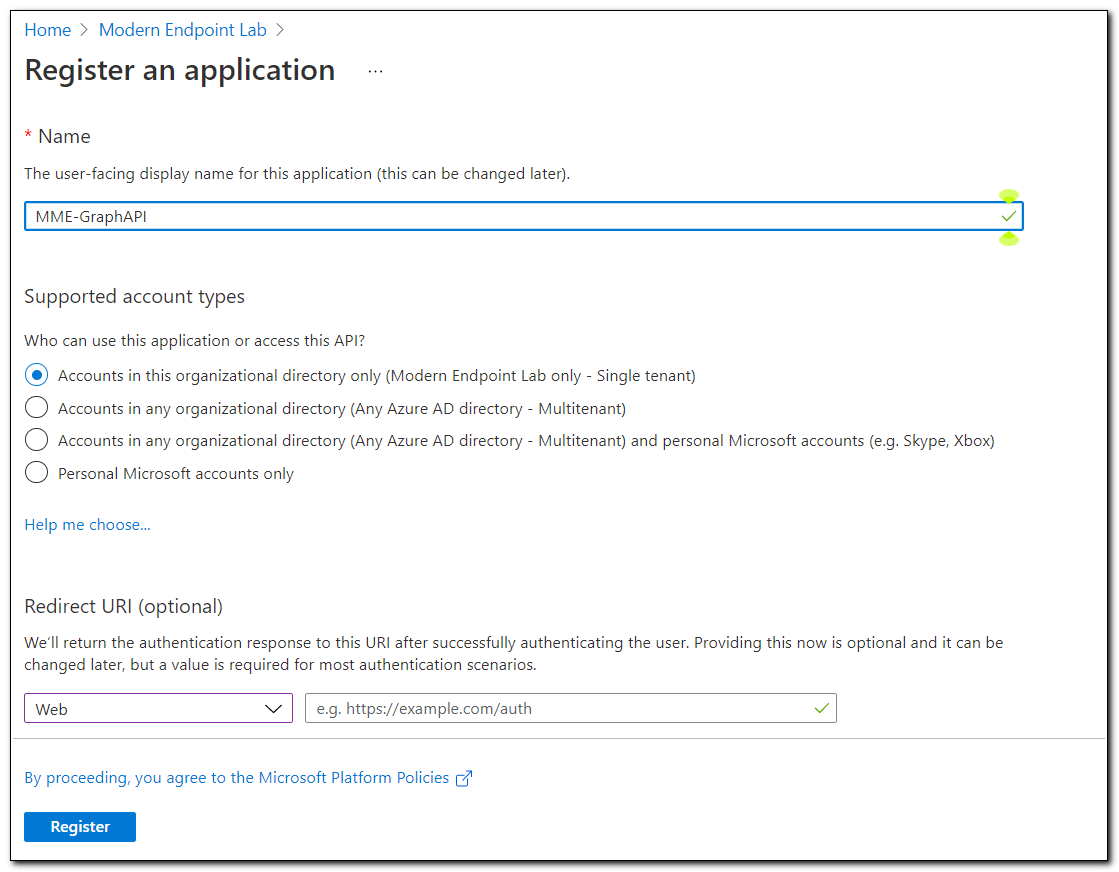
Give your application a name. Leave the defaults on Supported Account Types and Redirect URI. Click Register to create the application.
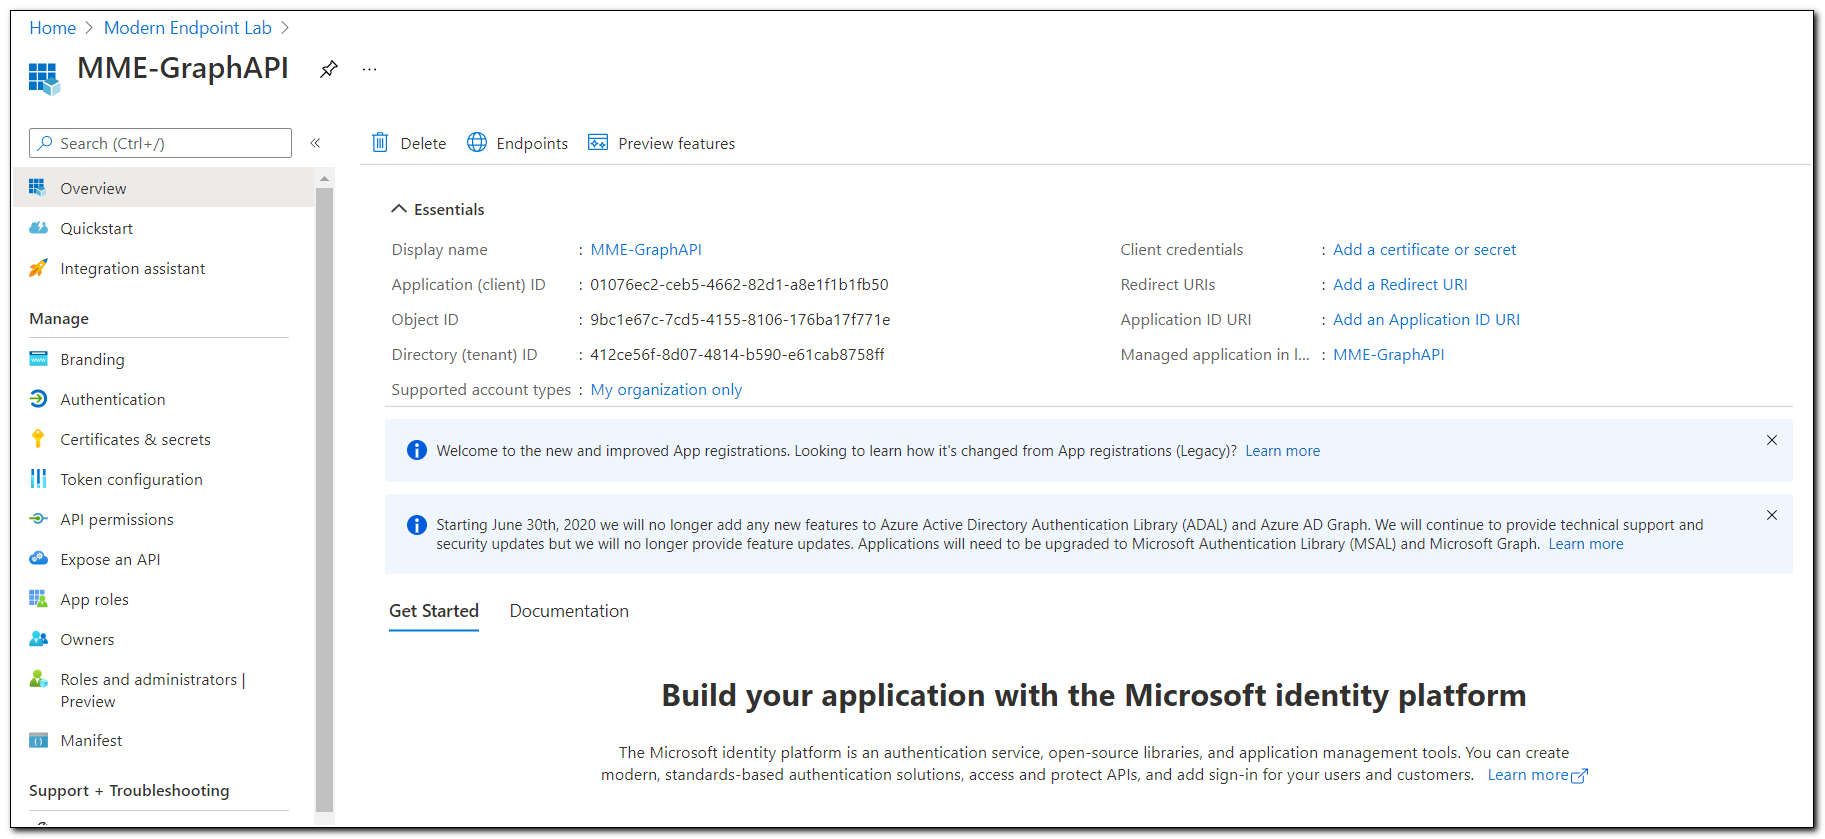
After registering the application, you will be redirected to the application registration’s overview page. This page includes an overview of the basic information, including the Client ID, Tenant ID, and a link to the application in Enterprise applications. Once the application has been created, we will need to configure the application for signing in as a public application. Click on the “Authentication” option on the menu.
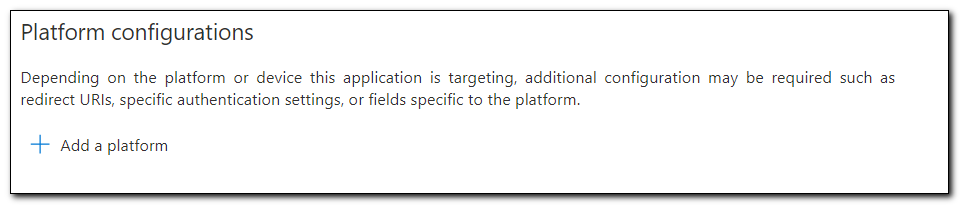
Click on “Add a platform” under platform configurations.
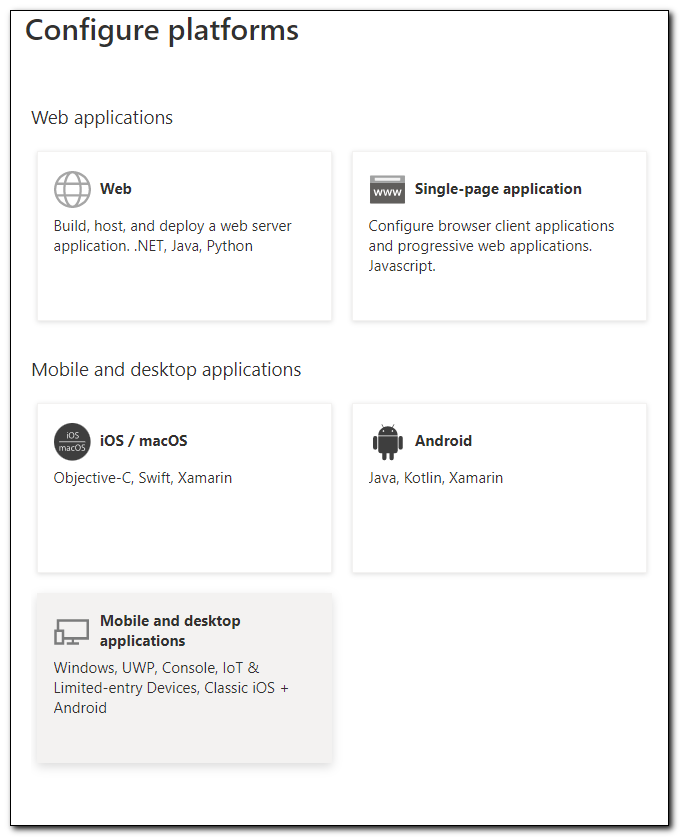
Select “Mobile and desktop applications” from the menu.
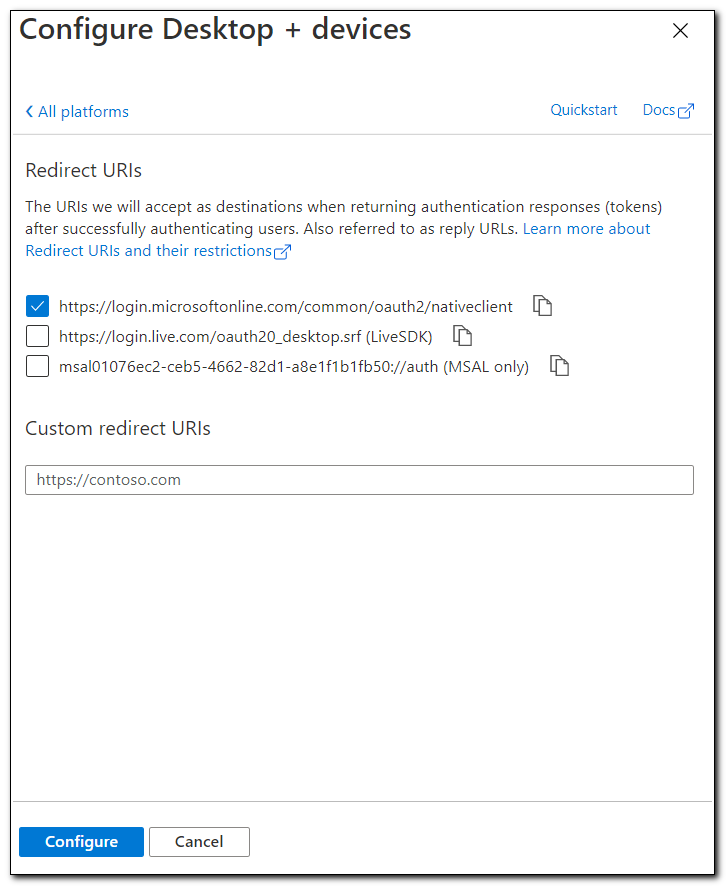
Click on the checkbox for https://login.microsoftonline.com/common/oauth2/nativeclient. Click Configure.
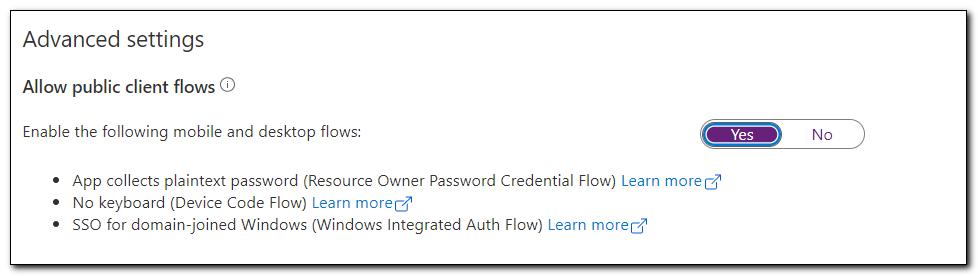
Scroll down to the bottom of the page and set “Allow public client flows” to yes. Click save at the top of the page.
The application registration has now been configured to allow us to connect to the application. The next step is to grant permissions to Microsoft Graph.
By default, our application has access to read user objects in Microsoft Graph. We want to add additional permissions for managing users, devices, and the Intune service. Click Add a permission.
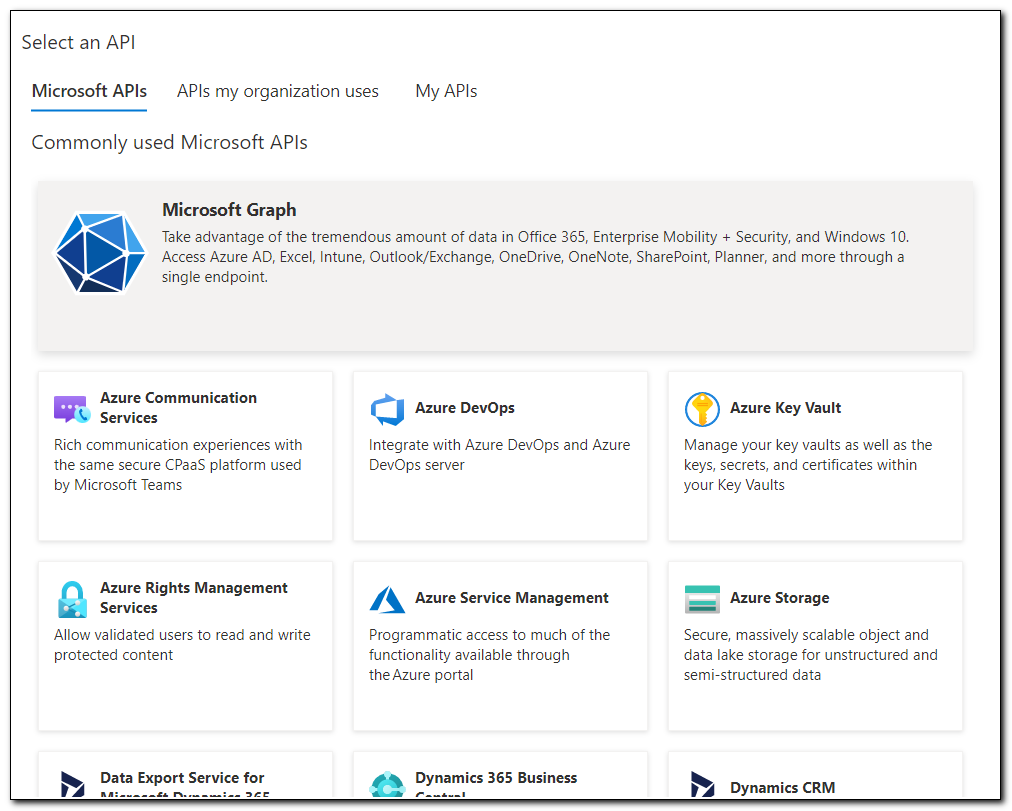
We can give applications access to several different APIs that are available in Azure. In this case, we only want to give access to Microsoft Graph. Click on Microsoft Graph at the top of the screen.
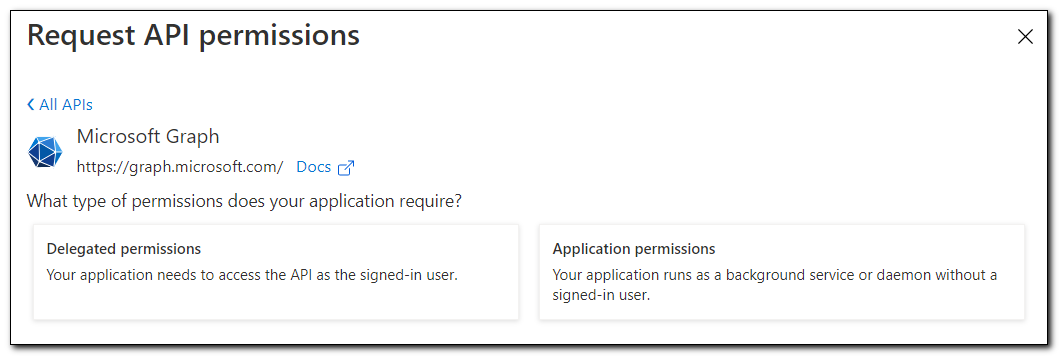
You will be asked to grant Delegated or Application permissions. Delegated permissions are used to have the application act on behalf of a signed in user. Application permissions allow the application to act as back-end service. For most endpoint management workloads, we will want to act as a service. Click on Application Permissions.
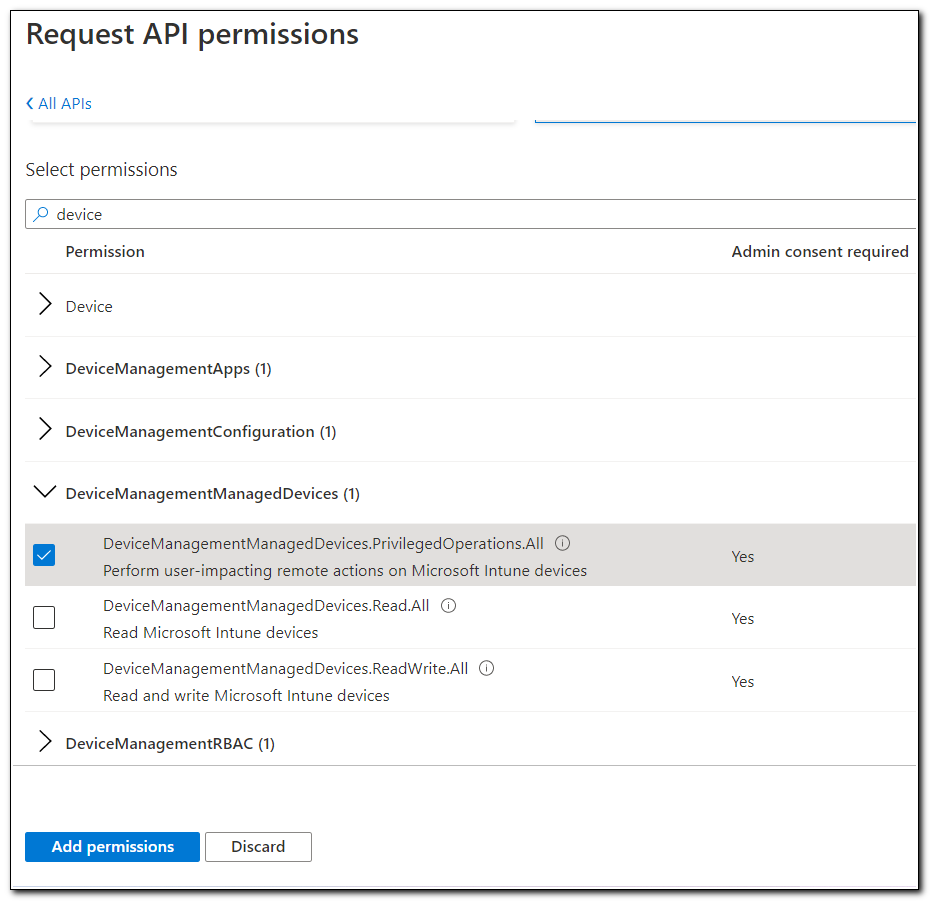
Clicking on Application permissions shows us the various API permissions that are available in Microsoft Graph. (Spoiler alert: there are a lot!). We want to create an application for managing typical endpoint management workloads, including managing users and group memberships. We will give the following permissions:
DeviceManagementApps.ReadWrite.All
DeviceManagementConfiguration.ReadWrite.All
DeviceManagementManagedDevices.PrivilegedOperations.All
DeviceManagementManagedDevices.ReadWrite.All
DeviceManagementRBAC.ReadWrite.All
DeviceManagementServiceConfig.ReadWrite.All
Directory.Read.All
Group.ReadWrite.All
User.ReadWrite.All
You can use the search box to search for the various permissions and check the box to grant the permissions to the API. Click Add Permissions to add the API permissions to the application.
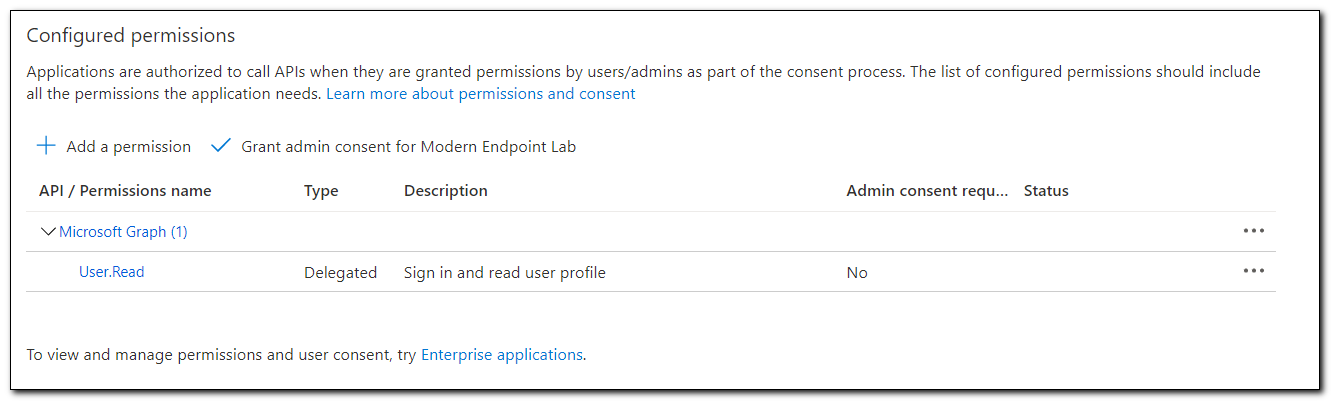
Each of the permissions that we just added needs to be consented to. It will appear on the configured permissions list with the status “Not granted for…”
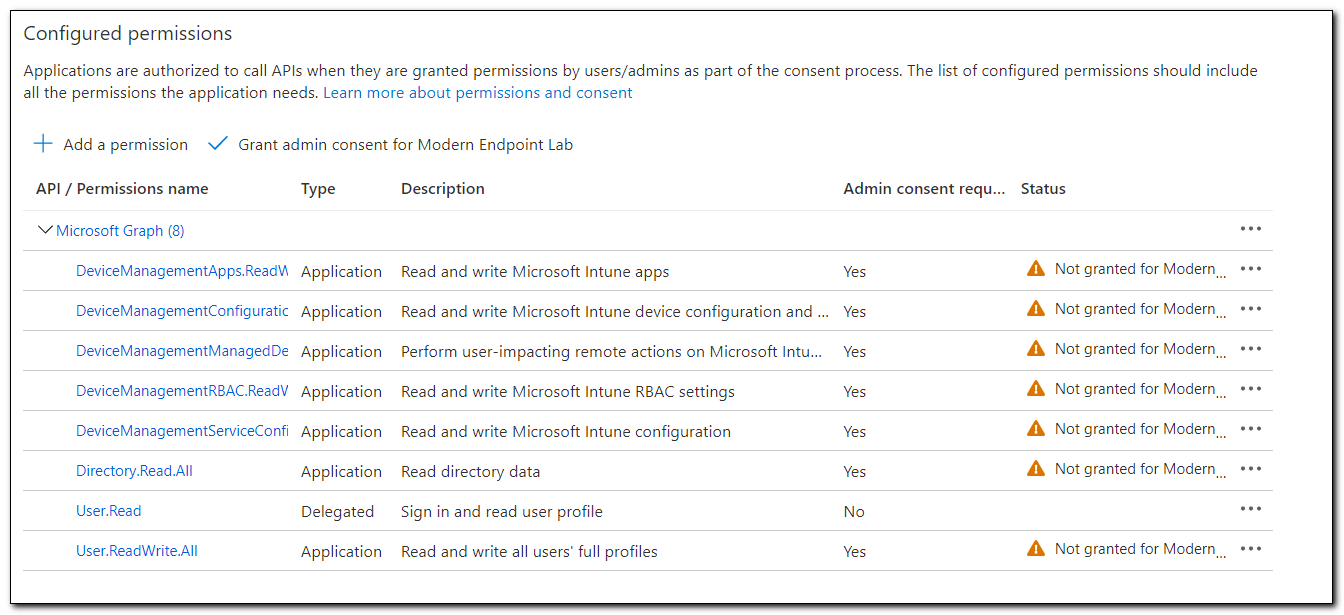
Click “Grant admin consent for…” to grant consent to the application. When prompted, click Yes to grant admin consent

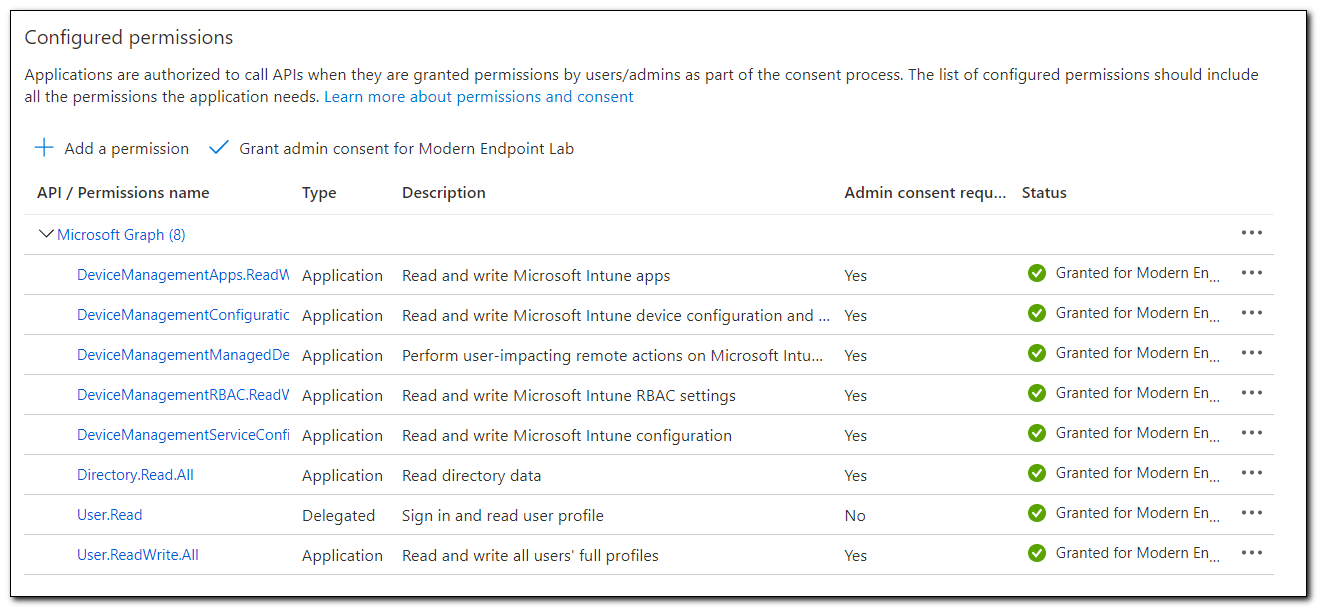
The permissions now show that consent has been granted for our tenant.
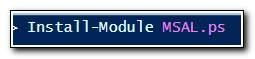
At this point the application is configured to allow interactive authentication. Interactive authentication is a great solution for scripts that we will be running manually. To authenticate to Microsoft Graph we will connect using the Microsoft Authentication Library (MSAL). Using the MSAL module is the easiest way to authenticate to Microsoft Graph in different contexts. Install the module by entering Install-Module MSAL.ps in an administrative PowerShell Window.
Once the module is installed, we are going to request an authorization token using the Get-MsalToken cmdlet. We will pass in our Tenant ID and the Client ID of the application. This will connect to the application, collect the registration information (including the API permissions) and build the Authentication Token. The Interactive switch is used to prompt for user authentication. The Client ID can be found on the Overview page of our Application Registration. The Tenant ID can be the tenant ID, Primary domain, or a verified domain name.
$authParams = @{
ClientId = '01076ec2-ceb5-4662-82d1-a8e1f1b1fb50'
TenantId = 'modernendpoint.xyz'
Interactive = $true
}
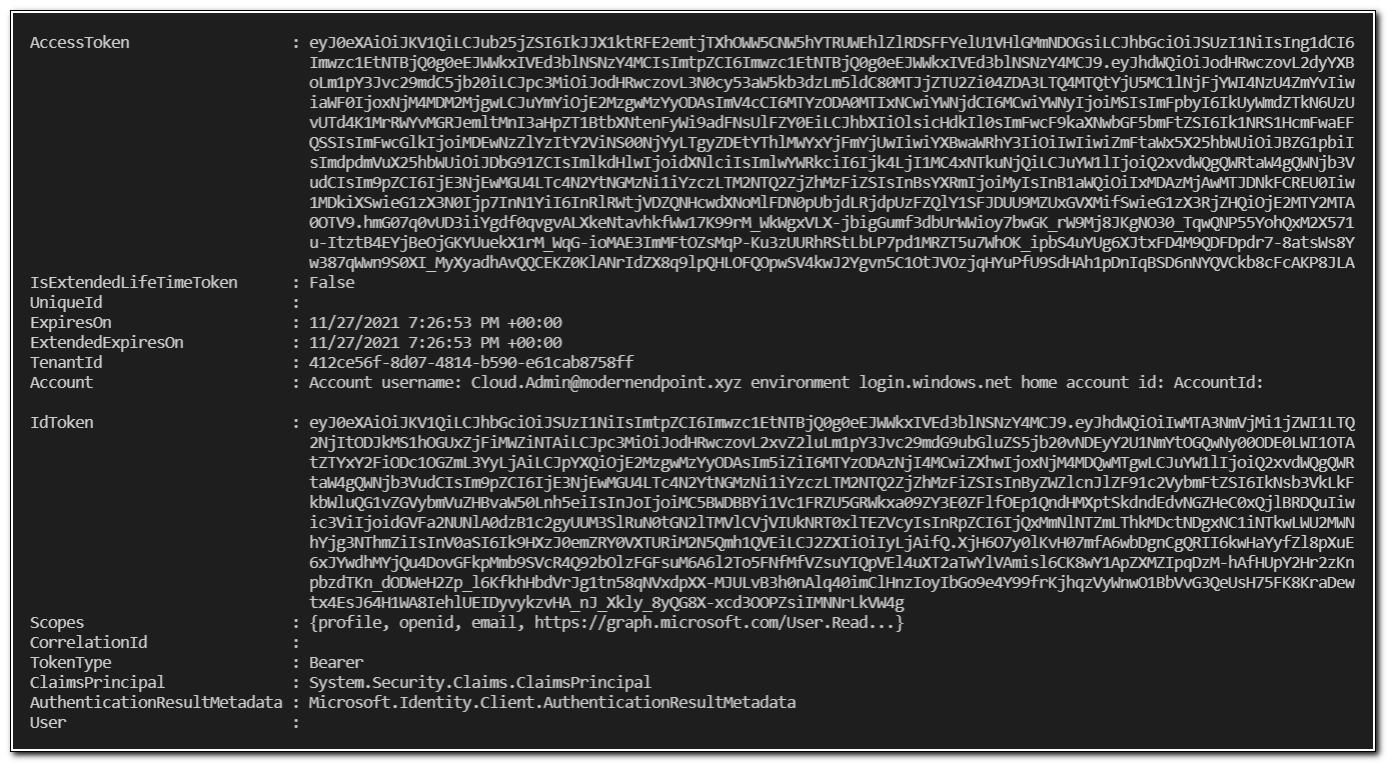
$auth = Get-MsalToken @authParams
$auth
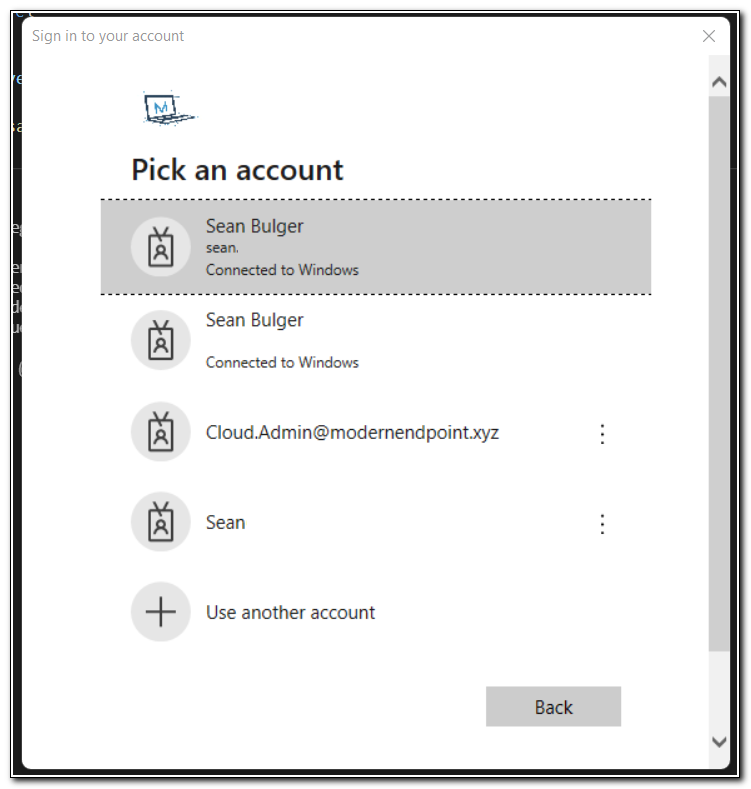
When prompted, enter your credentials to sign in.
After authenticating, you will receive a response. The $Auth in the code snippet above will return the token. The AccessToken is the value that we will need to pass into our API calls to interact with the Microsoft Graph.
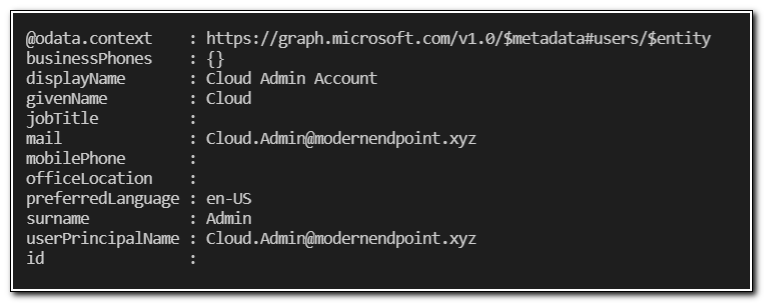
We can test our connection to GraphAPI by making an API call to return our user object. We will use the same API call from the first post in this series – GET https://graph.microsoft.com/v1.0/me.
$AccessToken = $Auth.AccessToken

#graph
$graphGetParams = @{
    Headers     = @{
        "Content-Type"  = "application/json"
        "Authorization" = "Bearer $($AccessToken)"
    }
    Method      = "GET"
    ErrorAction = "SilentlyContinue"
    URI = "https://graph.microsoft.com/v1.0/me"
}

Invoke-RestMethod @graphGetParams
This API call will return the user object that we originally authenticated with.
This works great for interactive authentication, but what if we want to run a script as part of an automation workflow or on a schedule? We wouldn’t be able to authenticate interactively. We could always hard code a username and password, but that’s not a good idea (for obvious reasons). The other (better) option is to create a client secret in our application registration and pass it in from a secure password vault. In a future blog post I will cover how to store credentials and client secrets in Azure Key Vault, but in this post, I want to cover how to create and use a client secret to authenticate to Microsoft Graph.
In the App Registration, click on Certificates & Secrets.
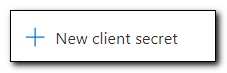
Click New Client Secret.
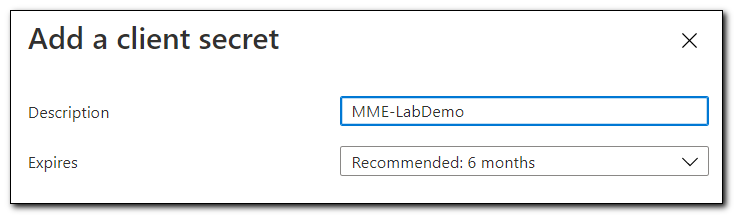
Name your client secret and select an expiration period. Click Add to create the secret.
Copy the client secret Value and save it in your password manager. The client secret is ONLY viewable when it is first created. If you lose the secret, you will need to create a new one.

Our commands to get the authorization token are almost identical. In this case we are going to replace “Interactive = $true” with our Client Secret. When passing in a credential, the password has to be passed as a secure string. In this example we pipe the secret to the ConvertTo-SecureString.
I know my Client Secret is visible here – don’t worry, this application registration was removed before this post went live! If you’re new to App Registrations, be sure to treat your Client Secrets just like a password. They should be saved in a secure fashion and never be shared. In later blog posts I will be storing my keys in Azure Key Vault. In that post, I will show you both how to save the keys and how to use them.
$authparams = @{
    ClientId    = '01076ec2-ceb5-4662-82d1-a8e1f1b1fb50'
    TenantId    = 'modernendpoint.xyz'
    ClientSecret = ('nV87Q~sQFYUd7Y7WJeANkWkfD5aEC9H_W~SRP' | ConvertTo-SecureString -AsPlainText -Force )
}
$auth = Get-MsalToken @authParams
$auth
This returns the same result as we received above when authenticating interactively.

By creating and connecting with the client secret we can connect programmatically to Microsoft Graph. This allows us to automate the connection and will be very helpful when creating tools to manage different workloads. Throughout the rest of this series, we will be using the Microsoft Authentication Library, particularly the client secret above to connect to Microsoft Graph. It is extremely useful for accessing resources from several different authentication tools.
Follow the full series below:
- Everything I wanted to know about APIs but was afraid to ask
- Connecting to Microsoft Graph with PowerShell
- Troubleshooting Microsoft Graph App Registration Errors
- Defining a script and finding the Microsoft Graph Calls
- Splatting with Invoke-RestMethod in PowerShell
- Updating Device Management name in PowerShell with Microsoft Graph
- Surprise Post:Adding Filters to application assignments with PowerShell and Microsoft Graph
- Working with Azure Key Vault in PowerShell
- Creating an Azure Automation Account
- Setting up a Hybrid Worker on an Azure Arc Enabled Server
- Connecting an Azure Automation Account to the Configuration Manager AdminService
- Running an Azure Automation runbook to update MEMCM Primary User
- Using Power Automate to update MEMCM Device based on Intune User